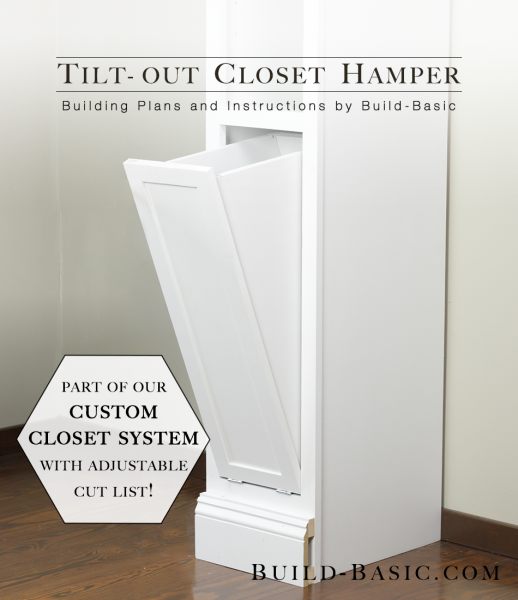
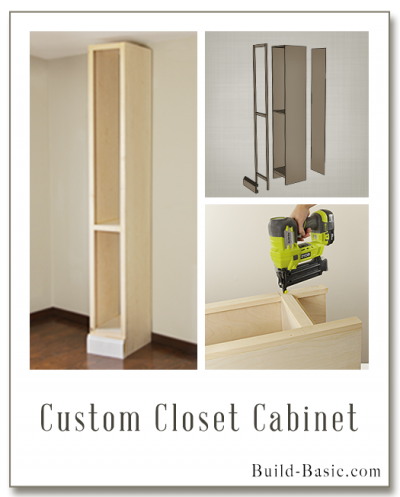
Welcome to The Build Basic Custom Closet System! In this Series, I’m showing how to make a handful of simple DIY components that come together to create a functional, beautiful custom closet space. Even better is that ALL of the cut lists are adjustable so you can quickly and easily pick and choose the type of storage you need, and size it to fit your space!


In this tutorial, I’m showing how to add a tilt-out hamper to the “Cubby” built in Part One. These Cubbies can also house add-ons like adjustable shelving and hanging rods, and pull out shoe shelves. In addition, this series includes free plans for an easy hideaway ironing station and built-in closet drawers that don’t require a table saw or router! Click around to see which organization options you’d add to your dream closet!


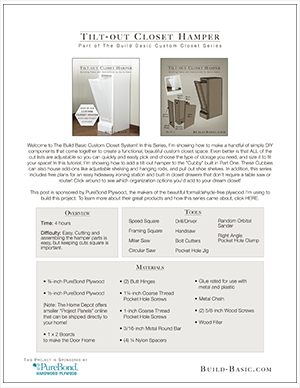
This post is sponsored by PureBond Plywood, the makers of the beautiful formaldehyde-free plywood I’m using to build this project. To learn more about their great products and how this series came about, click HERE.


*Click the images below to download Part One and Two of our Printable Instructions 

The Build Basic Custom Closet System

Series Introduction

Basic Closet Cabinet

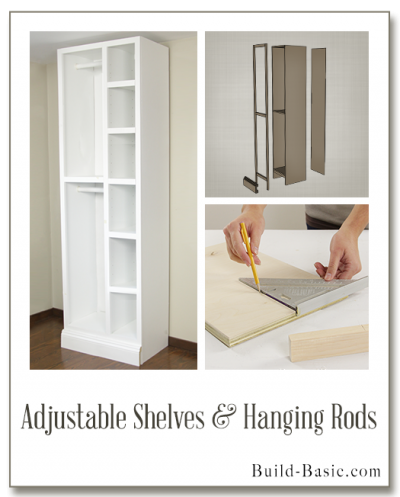
Adjustable Shelves and Hanging Rods

Tilt-out Hamper

Pull Out Shoe Organizer

Hideaway Ironing Station

Built-in Closet Drawers (the easy way)


TIP: Click the tabs below to see the tools, materials and cut list.

Time: 2 hours

Difficulty: Easy. Cutting and assembling the hamper parts is easy, but keeping cuts square is important.

Note: This list may contain affiliate links

¾-inch Plywood (I’m using PureBond Plywood in Birch)

½-inch Plywood (I’m using PureBond Plywood in Birch)  to make the inset panel in the Hamper Door (Note: The Home Depot offers smaller “Project Panels” of this product online that can be shipped to your home!)

1 x 2 Boards to make the Door Frame

(2) Butt Hinges

1¼-inch Coarse Thread Pocket Hole Screws to assemble the Hamper Walls and Bottom

1-inch Coarse Thread Pocket Hole Screws to attach the Door Panel to its Frame

3/16-inch Metal Round Bar to hold Hamper Bag

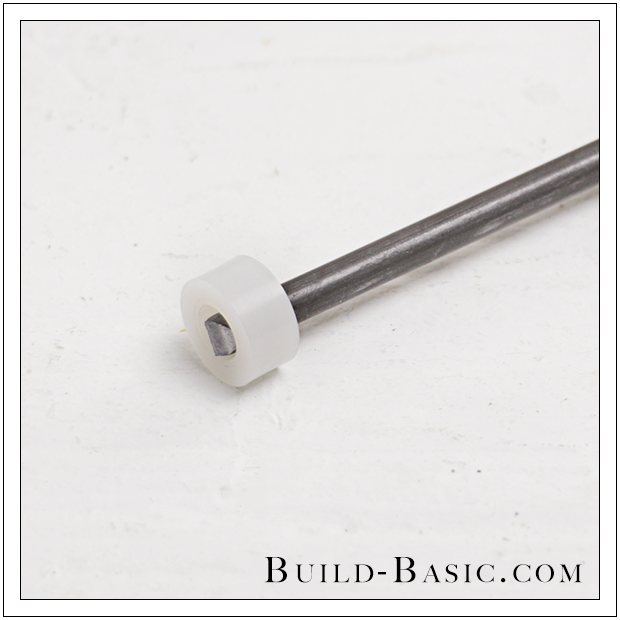
(4) ¼ Nylon Spacers to cap the Ends of the Rods

Glue rated for use with metal and plastic

Metal Chain

(2) 5/8-inch Wood Screws to attach the chain to the Hamper and Cubby

Wood Filler

*The cut list for this hamper is made to fit inside the 16-inch-deep Cubby built in Part One.

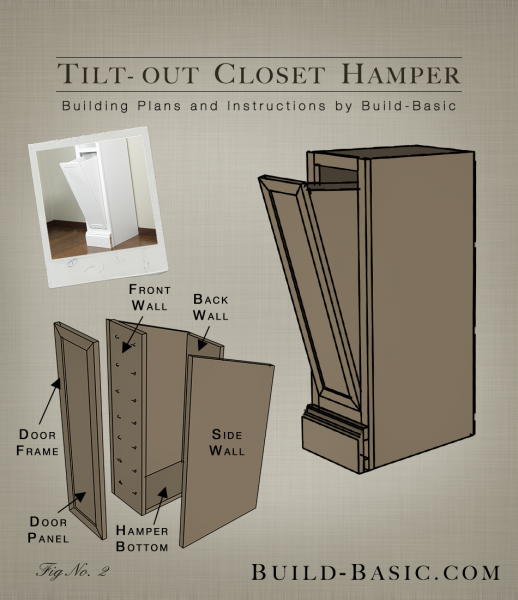
¾-inch Plywood Side Walls – 2 @ Interior Depth of the Cubby behind the Face Frame x Angle the top edge from a height of 1 inch less than the height of the Cubby Opening to 4 inches less than the heigh of the Cubby Opening.

¾-inch Plywood Front Wall – 1 @ 2½ inches less than the Width of the Cubby’s Opening (between the Face Frame Stiles) x The Height of the Side Walls

¾-inch Plywood Back Wall – 1 @ 2½ inches less than the Width of the Cubby’s Opening (between the Face Frame Stiles) x 4 inches less than the Height of the Side Walls

¾-inch Plywood Hamper Bottom – 2 @ 2½ inches less than the Width of the Cubby’s Opening (between the Face Frame Stiles) x 1½ inches less than the Depth of Side Walls

1 x 2 Door Frame Stiles – 2 @ 1/4 inch less than the Height of the Cubby’s Opening (between the Face Frame Rails)

1 x 2 Door Frame Rails – 2 @ 3 1/8 inches less than the Width of the Cubby’s Opening (between the Face Frame Stiles)

½-inch Plywood Door Panel – 1 @ Interior Height and Width of the assembled Door Frame

3/16-inch Metal Rod – 2 @ ½-inch longer than the Width of the assembled Hamper Box


Steps


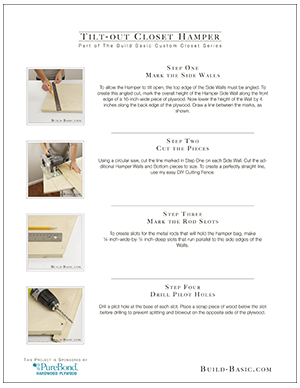
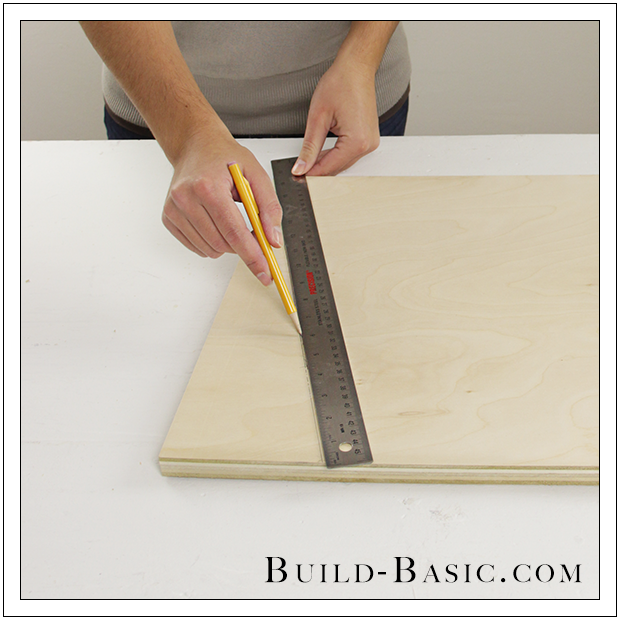
1. Mark the Side Walls

To allow the Hamper to tilt open, the top edge of the Side Walls must be angled. To create this angled cut, mark the overall height of the Hamper Side Wall along the front edge of a 16-inch-wide piece of plywood. Now lower the height of the Wall by 4 inches along the back edge of the plywood. Draw a line between the marks, as shown.
The Build Basic Custom Closet System - Tilt-out Hamper - Step 1

www.Build-Basic.com2. Cut the Pieces


Using a circular saw, cut the line marked in Step One on each Side Wall. Cut the additional Hamper Walls and Bottom pieces to size. To create a perfectly straight line, use my easy DIY Cutting Fence.
The Build Basic Custom Closet System - Tilt-out Hamper - Step 2

www.Build-Basic.com
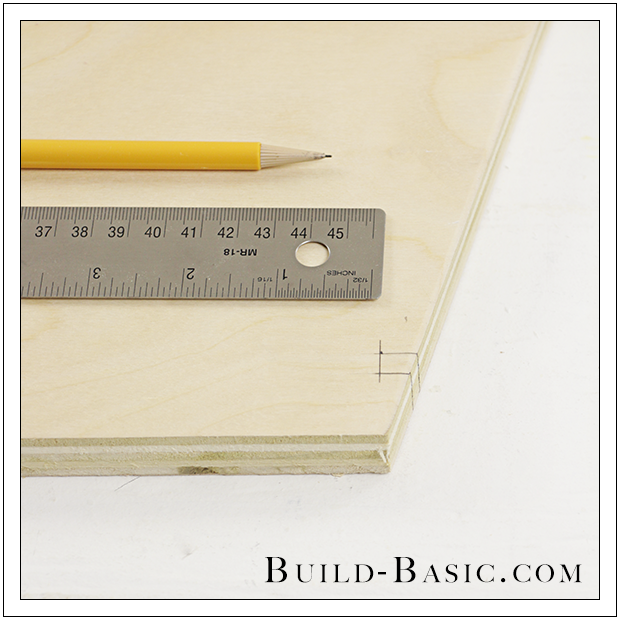
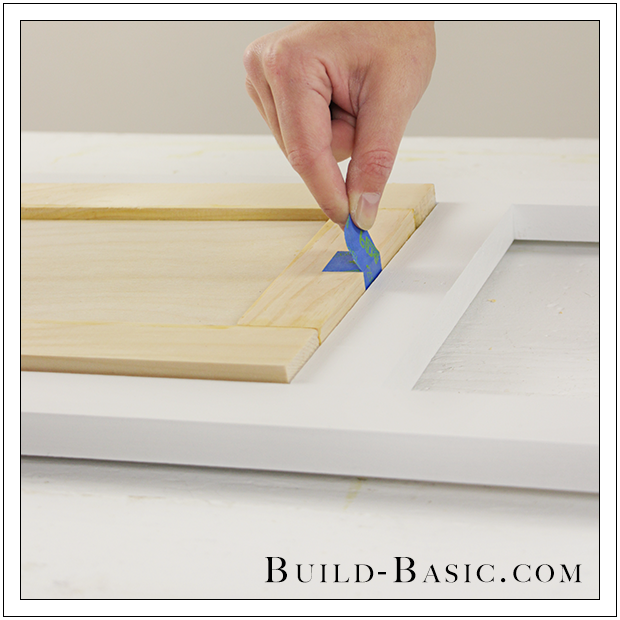
3. Mark the Rod Slots

To create slots for the metal rods that will hold the hamper bag, make ¼-inch-wide-by-¼-inch-deep slots that run parallel to the side edges of the Walls.
The Build Basic Custom Closet System - Tilt-out Hamper - Step 3

www.Build-Basic.com
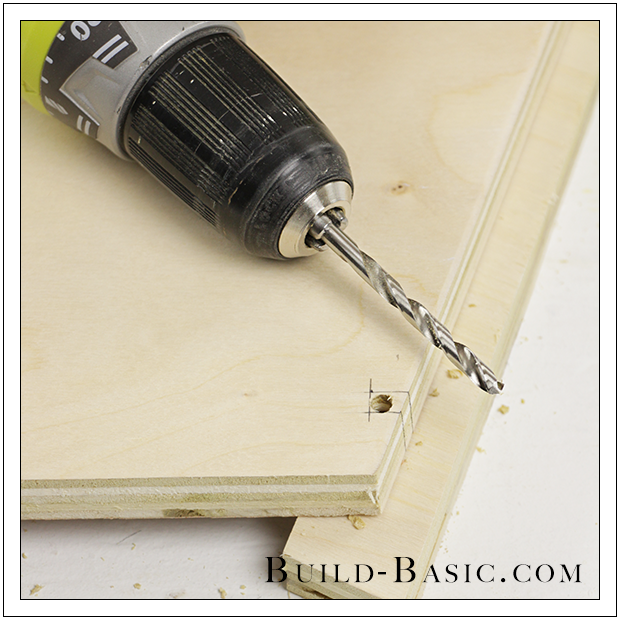
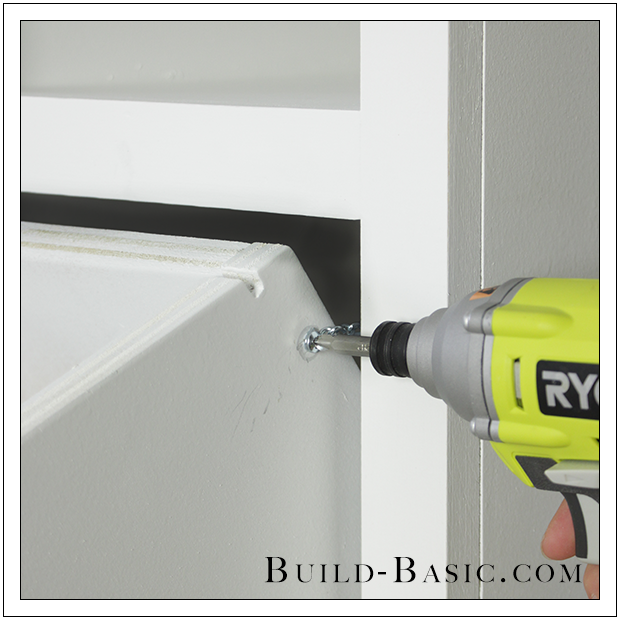
4. Drill Pilot Holes
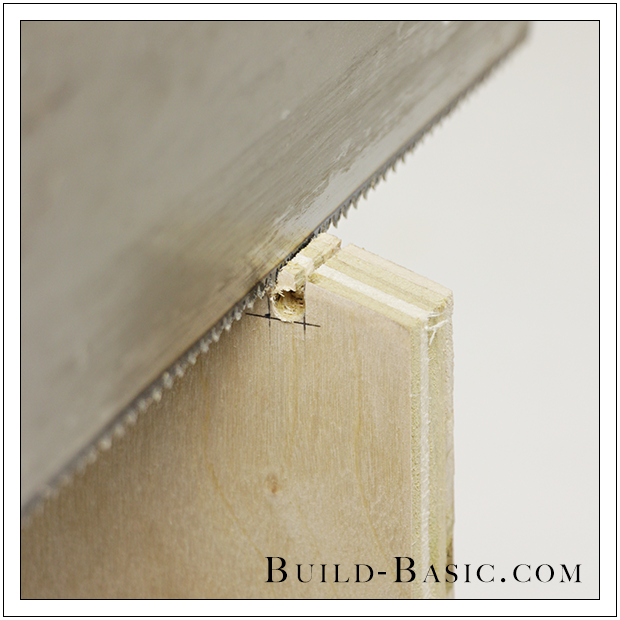
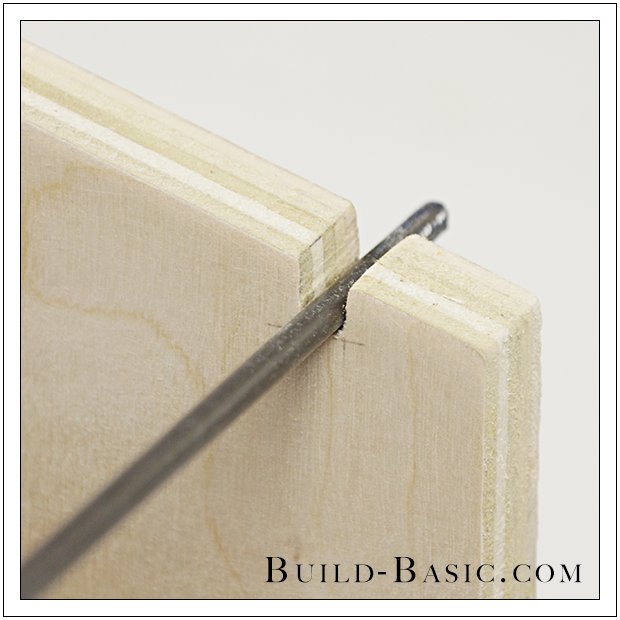
Drill a pilot hole at the base of each slot. Place a scrap piece of wood below the slot before drilling to prevent splitting and blowout on the opposite side of the plywood.
The Build Basic Custom Closet System - Tilt-out Hamper - Step 4

www.Build-Basic.com5. Cut the Slot

Using a handsaw, cut the vertical lines to remove the center of each marked slot.
The Build Basic Custom Closet System - Tilt-out Hamper - Step 5

www.Build-Basic.com6. Dryfit the Rod

Using bolt cutters or a saw with a metal cutting blade, cut the metal rod to length. Sand the end of the rod and slots before inserting the rod into the slot to check its length.
The Build Basic Custom Closet System - Tilt-out Hamper - Step 6

www.Build-Basic.com7. Cap the Ends of Each Rod

To prevent the Rods from slipping out of their slots, glue ¼-inch nylon spacers to the ends of each Rod.
The Build Basic Custom Closet System - Tilt-out Hamper - Step 7

www.Build-Basic.com
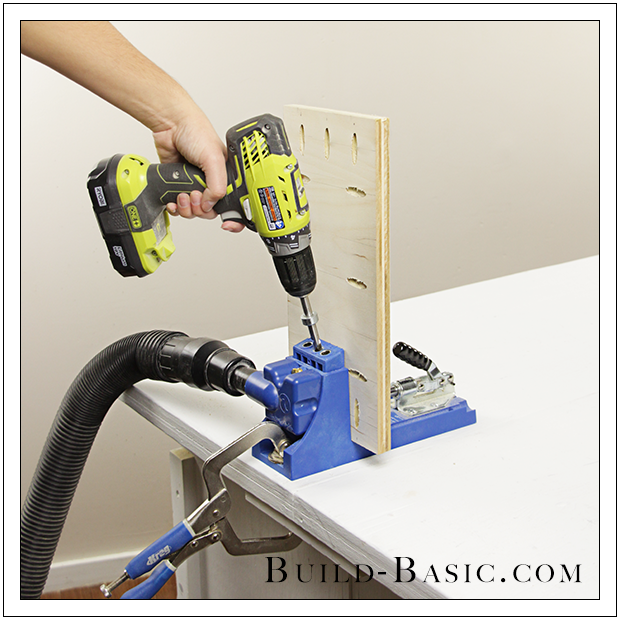
8. Prep the Hamper Front and Back Walls for Assembly

Using a pocket hole jig, drill pocket holes along the side edges of the Front and Back Walls.
The Build Basic Custom Closet System - Tilt-out Hamper - Step 8

www.Build-Basic.com
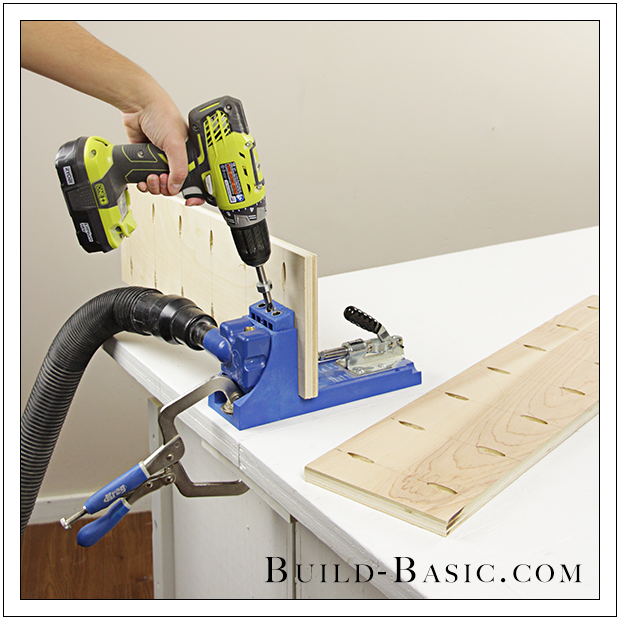
9. Prep the Hamper Bottom for Assembly

Using a pocket hole jig, drill pocket holes along all edges of the ¾-inch plywood Hamper Bottom. To learn how to use a pocket hole jig, check out my easy Video Tutorial.
The Build Basic Custom Closet System - Tilt-out Hamper - Step 9

www.Build-Basic.com
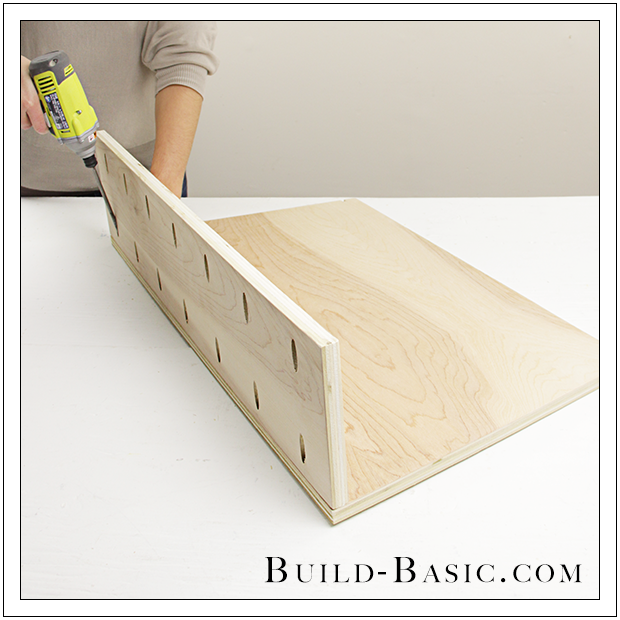
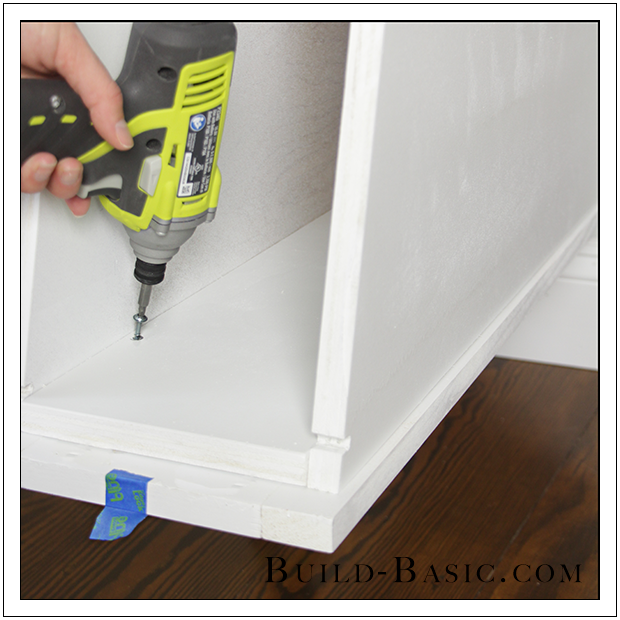
10. Attach the Front Wall to a Side Wall

Apply wood glue to the edge of the Front Wall. Place the edge of the Front Wall onto a Side, flush with its edge, and so that the pocket holes area facing outward–don’t worry they’ll be concealed by the Door Front later. Now, using a drill/driver, screw a 1¼-inch pocket hole screws through the Front Wall and into the Side Wall to hold the pieces in place.
The Build Basic Custom Closet System - Tilt-out Hamper - Step 10

www.Build-Basic.com11. Attach the Hamper Bottom

Apply wood glue to two adjacent edges of the Hamper Bottom, and then place it onto the Side Wall, butted against the Front Wall. Drive pocket hole screws through the Hamper Bottom and into the Side and Front Walls.
The Build Basic Custom Closet System - Tilt-out Hamper - Step 11

www.Build-Basic.com
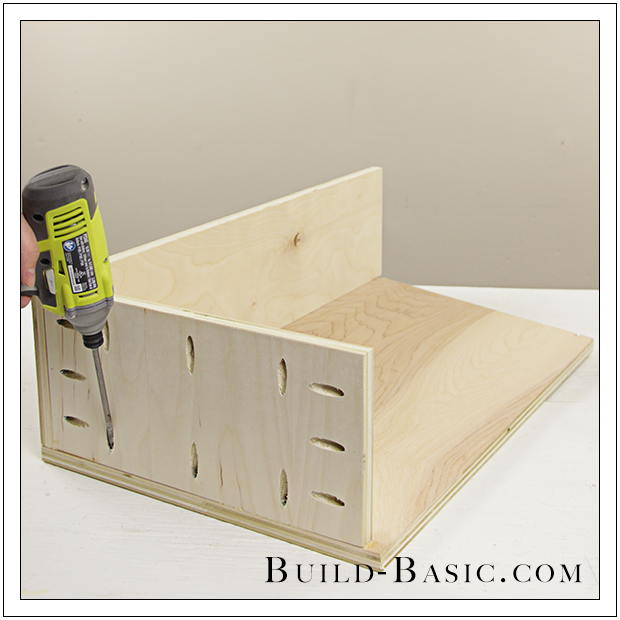
12. Attach the Back Wall

Apply wood glue to the remaining end of the Hamper Bottom, and to the edge of the Back Wall. Place the Back Wall onto the Side Wall, butted against the Hamper Bottom. Screw the Back Wall to the Side and Bottom.
The Build Basic Custom Closet System - Tilt-out Hamper - Step 12

www.Build-Basic.com
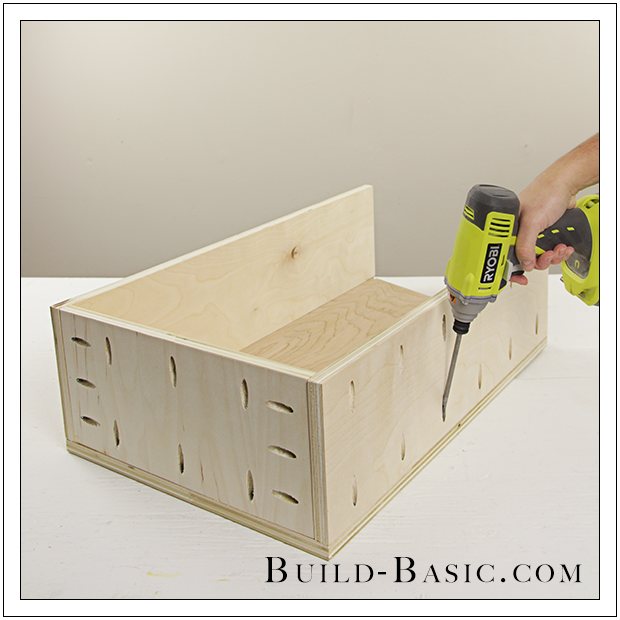
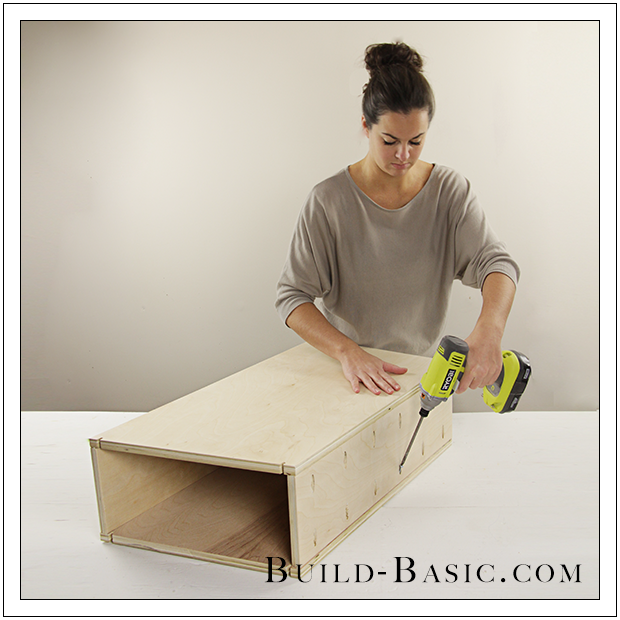
13. Attach the Remaining Side Wall

Apply wood glue to the exposed edge of the Front and Back Walls, and Hamper Bottom. Place the remaining Side Wall onto the assembly, and then screw it into place.
The Build Basic Custom Closet System - Tilt-out Hamper - Step 13

www.Build-Basic.com
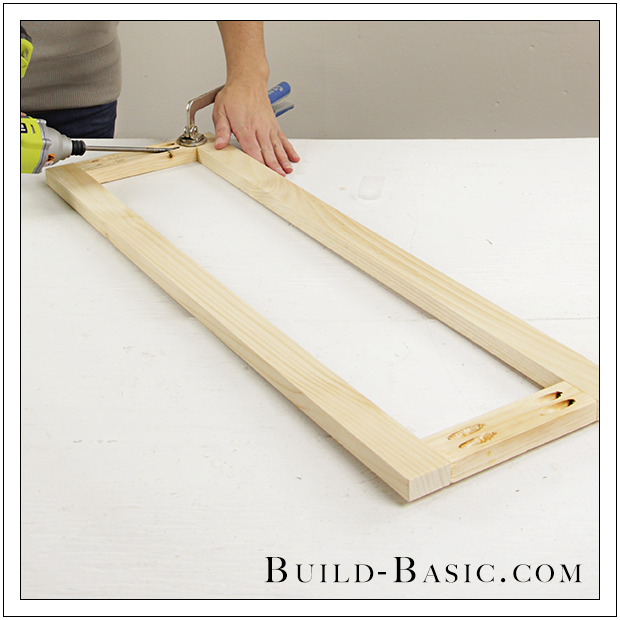
14. Frame the Door Front

Cut the 1 x 2 Door Frame boards to size. Drill two pocket holes at the ends of the horizontal Door Frame Rails. Apply wood glue to the ends of the Rails, and then place them on the work surface between the Stiles. Drive 1¼-inch pocket hole screws through the Rails and into the Stiles to hold the frame together.
The Build Basic Custom Closet System - Tilt-out Hamper - Step 14

www.Build-Basic.com
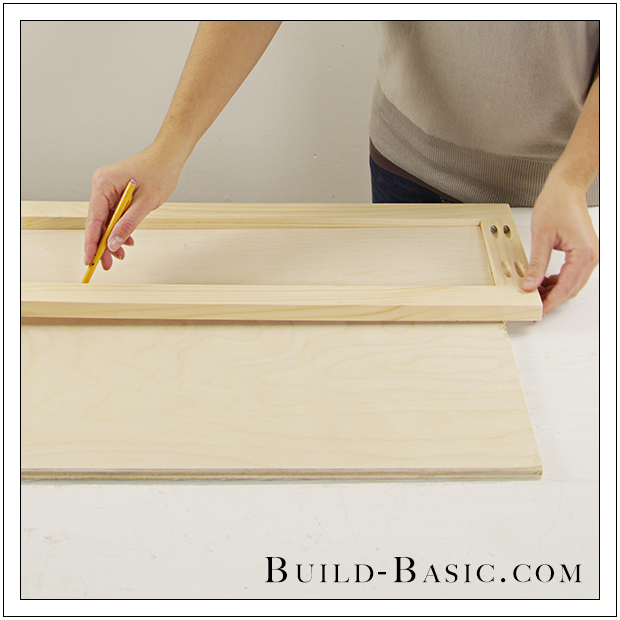
15. Prep the Door Panel

Lay the Door Frame onto a piece of ½-inch plywood. Mark the inside edges of the assembled Door Frame on the plywood. Using a table saw or a circular saw and my easy DIY Cutting Fence, cut the ½-inch plywood Door Panel to size. Finish prepping the Door Panel by drilling pocket holes around the perimeter of the panel–just be sure to reset your pocket hole jig and drill bit collar to the placement recommended for ½-inch-thick material.
The Build Basic Custom Closet System - Tilt-out Hamper - Step 15

www.Build-Basic.com
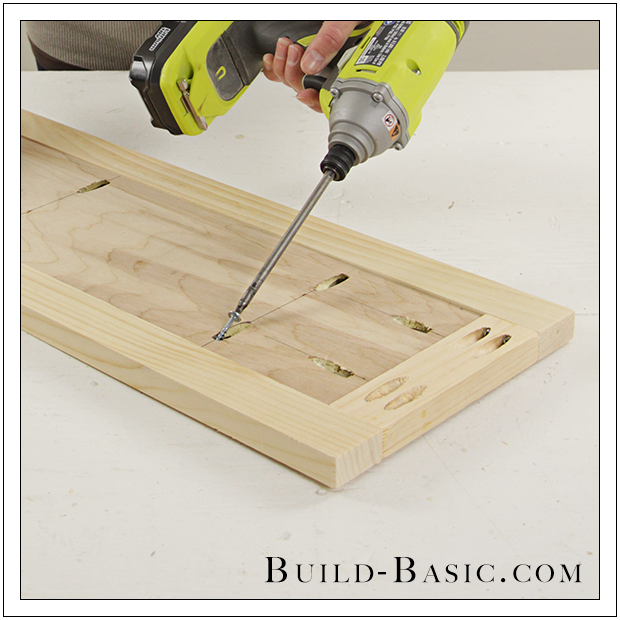
16. Install the Door Panel

Apply wood glue to the edges of the Door Panel, and then place it into the assemble Door Frame. Adjust the Panel so that the surface with the pocket holes–the backside of the panel–is flush with the backside of the Frame. Drive 1-inch pocket hole screws through the Panel and into the Frame to hold the pieces in place.
The Build Basic Custom Closet System - Tilt-out Hamper - Step 16

www.Build-Basic.com
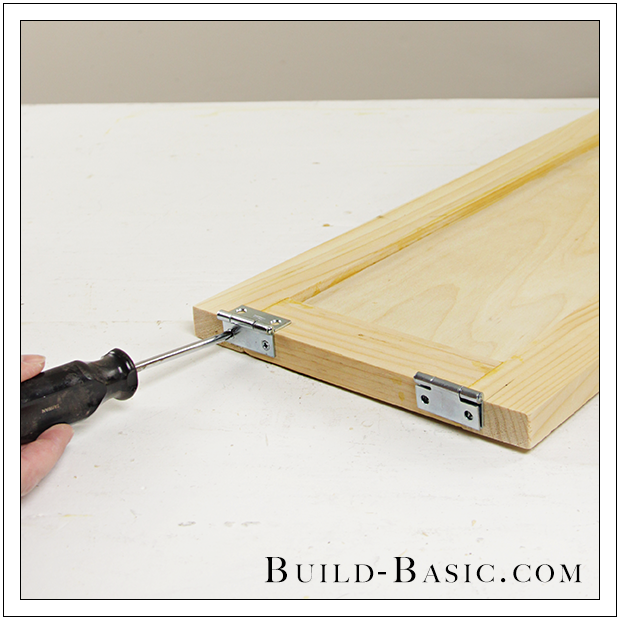
17. Attach the Hinges to the Door

Using a drill/driver, attach the hinges to the bottom edge of the Door Frame, about 1 inch from each edge.
The Build Basic Custom Closet System - Tilt-out Hamper - Step 17

www.Build-Basic.com18. Dryfit the Door

Using painter’s tape, create a “tab” at the top edge of the Hamper Door. Place the Door into the Cubby’s Face Frame to check that it fits properly with a light gap (about 1/16-inch) along the top and sides. (Note: this step can be completed while the Cubby’s Face Frame is installed or uninstalled, as shown.)
The Build Basic Custom Closet System - Tilt-out Hamper - Step 18

www.Build-Basic.com
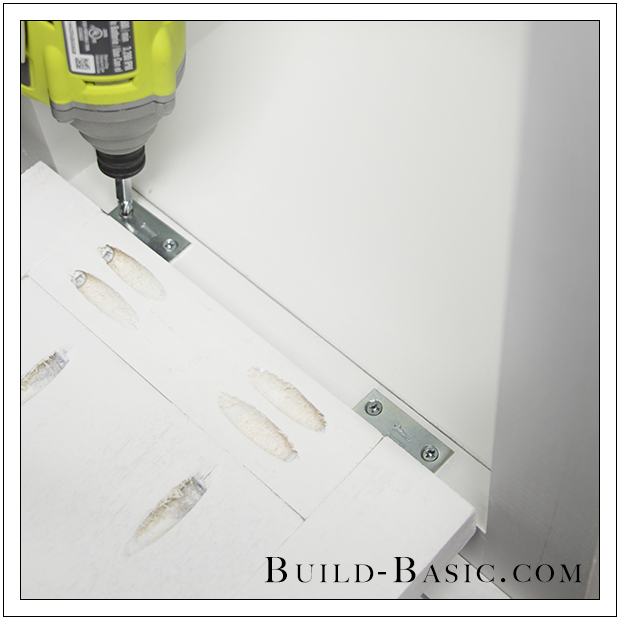
19. Attach the Hinges to the Cubby

Using a drill/driver, attach the hinges to the Rail of the Cubby’s Face Frame so that the knuckles of the hinge set proud of the front edge. (Tip: In woodworking, the word “Proud” means to stick out past flush.)
The Build Basic Custom Closet System - Tilt-out Hamper - Step 19

www.Build-Basic.com20. Install the Hamper

Tilt the Door open. Apply wood glue to the backside of the Door Front, and then center the assembled Hamper on the Door. Screw four 1¼-inch screws through the Front Wall of the Hamper and into the Stiles of the Door to hold the pieces in place.
The Build Basic Custom Closet System - Tilt-out Hamper - Step 20

www.Build-Basic.com21. Attach the Chain to the Cubby

To prevent the hamper from falling all the way open, attach a chain to the Hamper and Cubby. To attach the chain to the Cubby, place a 5/8-inch wood screw through a link in the chain, and then drive it into the inside of the Cubby Wall near the back, as shown. Stretch the chain forward, and shorten it so that only about 1 inch extends beyond the Cubby’s Face Frame.
The Build Basic Custom Closet System - Tilt-out Hamper - Step 21

www.Build-Basic.com
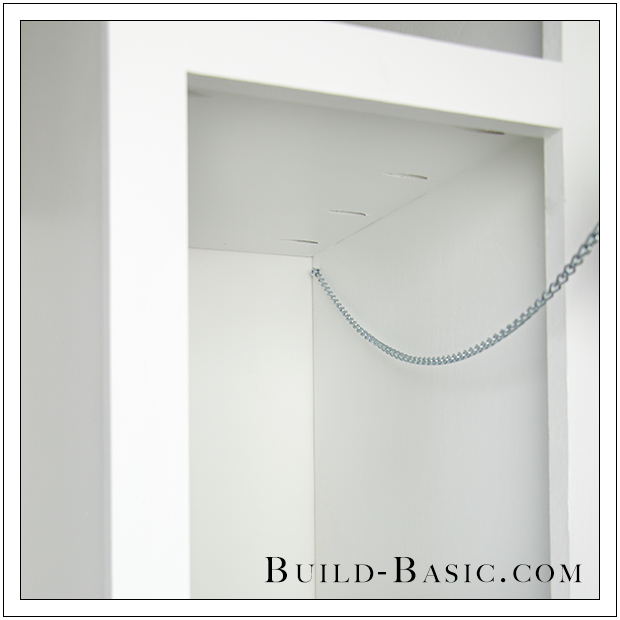
22. Attach the Chain to the Hamper

Tilt the hamper forward, and then drive a 5/8-inch wood screw through the end of the chain and into the outside of the hamper’s Side Wall, near its back edge, as shown.
The Build Basic Custom Closet System - Tilt-out Hamper - Step 22


www.Build-Basic.com


MORE BUILDING PLANS


2 thoughts on “The Build Basic Custom Closet System – Tilt-Out Closet Hamper

  1. Tommy T Maras

    I like this idea. I want to do the same thing but have the hamper be flush with a wall when closed with the open hamper in the closet on the other side of the wall. I want to be able to fill the hamper from my closet, then on the other side of the wall, in my laundry room, open the hamper and get the clothes. I think I can make it work with these plans. If anyone has seen what I describe, please leave a reply.

    Reply

Leave us a Comment!