Welcome to The Build Basic Custom Closet System! In this Series, I’m showing how to make a handful of simple DIY components that come together to create a functional, beautiful custom closet space. Even better is that ALL of the cut lists are adjustable so you can quickly and easily pick and choose the type of storage you need, and size it to fit your space!
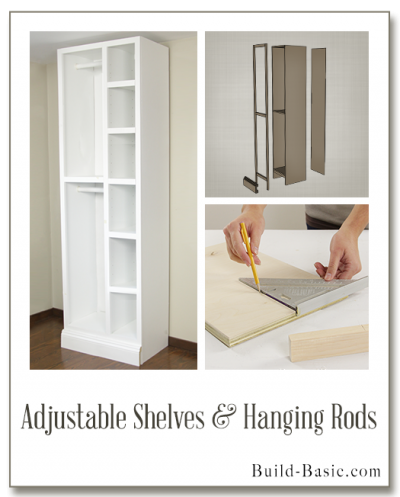
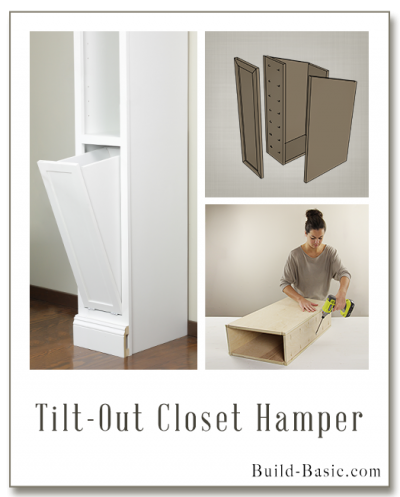
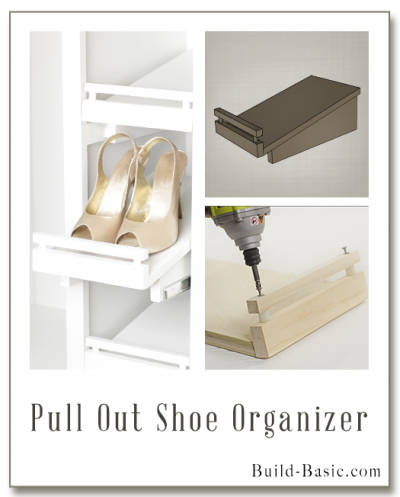
In this tutorial, I’m showing how to add easy build-in drawers without touching a router or table saw. This series also includes a basic “Cubby” that houses add-ons like adjustable shelving and hanging rods, a tilt-out hamper, and pull out shoe shelving, and free building plans for a hideaway ironing station. Click around to see which organization options you’d add to your dream closet!
This post is sponsored by PureBond Plywood, the makers of the beautiful formaldehyde-free plywood I’m using to build this project. To learn more about their great products and how this series came about, click HERE.
The Build Basic Custom Closet System
Series Introduction
Basic Closet Cabinet
Adjustable Shelves and Hanging Rods
Tilt-out Hamper
Pull Out Shoe Organizer
Hideaway Ironing Station
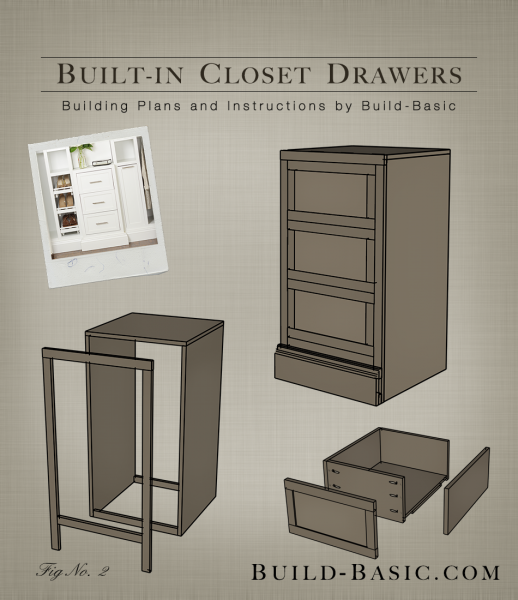
Built-in Closet Drawers (the easy way)
TIP: Click the tabs below to see the tools, materials and cut list.
Time: 6 hours
Difficulty: Easy. The parts assemble easily with pocket holes and wood glue.
*This project is sized to fit inside a 20-inch-wide Cubby that sits below our Hideaway Ironing Station
Box
- ¾-inch Plywood Sides – 2 @ 20″ D x 38″ H
- ¾-inch Plywood Top – 1 @ 20″ D x 20″ W
- 1 x 2 Crosspieces – 3 @ 18½ inches
Face Frame
- 1 x 2 Face Frame Upper Rail – 1 @ 20 Inches
- 1 x 2 Face Frame Lower Rail – 1 @ 17 Inches
- 1 x 2 Face Frame Stiles – 2 @ 36½ inches
Drawers
- ¾-inch Plywood Drawers Sides – 6 @ 8″ H x 19″ D
- ¾-inch Plywood Drawers Ends – 6 @ 8″ H x 14½” W
- ½-inch Drawer Floor – 3 @ cut to fit
- 5/8-inch Drawer Cleats – 12 @ 12 inches
- 1 x 2 Drawer Front Frame – 6 @ cut to fit
- 1 x 2 Drawer Front Frame – 6 @ cut to fit
- ½-inch Drawer Front Panel – 3 @ cut to fit
- 1 x 2 Drawer Slide Padding – 6 @ 20 inches
Steps
1. Assemble the Box
Cut the ¾-inch plywood pieces to size a circular saw and my easy
DIY Cutting Fence. Drill pocket holes along the top edge of the Box Sides. Position the pocket holes facing the inside of the box. Apply glue to the top edge of the Sides, and then place them onto the Top. Using a drill/driver, drive 1¼-inch pocket hole screws through the Sides and into the Top. (Tip: To learn how to use a pocket hole jig, watch my easy
Video Tutorial.)
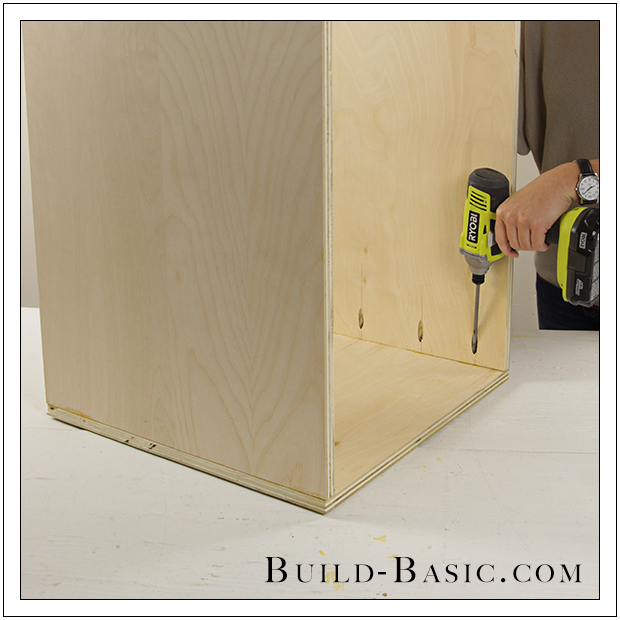
 2. Add the Upper Crosspiece
Drill pilot holes through the ends of each 1 x 2 Crosspiece. Position a 1 x 2 against the underside of the Plywood Top, flush with the back edge of the Box. Screw through the Crosspiece and into the Plywood Sides to brace the pieces.
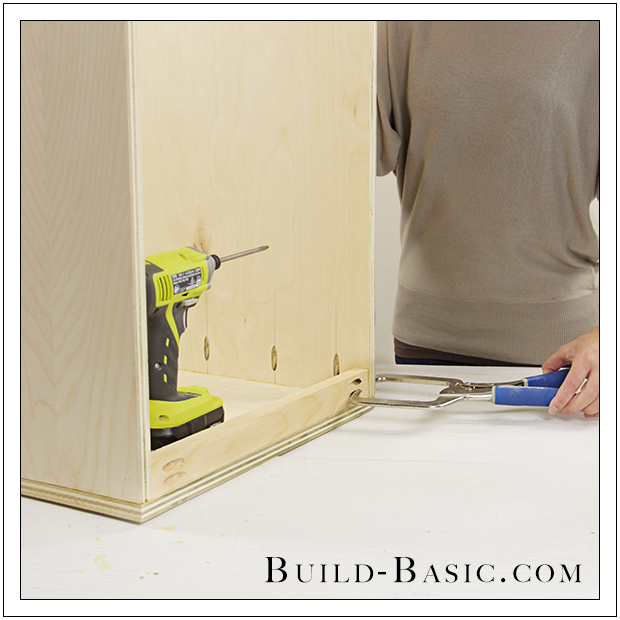
3. Add the Lower Crosspieces
Apply wood glue to the ends of a 1 x 2 Crosspiece. Position the Crosspieces at the base of the Box–one flush with the front of the Box, the other flush with the back edge of the Box.Using a drill/driver, drive 1¼-inch pocket hole screws through the Crosspieces and into the Plywood Sides.
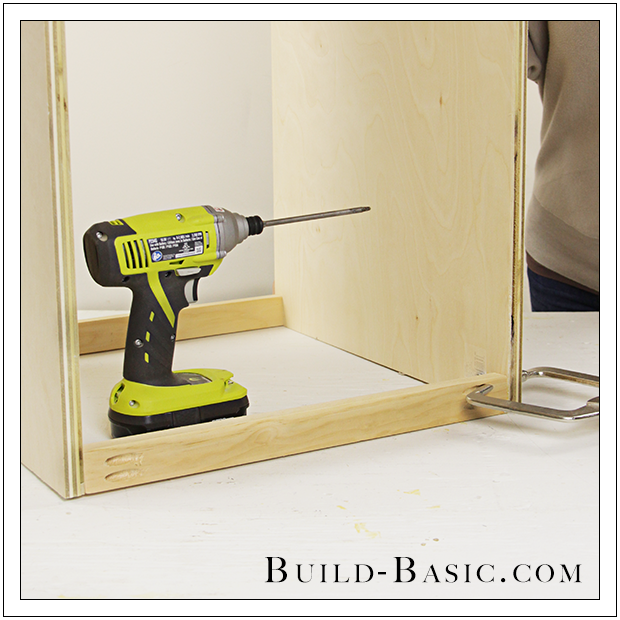
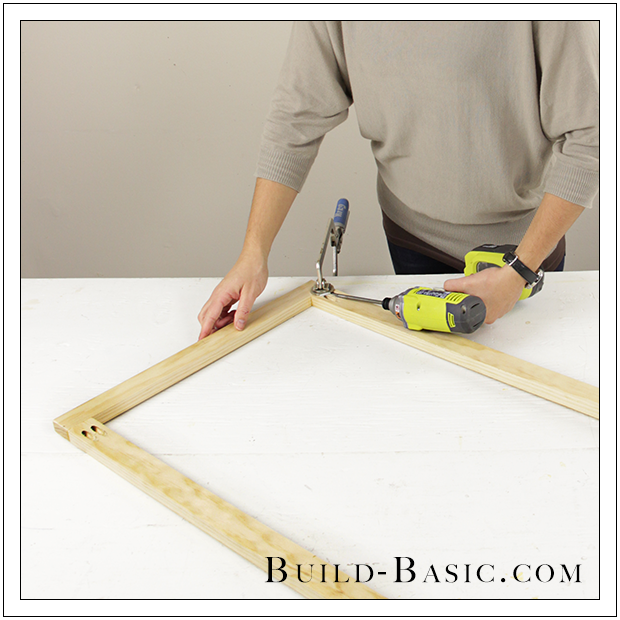
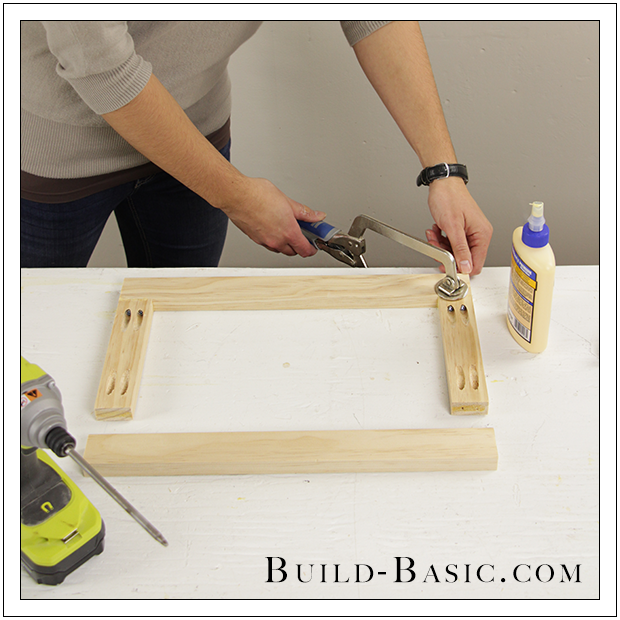
4. Assemble the Face Frame
Cut the 1 x 2 Face Frame Stiles and Rails to size. Drill pocket holes through the top end of the Stiles. Apply wood glue to the top ends of the Stiles, and then butt them against the underside of the Upper Rail, flush with its ends. Using a drill/driver, assemble the pieces with 1¼-inch pocket hole screws.
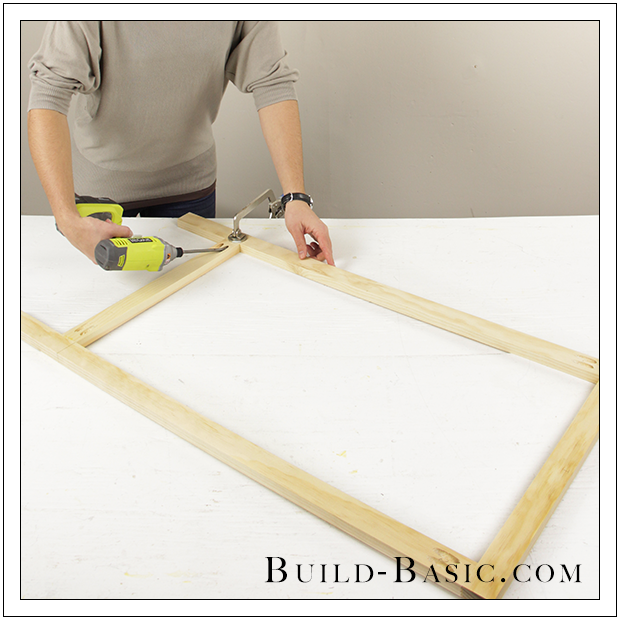
5. Attach the Lower Rail
Make a mark on each Stile that’s 7 inches from its base–this allows room for the 5½-inch baseboard and 1 x 2 padding. Apply wood glue to the ends of the Lower Rail, and then position it below the line on each of the Stiles. Drive screws through the Rail and into the Stiles to hold the pieces in place.
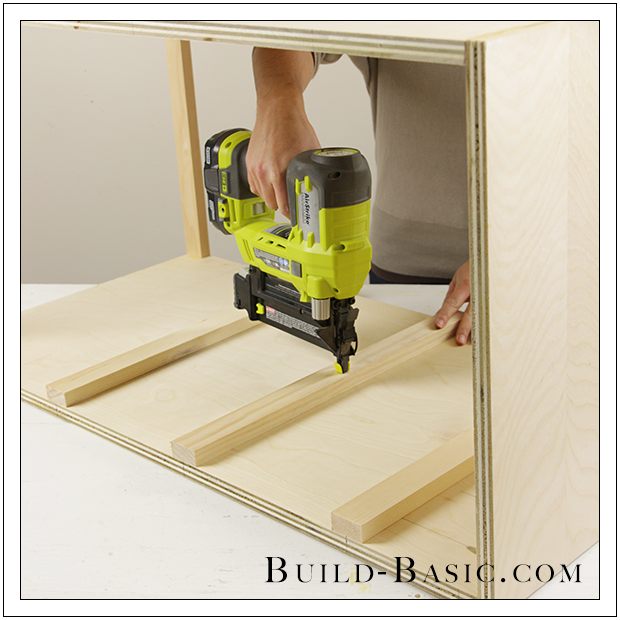
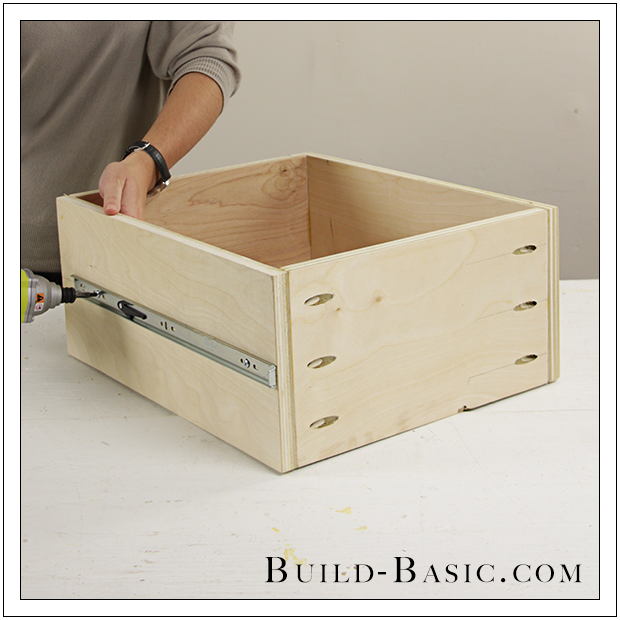
6. Attach the Padding and Drawer Slides
To allow the drawer slides inside the box to slide out past the lip of the Face Frame, install horizontal strips of 1 x 2 padding inside the box centered on the height of each drawer. To determine this height, divide the height of the opening between the Rails into three equal sections, and then mark their center. Place the 1 x 2 boards onto the center lines, and then nail them into place using a pneumatic nail gun a 1¼-inch finish nails. Lastly, install the drawer slides, flush with the front edge of the 1 x 2 Padding strips.
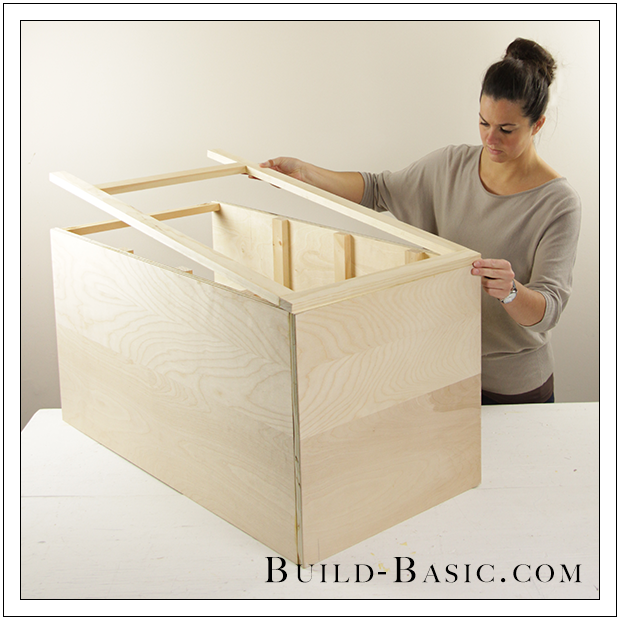
7. Attach the Face Frame
Apply wood glue to the front edge of the Box pieces, and then position the Face Frame onto the Box Using a pneumatic nail gun and 1¼-inch finish nails, nail through the Face Frame and into the Box to hold the pieces in place.
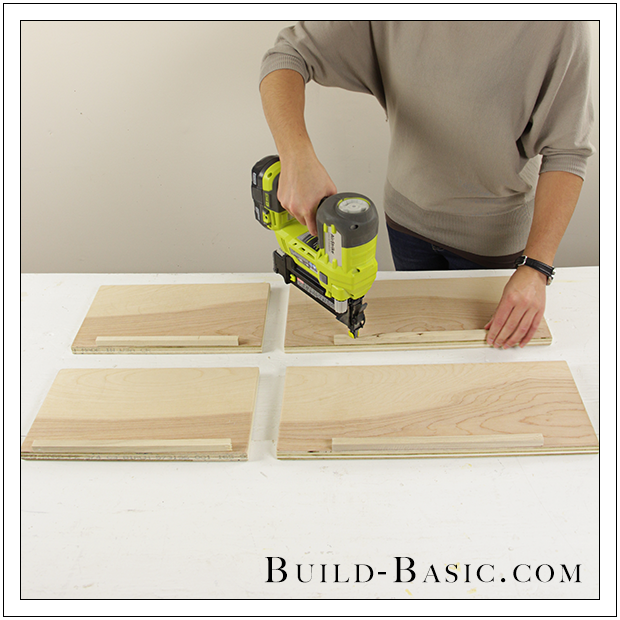
8. Prep the Drawer Parts
Center a cleat on the inside face of each drawer part, flush with its bottom edge. Apply a bead of wood glue to the cleat, reposition it, and then nail it into place using a pneumatic nail gun and 1-inch finish nails.
9. Position the Sides
Drill three pocket holes along the edges of the Drawer Box End pieces. Apply wood glue to the Ends, and then set them in place between the Sides with the pocket holes facing outward. Using a drill/diver, drive 1¼-inch pocket hole screws through the Ends and into the Sides. For more detailed instruction on building a drawer using my easy method, check out my
Basic DIY Drawer Tutorial.
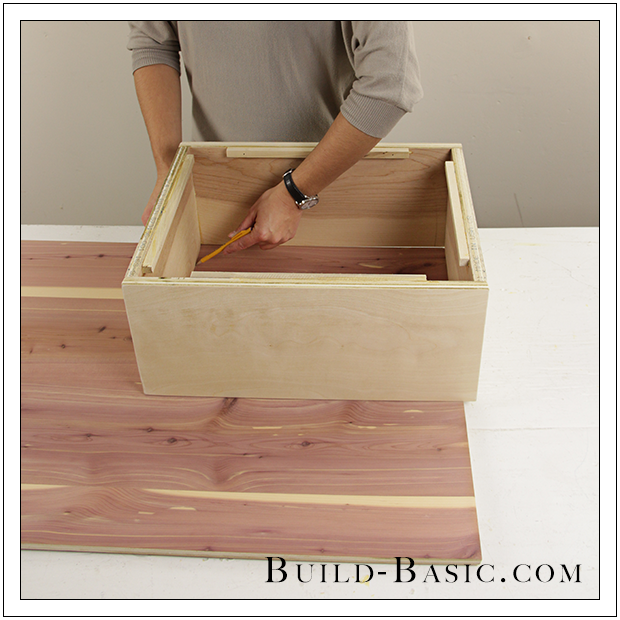
10. Mark the Drawer Floor
Lay a piece of ½-inch plywood on the work surface. Place the assembled Drawer Box onto the plywood, and then trace along its interior. I placed the drawer box upside down so I could trace its interior edge without having the cleats in the way.
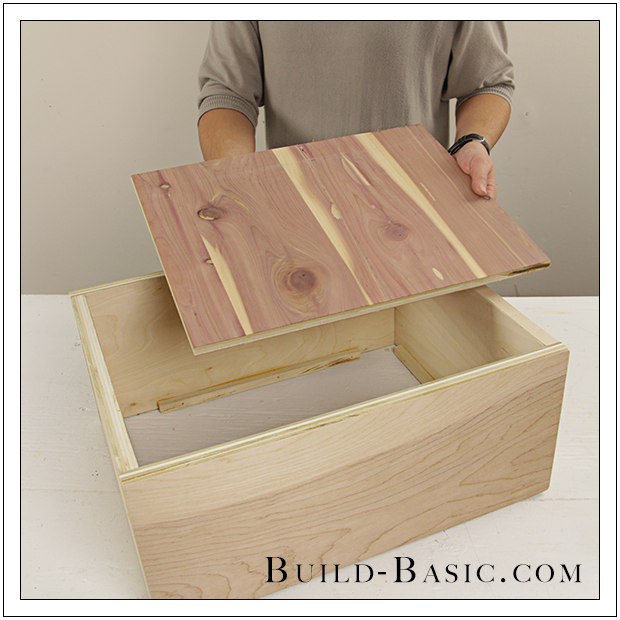
11. Cut and Install the Drawer Floor
Cut the ½-inch Plywood Floor to size. Apply a bead of wood glue to the top edge of each cleat. Position the plywood inside the Box on the Cleats, and allow to dry.
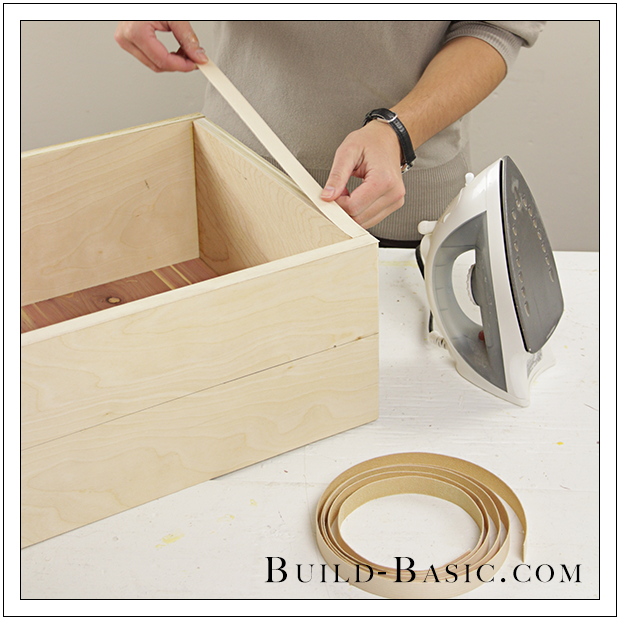
12. Edge the Drawer Box
13. Attach the Drawer Slides
Detach each bracket from its slider. Align the front edge of the bracket with front edge of each Drawer Side. Level the bracket along the center of the Drawer’s height, and then screw it into place using the hardware provided with the slides or 5/8-inch wood screws.
14. Assemble the Drawer Front Frames
Measure the height and width of the Face Frame’s opening. Subtract 1/8-inch from the Width of the opening to determine the length of the Rails. To determine the height of the Stiles, subtract the thickness of the Rails and a 1/16 gap between the Drawers and between the Drawers and the Rails, and then divide the result by that number by three. Cut the 1 x 2 Frame pieces to length, and then drill pocket holes through the ends of the vertical Stiles. Apply wood glue to the ends of the Stiles, and then clamp them in place between the Rails. Using 1¼-inch pocket screws, assemble the Frames.
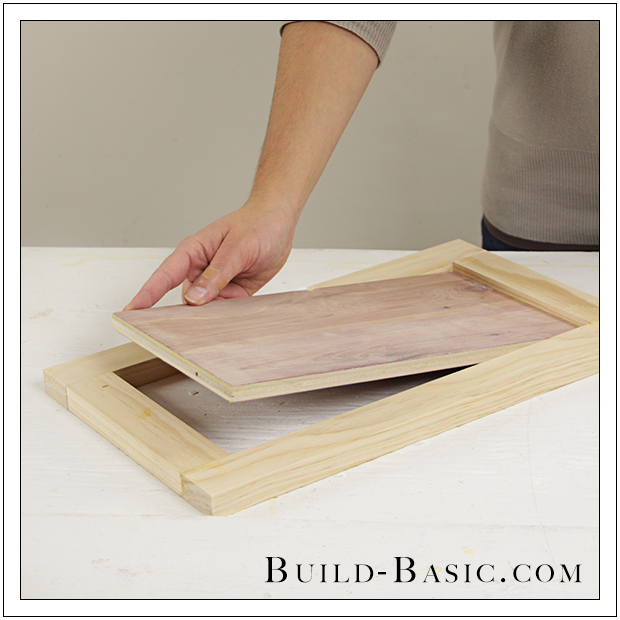
15. Insert the Drawer Front Panel
Trace the interior edge of each Frame onto a piece of ½-inch plywood. Cut the plywood Panel to size, and then dry fit it into the Frame.
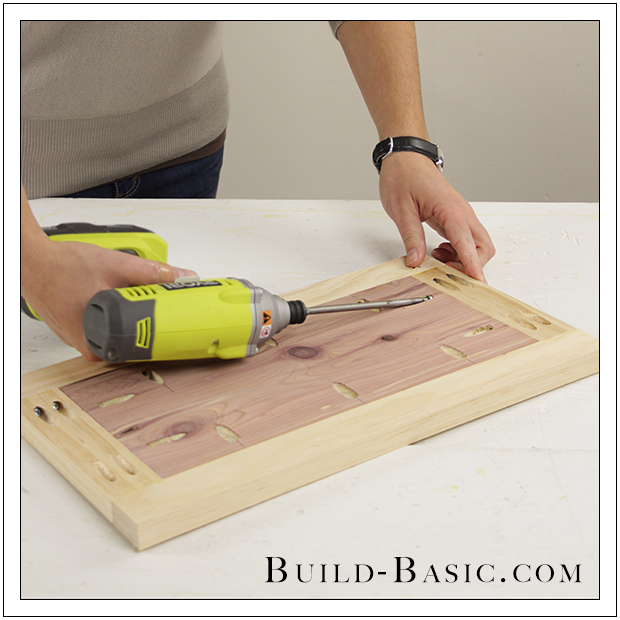
16. Attach the Panel to the Frame
Using a pocket hole jig adjusted to ½-inch settings, drill pocket holes along the perimeter of the ½-inch plywood Panel. Apply wood glue to the edge of the Panel. Place the Panel back into the Frame, flush with the back of the Frame. Drive 1-inch pocket hole screws through the Panel and into the Frame to hold the pieces in place.
17. Install the Drawer Fronts
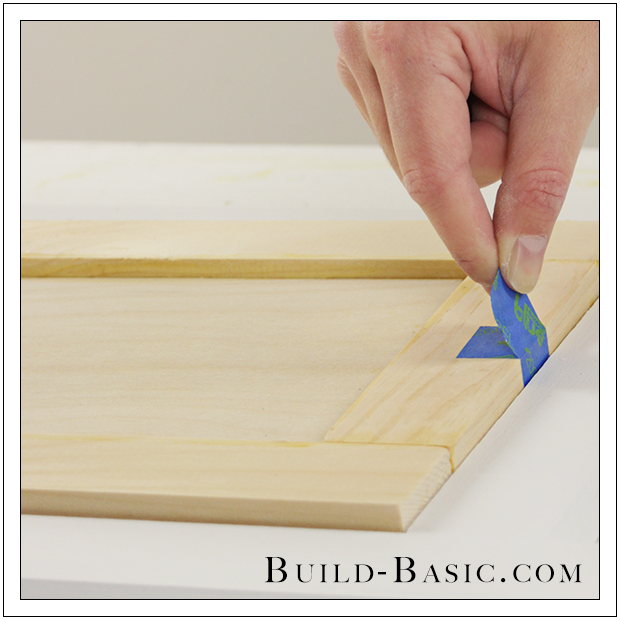
Place the Drawers into the Box, and then lay the Box on its back. Create “tabs” with painters tape on each end of the Drawer Fronts to help make adjustments. Position the Drawer Fronts onto the Drawers with equal spacing between the Drawer Fronts, and between the Drawer Fronts and the Face Frame. Once in position, apply a dab of hot glue to hold the Drawer Fronts in place. Lift the Drawer open, and then screw through the Drawer Box and into the backside of the Drawer Front using 1-inch wood screws.
MORE BUILDING PLANS


Kim
I am a beginner, beginner. I have been reading and looking at your site for months and plan to actually execute soon. I’m starting with just linen type cabinets, but eventually one of my cubbies will be drawers. I’m pretty sure I will have made plenty of mistakes before I get there. How terribly difficult is it to use different size drawers? My stack will be taller (stand up height) and I want narrow drawers at the top for jewelry and makeup, and wider ones at the bottom for clothes or larger items. I have amazing visions, with no skill set. 🙂
Anonymous
I love your step by step projects. Do you have a picture of step 6, after drawer slides are added? I was a little confused where you put the slides and do not see it in any other picture. Thanks!!
kati
What kind of paint did you use for this project?