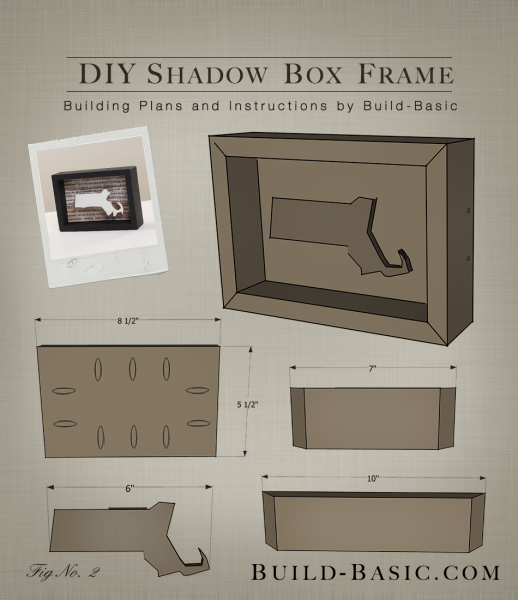
When I saw this display frame in a gift shop, I couldn’t help but let my DIY wheels turn. The shadow box is easily assembled with pocket holes and screws, and is the perfect housing for a cutout of your home state backed with a rustic graphic. All I needed were a few boards, some graphic paper from Michael’s, and a jigsaw to complete the look.
TIP: Click the image above to reveal the free building plans. Click the tabs below to see the tools, materials and cut list.
Cost: $8
Time: 30 minutes
Difficulty: Moderate. The assembly of the box is simple, but cutting the state out with a jigsaw requires some patience.
Note: This list may contain affiliate links
1 x 3 Board – to make the shadow box sides. Get at least 3 feet.
¾” x 5½” x 10″ Plywood or 1 x 6 Board (actual dimensions are ¾” x 5½”) to make the inset panel.
1 x 2 Block to separate the cutout from the background. This can really be any scrap piece of wood that’s at least ¾-inch-thick.
¼” x 4 Hobby Board to make the state cutout
1 ¼” Pocket Hole Screws
Printer and Paper to create a template
(2) 1½-inch Finish Nails to secure the Spacer Block and State Cutout
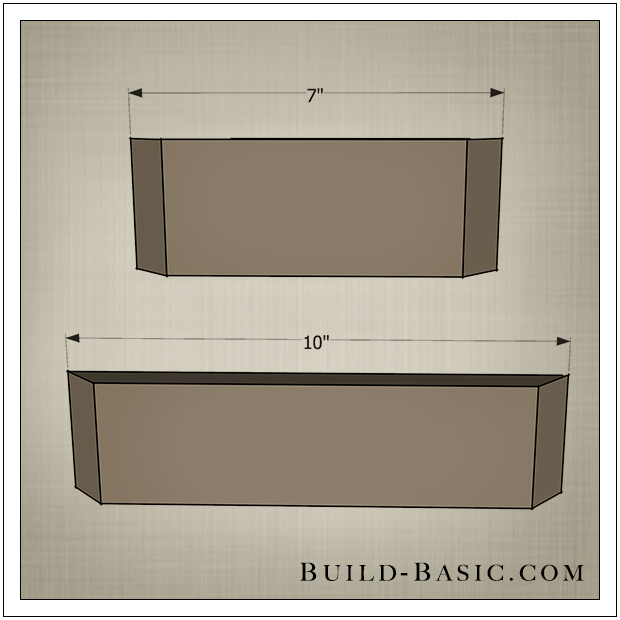
1 x 3 Sides – 2 @ 10 inches (beveled at opposing 45-degree angles)
1 x 3 Sides – 2 @ 7 inches (beveled at opposing 45-degree angles)
¾” Plywood Panel – 1 @ 8½”W x 5½”H
1 x 2 Block – 1 @ 2 inches
¼” Hobby Board – 1 @ Cut to size of shape roughly 6″W x 3½”H (depending on orientation)
Steps
1. Cut the Sides
Using a miter saw and the cut list above, stand a 1 x 3 on edge on the saw. Bevel the ends of the piece at 45-degree so that the length of the board—from long point to long point—is 10 inches. Repeat this process to cut the remainder of the shadow box Sides.

2. Cut and Prep the Panel
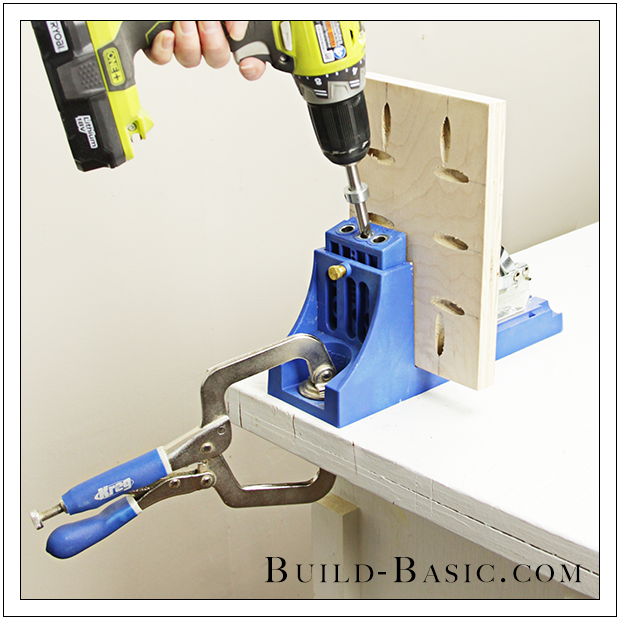
Using a miter saw, cut a board or piece of plywood to the dimensions noted in the cut list above. Using a pocket hole jig and a drill/driver, create two pocket holes along the shorter sides of the Panel, and three pocket holes along the longer sides of the Panel.
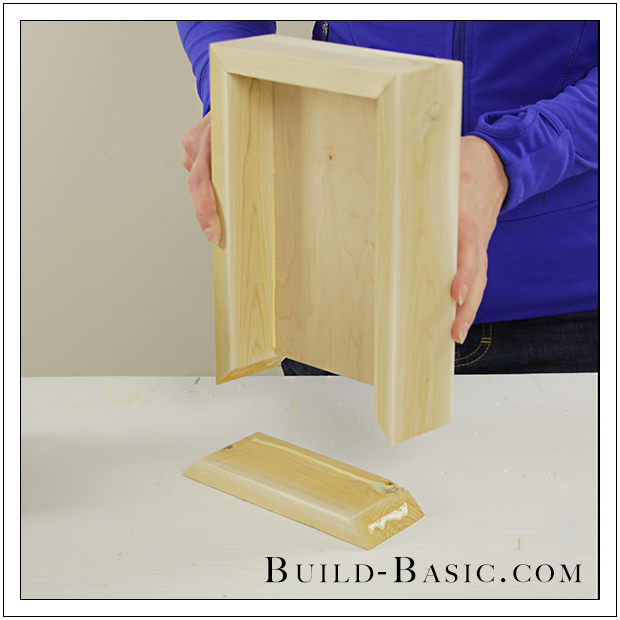
3. Fit the Panel
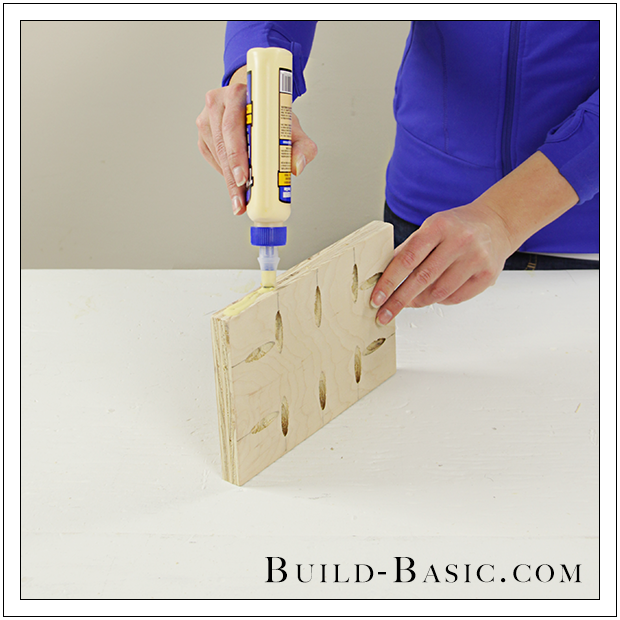
Surround the Panel with the 1 x 3 Sides, placed on edge. Ensure the miter joints close tightly around the Panel. Remove the Sides, and then apply glue along one edge of the Panel.
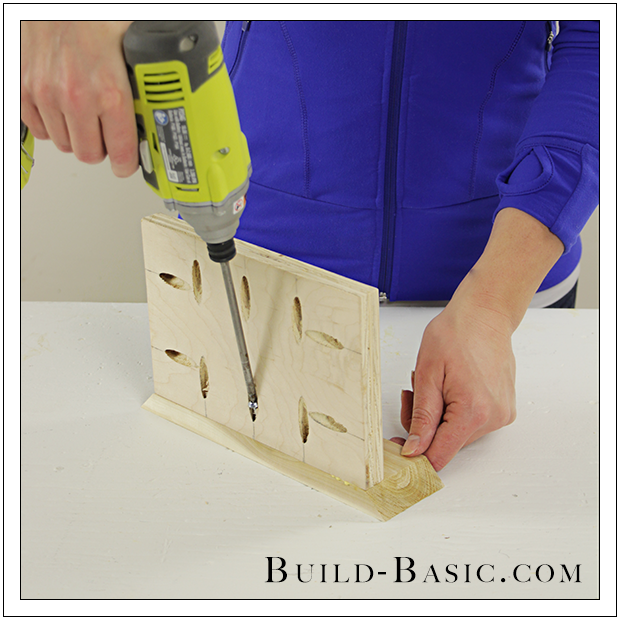
4. Attach the First Side
Lay the first Side flat on the work surface, as shown. Place the Panel onto the board so that the face with the pocket holes sets flush with the edge of the board. Slide the Panel side to side until its ends rest along the inside edge of each miter. Using a drill/driver, drive 1¼-inch pocket hole screws through the Panel and into the 1 x 3 Side.
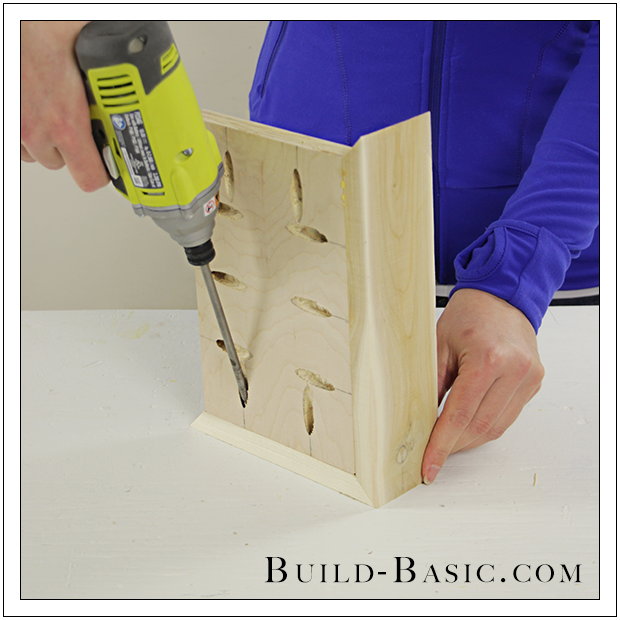
5. Install a Second Side
Apply glue to a second side of the Panel and to an exposed miter joint on the first Side. Place the adjoining Side against the Panel, and then screw it into place using a drill/driver a 1¼-inch pocket hole screws.
6. Attach the Remaining Sides
Using a drill/driver and screws, attach the remaining Sides, being sure to apply wood glue along the edge of the Panel and to the miter joints.
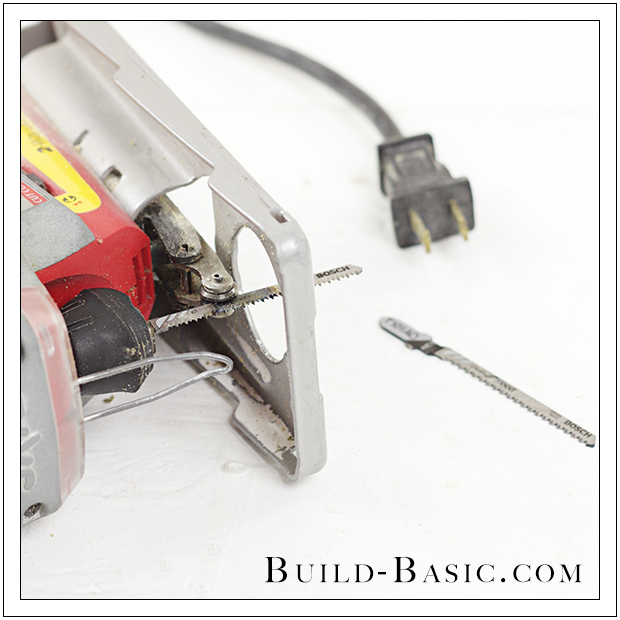
7. Cut out the Shape
Print or draw the state on a piece of paper. Cut out the shape, and then trace it onto the ¼-inch-thick hobby board. Replace the blade of your jigsaw with a thin scrolling blade so that it can easily maneuver around the curves, and then cut out the shape. Using s sanding sponge, smooth the cut edges of the shape. Now is likely the best time to apply paint or stain to all the parts and apply any graphic paper to the Panel.
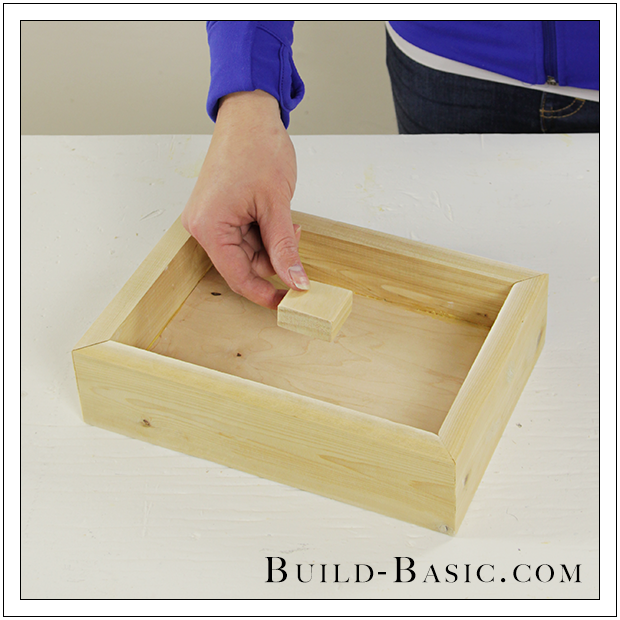
8. Finish the Pieces and Install the Spacer Block
Place the Spacer Block in the center of the assembled frame, or wherever it can best hide behind the cutout, and then mark its location. Remove the Block, apply glue to its backside, and then set it back in place. Finish by securing the Block with a nail that’s at least 1½-inches-long.
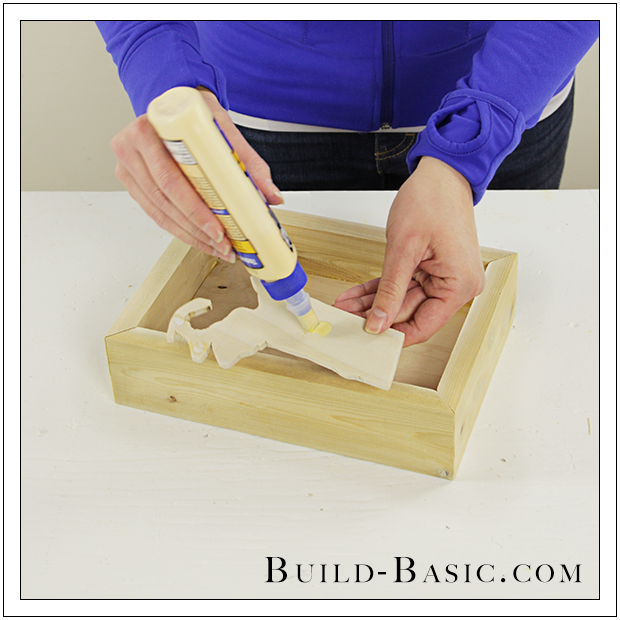
9. Prep the Shape
Place the State onto the Block to visually determine it positioning. Now remove the State, and apply glue to its backside where it will touch the Spacer Block.
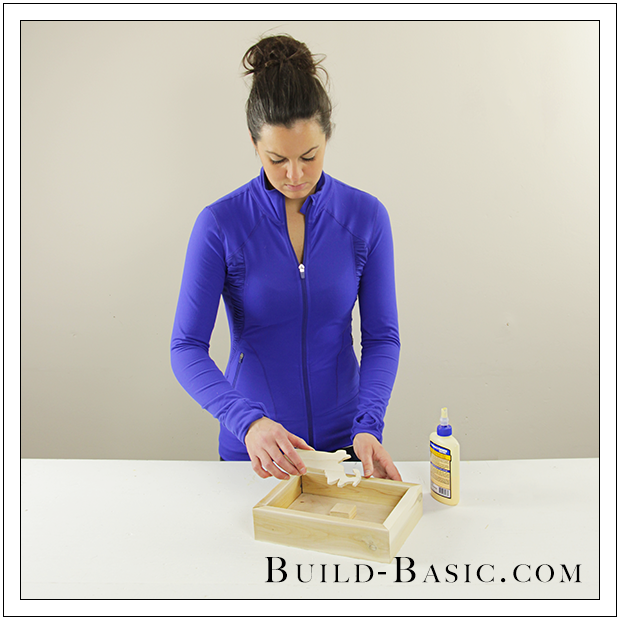
10. Install the State
Place the State onto the Spacer Block, repositioning it as needed. Finish the installation by nailing one 1½-inch nail though the State and into the Spacer Block—being sure not to hit the nail installed in Step 8. Finish by touching up the nail hole with wood filler and paint or stain, if desired.
MORE BUILDING PLANS