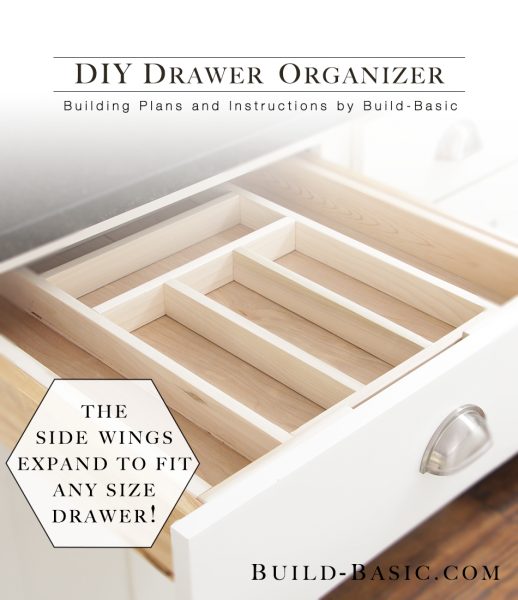
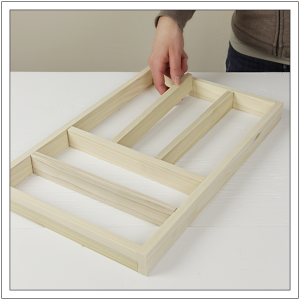
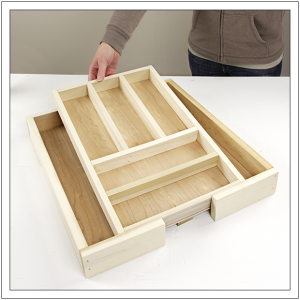
A drawer organizer for the silverware drawer is a must, but finding one to fit your exact dimensions can be difficult. Luckily, this DIY version has “wings” that glide out to add storage and fit any width drawer.
Miss Jenn’s Blog Post about the inspiration behind this project? Read it here:
What I Forgot to Add in Our Kitchen Remodel
Cost: $23
Time: 4 hours
Difficulty: Moderate. The cuts are easy, but keeping everything square during assembly takes some finesse.
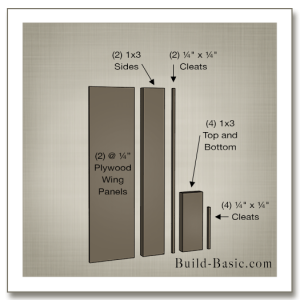
(1) ¼” x 2′ x 2′ Plywood Project Panel
(4) ½” x 2 x 4′ to create the Sides and Dividers in the Center Panel
(1) 1 x 3 x 6′ to create the Expandable Wings
(2) ¼” x ¼” x 36″ Square Dowels to create the Cleats on the Expandable Wings
1 inch Finish Nails to assemble the Center Panel
1¼ inch Finish Nails to assemble the 1×3 Sides on the Expandable Wings
Wood Glue
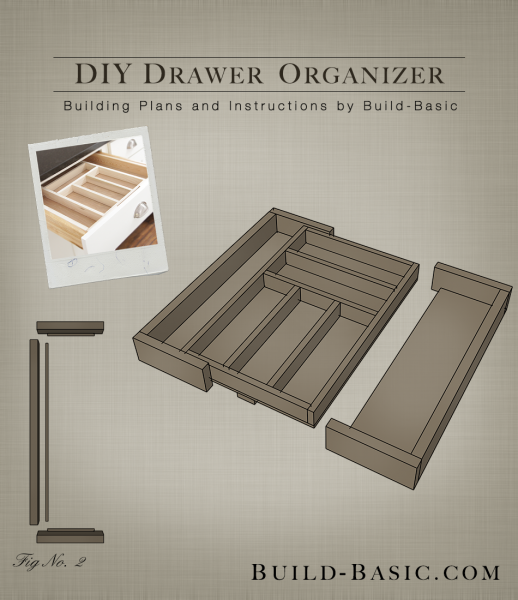
Center Draw Insert
- ½” x 2 Sides – 2 @ 18 inches
- ½” x 2 Horizontal Dividers – 4 @ 10½ inches
- ½” x 2 Vertical Dividers – 2 @ 10 inches
- ½” x 2 Support – 1 @ 18 inches
- ¼ inch Plywood Floor – 1 @ 18″ H x 11½” W
Expandable Wings
- 1 x 3 Sides – 2 @ 18 inches
- 1 x 3 Top and Bottom – 4 @ 6½ inches
- ¼” x ¼” Cleats (Sides) – 2 @ 18 inches
- ¼” x ¼” Cleats (Top and Bottom) – 4 @ 4½ inches
- ¼ inch Plywood Floor – 2 @ 18″ H x 4¼” W
Steps
1. Cut the Center Panel Parts
Using a miter saw and the cut list above, cut the ½” x 2 Center Panel pieces to size. Using a circular saw and a framing square, cut the Center Panel to size.
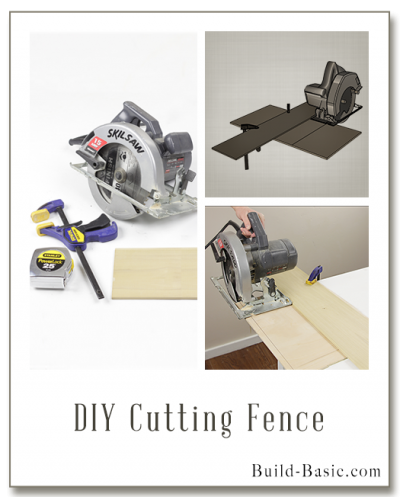
Tip: Get a straight cut on the plywood panel using our DIY Cutting Fence

2. Cut the Expandable Wing Parts
Using a miter saw and the cut list above, cut the 1 x 3 and ¼” square dowel Expandable Wing pieces to size. Using a circular saw and a framing square, cut the Expandable Wing Panels to size.
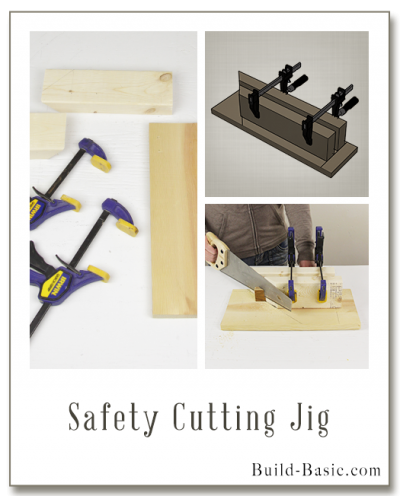
Tip: Cut the square dowels carefully with our Safety Cutting Jig
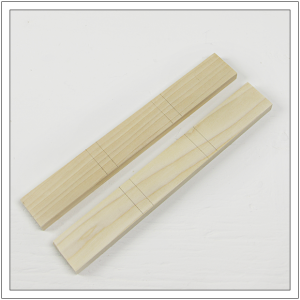
3. Mark the Sides
In steps 3 – 10 we’ll assemble the Center Panel. First, lay the ½” x 2 Sides flat on the work surface with their ends aligned. Measuring from the top edge of each board, make marks at 3½ inches, 4 inches, 7 inches and 7½ inches. Using a speed square, lightly transfer the lines across the inside face of both boards, as shown. Flip the boards over and transfer the lines to the opposite face. This will make it easier to position the nail gun during assembly. The horizontal dividers will be positioned in the ½-inch space between the lines. The remaining two horizontal dividers will be aligned with the ends of the Side pieces.
4. Mark the Dividers
Lay two ½” x 2 Horizontal Dividers flat on the work surface with their ends aligned. Measuring from the ends of each board, make marks at 3 1/8 inches and 3 5/8 inches. Using a speed square, lightly transfer the lines across the inside face of both boards, as shown. Flip the boards over and transfer the lines to the opposite face. The two Vertical Dividers will be positioned in the ½-inch space between the sets of lines.
5. Dryfit the Pieces
Stand all the parts on edge. First position two Horizontal Dividers between the Sides, flush with their ends. Place the remaining Horizontal Dividers between the Sides and inside the marks made in Step 3. Lastly, place the Vertical Dividers in place inside the lines marked in Step 4. Using a speed square, finesse the placement of the parts and make sure all joints fit snug.
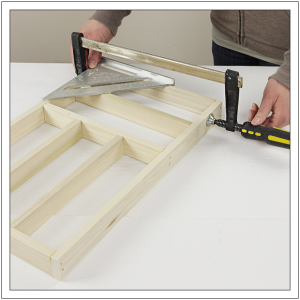
6. Assemble the Dividers
Remove the Vertical Dividers and the lower two Horizontal Dividers marked in Step from the assembly. Apply wood glue to the ends of the Vertical Dividers, and then clamp the parts in place. Using a speed square, ensure the Vertical Dividers set perfectly perpendicular to the adjoining Horizontal Dividers. Using a pneumatic nail gun and 1-inch finish nails, shoot two fasteners through the Horizontal Dividers and into the ends of each Vertical Divider.
7. Assemble the Remaining Pieces
Place the assembled pieces from Step 6 back in the place. Apply wood glue to the ends of each Horizontal Divider. Using a speed square, double and triple check everything is square, and then place clamps across the assembly, as shown. Using a pneumatic nail gun and 1-inch finish nails, shoot two fasteners through the outside of the Sides and into the ends of each Horizontal Divider.
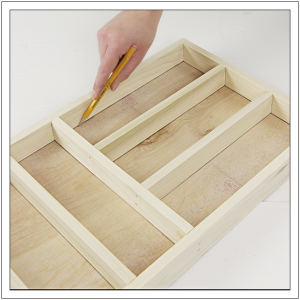
8. Mark the Plywood Panel
Place the ¼” plywood panel face down beneath the assembled dividers. Using a pencil. Mark the outline of the openings on the plywood.
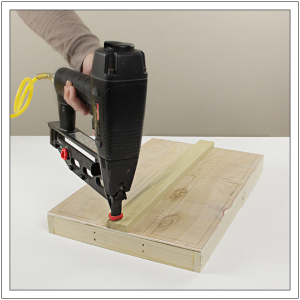
9. Attach the Plywood Panel
Place the assembled Dividers face down on the work surface. Apply a very thin bead of wood glue to the top edge of each Divider. Position the plywood Panel face down on the Dividers. Try not to “slide” the panel around, which will spread the glue. Using the pneumatic nail gun and 1-inch finish nails, shoot two fasteners through each edge of the Panel and into the ½” x 2 boards, and at least one nail into each interior Divider. Be sure to use the lines marked in Step 8 as a guide.
10. Attach the Support Bar
Apply wood glue to the face of the ½” x 2 Support. Place the support on the underside of the plywood Panel, centered on its width. Nail through the ends of the board and into the Panel and top and bottom Horizontal Dividers to secure the Support in place.
11. Attach the Cleats
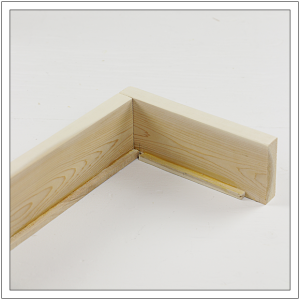
Now that the Center Panel is complete, let’s move on to creating the two Expandable Wings. Lay the 1×3 Top, Bottom and Side pieces on the work surface. Place a corresponding ¼” Square Dowel Cleat on each 1×3, flush with its bottom edge. On the long 1×3 Sides, the Cleats should rest flush with the ends of each board. Center the Cleats on the shorter pieces so that it’s one inch form the ends of each board. Apply wood glue to the Cleats, and than clamp them in place. Wipe away any excess glue with a damp rag.
12. Assemble the Parts
Once the glue on the Cleats is dry, stand the parts upright on the work surface. Position the Sides inside the Top and Bottom 1x3s, so that the Cleats all face inward, as shown. Apply wood glue to the ends of the 1×3 Sides, and then use a speed square to adjust the pieces. Clamp the parts in place. Using a pneumatic nail gun and 1¼-inch finish nails, shoot two fasteners through the Top and Bottom 1x3s and into the ends of the Side 1x3s.
13. Add the Plywood Panel
Apply wood glue to surface of each Cleat, and then place the corresponding plywood Panel in place. Clamp the Panel to the Cleats, and then allow to dry.
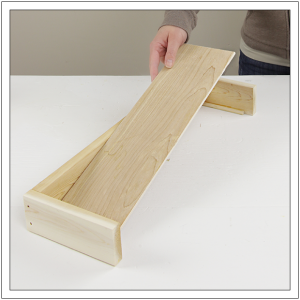
14. Add the Wings to the Center Panel
Place the Center Panel onto the Wings so that the edges of the Center Panel set inside the outer 1×3 walls of the Wings. Place the assembly in the drawer, and then pull the Wings outward until they rest against the inside walls of the drawer.
MORE BUILDING PLANS


Sergey
Would be nice to add the metric system.