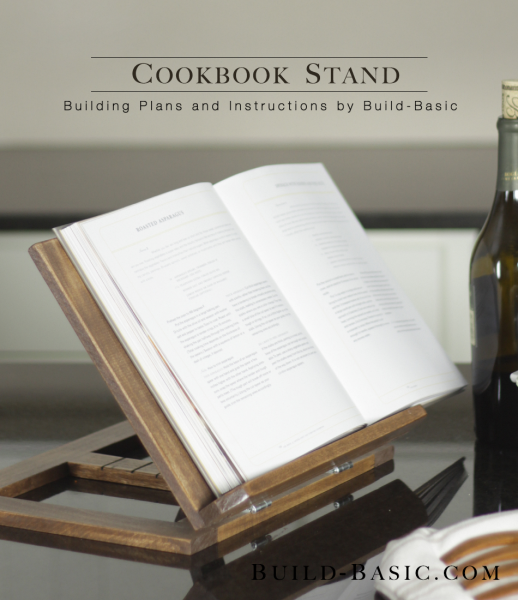
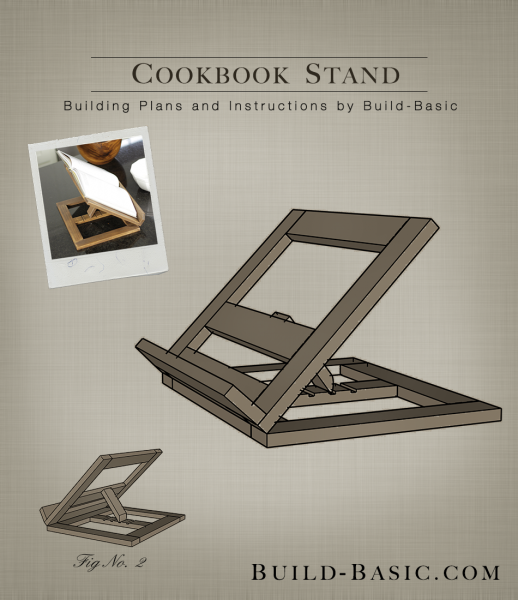
Whether you’re pulling out the secret family recipe or looking for a thoughtful hostess gift for your next gathering, this handmade cookbook stand is the perfect solution. With straightforward cuts and a simple assembly, this project comes together in no time. The design boasts hinges for fold-flat storage, and book holder that tilts to a range of viewing angles to accommodate any cook. Once complete, all you need to make the perfect meal–if you’re like me–is some serious practice and a handy fire extinguisher.
Cost: $11
Time: 1 hour
Difficulty: Easy. Square cuts and butt joints make the parts of this project fairly easy to assemble.
*Note: a ½ x 2 board has an “actual” width of 1½-inches.
(3) ½ x 2 x 4 Boards
(3) 1 inch hinges
1 inch wood screws
Wood Glue
*Note: a ½ x 2 board has an “actual” width of 1½-inches.
½ x 2 board – 9 @ 10 ½ inches
½ x 2 Leg – 1 @ 4 ¼ inches (Bevel one end at 45-degrees)
½ x 2 Slotted Stand – 1 @ 7 ½ inches
½ x 2 Book Rest – 1 @ 13 ½ inches
Steps
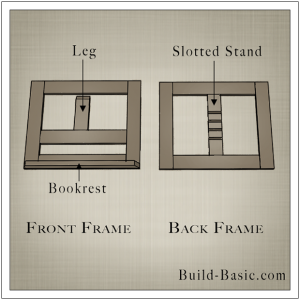
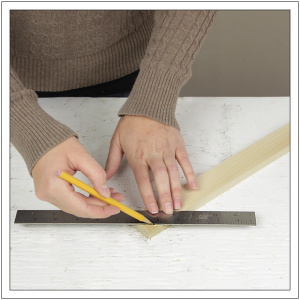
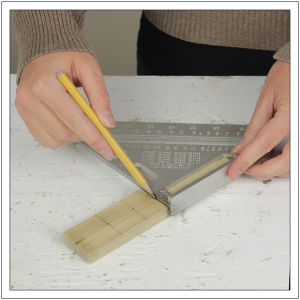
1. Size and Layout the Parts
Using the cut list above, cut the pieces to size using a miter or hand saw. Using the drawing provided, layout the pieces on a flat work surface. Note that all pieces are 10½ inches long unless marked as a “specialty part” on the drawing. The specialty parts are the leg, bookrest and slotted stand.
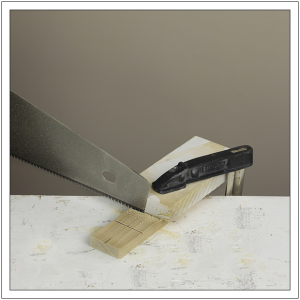
 2. Customize the Leg and Bookrest
Using a miter or handsaw, clip the front corners of the bookrest and bevel one end of the leg piece at 45-degrees. Return the pieces to their place in the front frame.
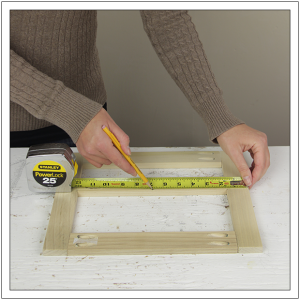
3. Mark the Slotted Stand
To create the slots for the leg to rest in, mark four lines on the “slotted stand” that are 3, 4, 5 and 6 inches from the top edge of the board.
4. Cut the Slots
Clamp the straight edge of a scrap block along the first line. Using a handsaw, carve a shallow groove. Repeat to create a grove at each marked line. Return the board to its place in the back frame.
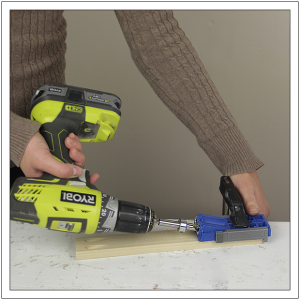
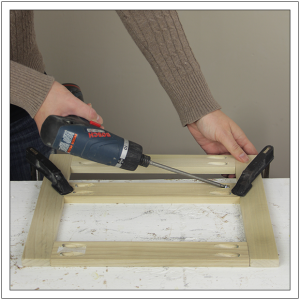
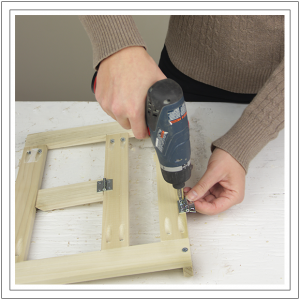
5. Drill the Pocket holes
Remove each of the horizontal 10½ inch pieces and the “slotted stand” from the frames. Flip the first board face down, and, using a
Kreg Jig, bore two pilot holes into the end of the board. Repeat of the opposite end of the board. Repeat this process with the remaining horizontal pieces and the “slotted stand”. Once complete, each of these boards should contain four pilot holes.
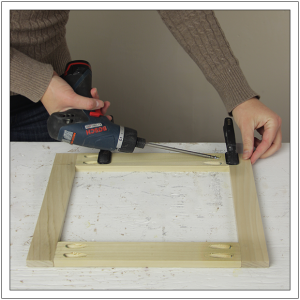
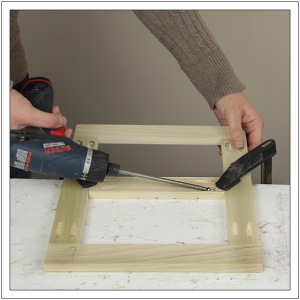
6. Assemble the Frames
One-by-one, apply wood glue to the joints, and then clamp them to the work surface. Drive 1 inch wood screws through the pilot holes to secure the parts in place.
7. Insert the Slotted Stand
Apply wood glue to the ends of the slotted stand, and then place the board centered vertically in the frame. Drive wood screws through the pilot holes in the slotted stand to hold it in place in the back frame.
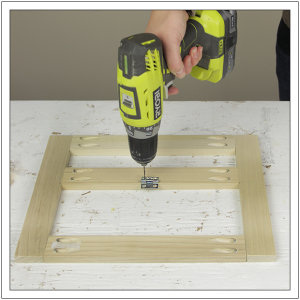
8. Insert the Crosspiece
On the front frame, make a mark 5¾ inches from its top edge. Apply wood glue to the ends of the remaining 10½ inch board. Place the board horizontally inside the frame. Position the board so that its top edge aligns with the marks, and then use wood screws to secure it in place.
9. Mark the Crosspiece
Using a tape measure, mark the center of the crosspiece installed in the last step.
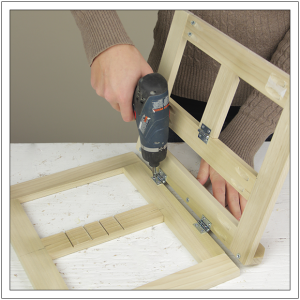
10. Drill the Hinge Pilot Holes
Center a hinge on the mark, and, using a drill/driver, drive a shallow pilot hole through the holes in the hinge and into the crosspiece. Now drive the screws provided with the hinge into the pilot holes to hold the hinge in place.
11. Attach the Leg
Position the leg centered on the hinge so that the bevel side is facing downward as shown. Position the hinge on the leg, drill pilot holes, and secure the hinge in place.
12. Add the Bookrest
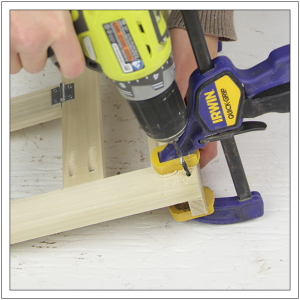
Clamp the bookrest against the face of the front frame. Position the board so that the underside is flush with the bottom edge of the frame. Apply wood glue to the back edge of the bookrest board. Clamp it in place. Carefully drill pilot holes through the backside of the frame and into the back edge of the bookrest. Using 1 inch wood screws, secure the bookrest in place.
13. Attach the Hinges
Make marks on the backside of the front frame that are 4 inches from each end. Position and secure a hinge inside each mark.
14. Attach the Front and Back Frames
Position the hinges of the face of the back frame. Align the sides of the frames, and then secure the hinges to the frame.
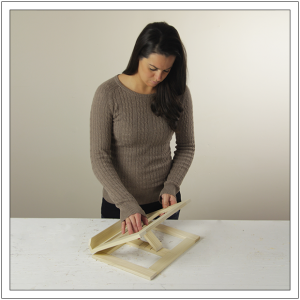
15. Adjust the Angle of the Stand
Tilt the top edge of the front frame upward, allowing the leg to drop down. Once the beveled end of the leg drops into a slot, it will hold the face frame in place.
MORE BUILDING PLANS


Ben
Thanks for the plans. Really enjoyed this as a beginning wood worker. It allowed me to get experience with some new tools and techniques.
Henry
Thank you for sharing Jenn. Nice classy functional book stand.
Tanya Clark
I am trying to make this stand using your instructions however my wood has split where the wood is supposed to joined into the side pieces. I am using Kreg 1 inch screws and the screws don’t even reach the sides of the lumber. Not sure if the screws makes a difference or not, but my lumber is split
And I will have to buy more if I want to make this stand.
Craig Pickell
Can I get a printed plan for the cook book stand ? please let me know and the cost . thanh you