


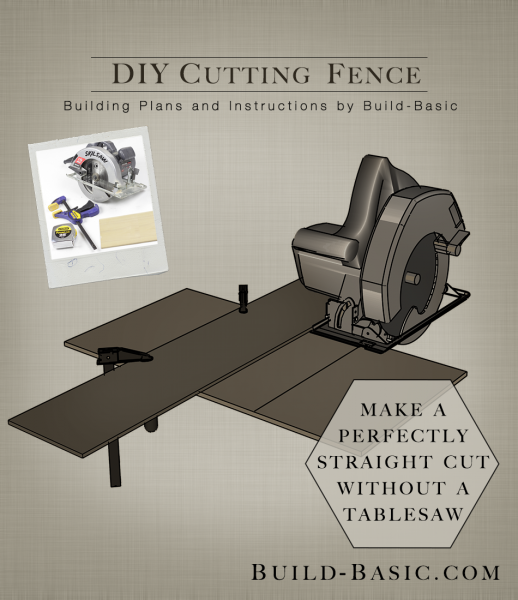
Cutting a perfectly straight line with a circular saw or jigsaw is nearly impossible. The trick is to create a “fence” for the saw to run alongside. That way, the cut stays straight, and you can concentrate on operating the saw instead of staring at the cut line. Check out the steps below to get it set up. Once you get the hang of positioning the fence, using it becomes second nature. And, most importantly, you’ll be much happier with the final cut.
Cost: $0
Time: 5 Minutes (First-time set-up)
Difficulty: Easy. Positioning the fence is quick and easy, and results in better final cut.
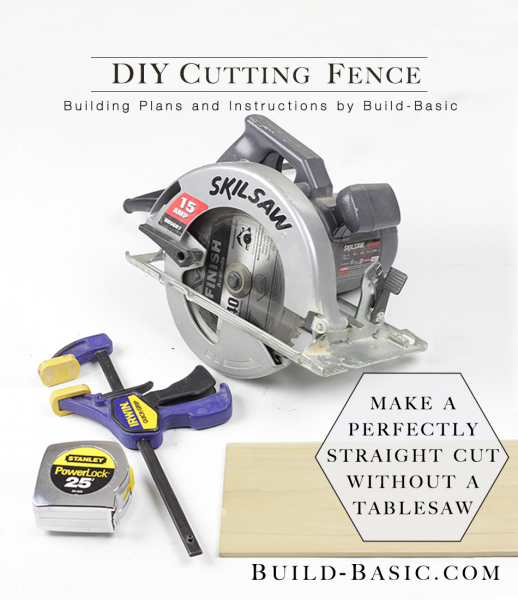
Tape Measure
Framing Square
Circular Saw (or Jigsaw)
Hand Clamps
(1) 1 x 5 Board (I like this size because it’s wide enough that the body of my saw doesn’t get hung up on the head of the clamps.)
None
Steps
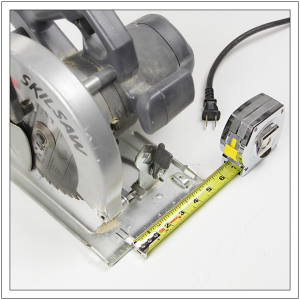
1. Measure the Saw’s Footplate
Unplug the saw, and then place a tape measure along the front edge of its footplate. Measure from the 0-degree marking to the edge of the footplate. If I’m standing behind my saw, I’m measuring to the left of the blade. Personally, I prefer to keep the waste side of my cut line to the right of my blade so that the majority of my footplate is resting on a solid foundation that won’t fall away once the cut is complete. Either way, just note that you’ll be placing the “fence” board on whichever side you measure on the footplate.
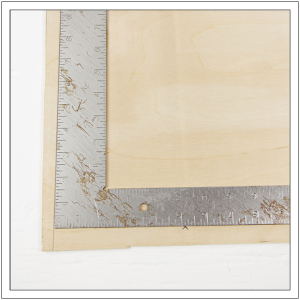
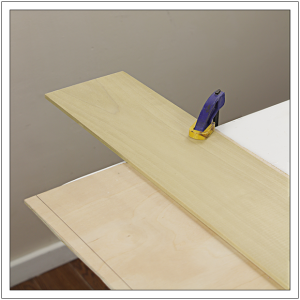
 2. Mark the Fence Placement
Place one leg of a framing square along the cut line. Along the adjacent leg, mark the width of the footplate measured in Step 1. On my saw, this distance was 5 1/8-inches. Mark this distance near the start and end of the cut line.
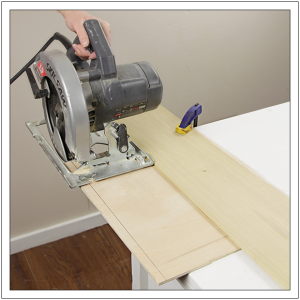
3. Position the Fence
Position the cut line over the edge of a table or up on blocks. Align the edge of the “fence” board with the marks made in Step 2. Allow several inches of the fence to extend beyond each end of the piece being cut. This will help start and end the cut squarely. Clamp the fence in place. Make sure the piece being cut is secure as well.
4. Make the Cut
Place the saw’s footplate against the edge of the fence. Check that the saw’s blade lines-up with the cut line. (Don’t forget to adjust the depth of the blade to about a half-tooth deeper than the thickness of the material.) Plug in the saw. With the saw in place against the fence, and the front of the footplate resting on the material, start the saw blade. Now push the blade slowly into the material to start the cut. Run the blade through the material, with the footplate against the fence, until the blade fully exits the material.
MORE BUILDING PLANS


Joe
Have discovered an even quicker way to do this without having to measure off the blade each time.
If you take the board that will be your straightedge fence (as seen in the picture above), glue that down to a second piece of the same length, but equal to the wide of your fence + the width of your saws base plate. Then, cut along the fence like shown above but cutting through the the bottom board that you glued the fence to. This will leave you a perfectly straight cut that is the exact width of your saw to the blade. From now on, instead of measuring away from the blade, just lay that newly cut edge down on the cut line of your project piece, clamp it, and it will cut perfect every time.
This can be made into any size, from a full 8ft sheet for ripping plywood down to a much smaller piece for cross cutting.
LeRoy Lemon
I have tried to build a draw before with no luck, just could not figure out how to drill the pocket holes. watched your video and went and bought that little jig. Never knew how easy it would be, but it’s great, built a draw and can’t wait to suse it again
Michele
Thanks for this post! Don’t know why I didn’t think of it before–just been using my T-square as my “fence” but the clamp always gets in the way…this will work much better! 🙂
lelobo
Hi Jenn, Way to go, with just a very short setup time you’ve given yourself smoother control of the saw. A much better accuracy on the cut and you have greatly increased the safety factor.
A circular saw does have it’s dangers and you’ve shown that with a few minutes of setup time a project becomes smoother, safer, more precise and the enjoyment of a calm operation will be reflected in the finish quality. Kinda boosts the pride up a little also I’d say.
Till next, Ray R.
Pingback: What I Forgot to Add in Our Kitchen Remodel ‹ Build Basic