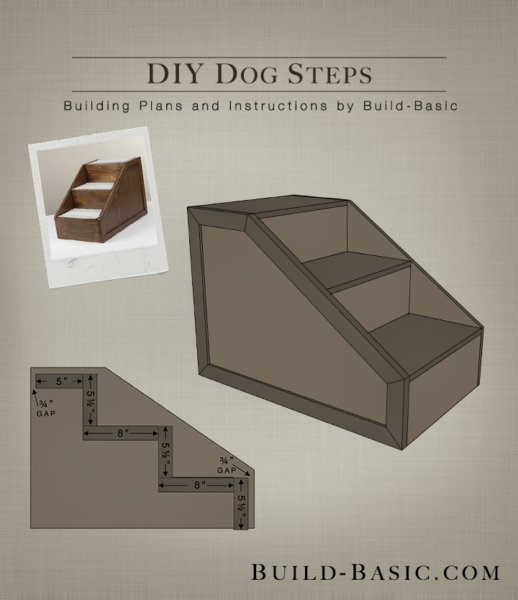
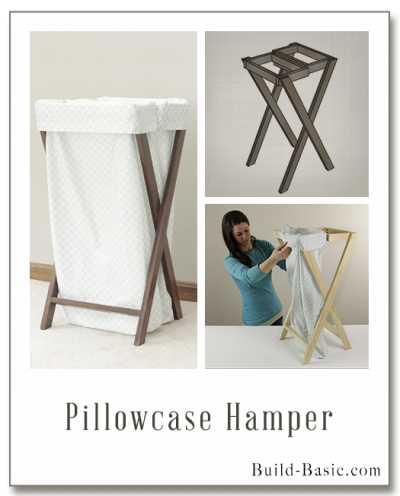
Give your pup a leg up with these easy-to-assemble pet steps. With plywood sides and simple 1×2 cleats to hold the pieces in place, you’ll be pleasantly surprised how easily the parts come together. And at under $30, you’ll be glad you avoided the hefty pet store price tag!
TIP: Click the image above to reveal the free building plans. Click the tabs below to see the tools, materials and cut list.
Cost: $28
Time: 3 hours
Difficulty: Moderate. The cuts are easy, but taking the time to layout and square the cleats takes some time.
(1) ½” x 2′ x 4′ Birch Plywood to make the Sides and Treads
(1) 1 x 2 x 8′ to create the Cleats and a Support Bar across the back
(1) 1 x 6 x 6′ to create the Risers and a Support Bar across the back
(3) ½” x 2″ x 4′ Boards to Trim the Sides (Optional)
Wood Glue
1¼ inch Finish Nails to attach the Risers, Treads and Support Bars
1 inch Finish Nails to attach the Cleats
¾ inch Finish Nails to attach the Trim (optional)
Fabric to make a Stair Runner (optional)
Drawer Liner to cushion beneath the Runner (optional)
Hand Stapler and 3/8-inch staples to attach the Runner (optional)
½ inch Plywood Sides – 2 @ 17¼” H x 24″ W
½ inch Plywood Treads – 3 @ 13¼” W x 8″ D
1×6 Risers – 3 @ 13¼ inches
1×2 Support Bar – 1 @ 13¼ inches
1×6 Support Bar – 1 @ 13¼ inches
½” x 2″ Trim – Cut to Fit
1×2 Cleats
- 1×2 Riser Cleats – 6 @ 5½ inches
- 1×2 Bottom Tread Cleats – 2 @ 8 inches
- 1×2 Middle Tread Cleats – 2 @ 8 inches
- 1×2 Top Tread Cleats – 2 @ 5 inches
Steps
1. Cut the Parts
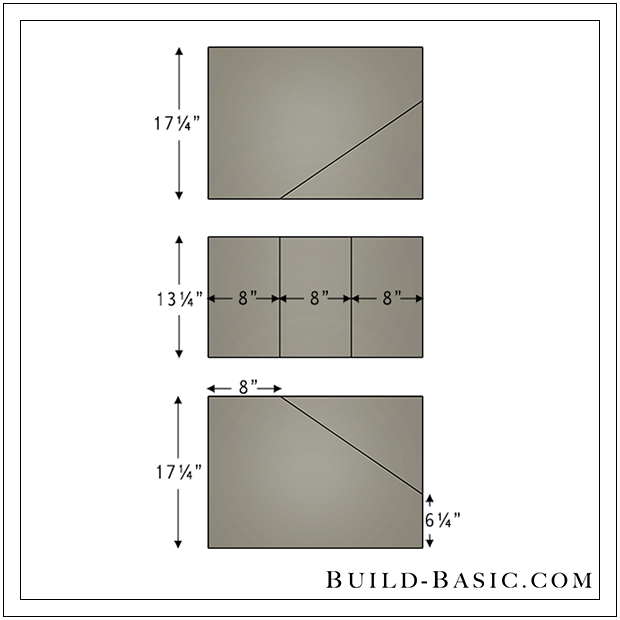
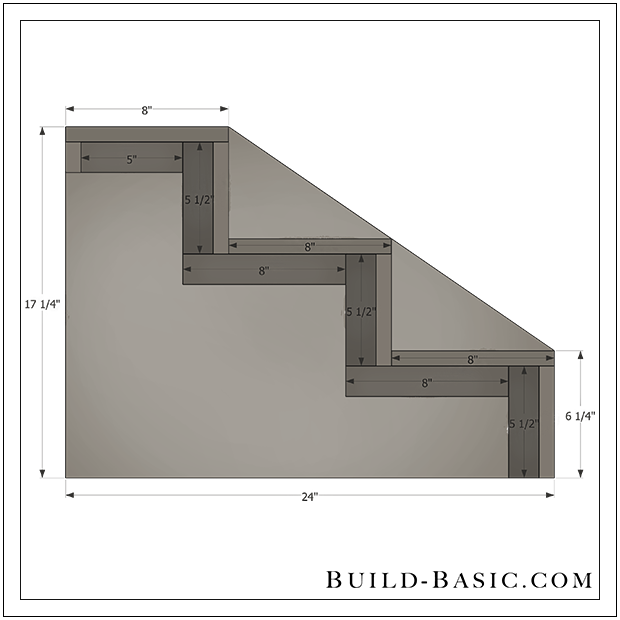
Using a miter saw and the cut list above, cut the 1×2 and 1×6 pieces to size. Using a circular saw and the diagram at the right, divide the 2-by-4-foot plywood into three parts. Since you lose about an 1/8-inch per cut, the parts should end up measuring two at 17 inches and one at 13½ inches, all by 24-inches-wide. Cut the middle section into three 8-inch-wide Treads.
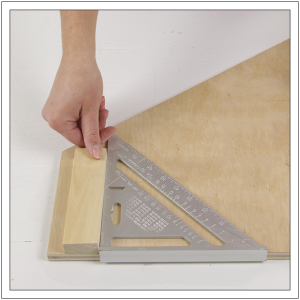
 2. Shape the Sides
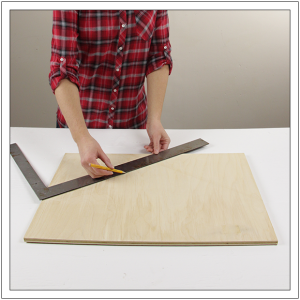
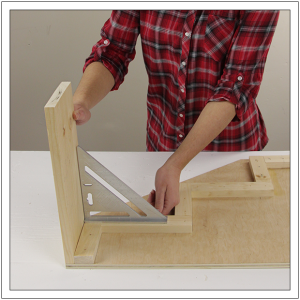
To mark the angled cut on each Side piece, lay the Sides face-up, and then make marks 6 inches up from the bottom-front corner, and 8 inches across from the top-back corner. Connect the marks on each board.
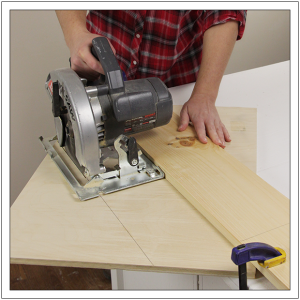
3. Cut the Sides
Using a circular saw cut along the line on each plywood Side. To create a straight cut, I use a makeshift fence for the saw to run along. To do so, unplug the saw and measure the distance from the saw blade to the outer edge of the footplate. Now measure and mark that distance in two places perpendicular from the line (very important that the marks are perpendicular from the line). Clamp a board along the marks so that the saw will run along the edge of the board and cut the line. For example: my footplate runs 5 1/8-inch-wide to the left of the blade, and so the board in the photo is 5 1/8 inches from my cut line.
4. Place the First Cleat
Lay the plywood Sides face down on the work surface. Using a speed square, mark a vertical line ¾ inch from the font edge on each Side. Align a 5½-inch Riser Cleat inside the line on each board. Apply glue to the back of the Cleat, and then nail it into place using a pneumatic nail gun and 1-inch finish nails.
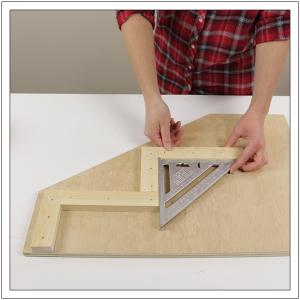
5. Layout the Cleats
Using the diagram at the right and a speed square, layout the remaining Cleats.
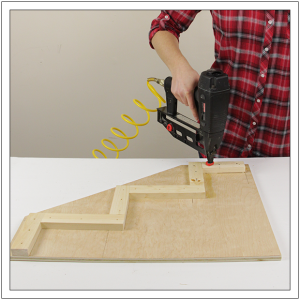
6. Install the Cleats
Starting low and working up the “steps”, apply wood glue to the back of each Cleat, and then nail it in place. Continue using the speed square to ensure everything remains square.
7. Finish Installing the Cleats
Once you reach the Top Tread Cleat, check that there is a ½ inch gap above the cleat where the Tread will set. Additionally, there should be a ¾ inch gap behind the cleat to allow room for the Support Bar to be installed later.
8. Attach the First Riser
Apply wood glue to face of the front Cleat and one end of the first 1×6 Riser. Set the end of the Riser against the Cleat so that it butts into the inside of the Side wall. Using a speed square, hold the Riser square to the Side, and then nail through the face of the Riser and into the Cleat using a pneumatic nail gun and two 1¼ inch finish nails. Repeat to attach the Riser to the remaining Side.
9. Attach the Remaining Risers
Set the second Riser in place against the next vertical Cleats. Apply wood glue to the face of the Cleats and to the ends of the Riser before nailing through the face of the Riser and into the Cleats to hold it in place. Repeat to install the uppermost Riser.
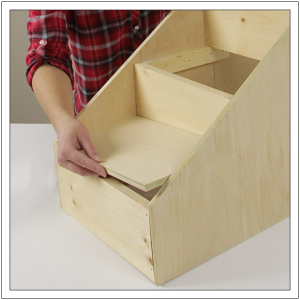
10. Place the First Tread
Apply wood glue to the top edge of each horizontal Cleat and the top edge of each Riser. Set the first Tread in place on the lowest Cleats. The front edge of the Tread should set flush with the face of the lowest Riser, while the back edge sets against the middle Riser. Nail two nails through the face of the Tread and into each Cleat to hold the Tread in place.
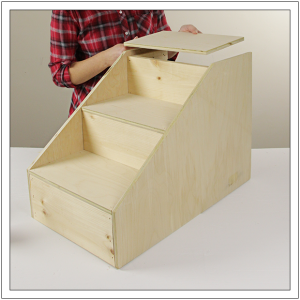
11. Attach the Remaining Treads
Repeat Step 10 to install the remaining Treads. Once you reach the top, the Tread will set flush with the face of the Riser below it, and rest flush with the back edge of the Sides.
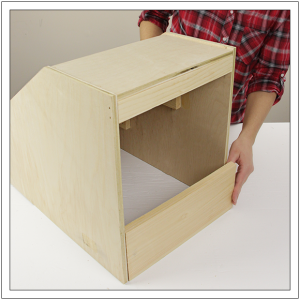
12. Add the 1×2 Support Bar
Place the 1×2 Support Bar between the Sides and against the underside of the top Tread. Nail two 1 ¼ inch nails through each Side and into the ends of the 1×2 to hold it in place. (Note: I didn’t mind nailing though the Sides because I knew it’d be covered with trim. If you don’t plan to install trim, a Kreg Jig can be used to make pocket holes in the 1×2 so that the fasteners remain hidden.)
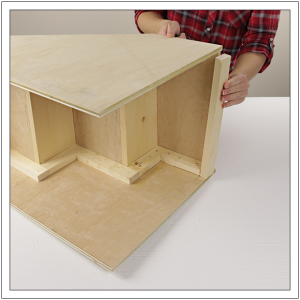
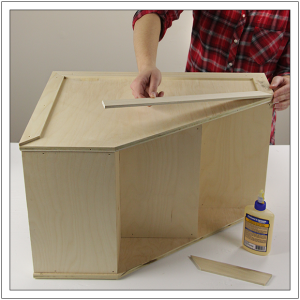
13. Add the 1×6 Support Bar
Place the 1×6 Support Bar between the Sides and flush with their bottom and back edges. Nail through the Sides and into the ends of the board with 1 ¼ inch nails to hold the piece in place.
14. Cut and Attach the Trim (optional)
Lay the ½” x 2″ trim in place to mark each cut as you work around the perimeter of each Side. Using a miter saw, cut the boards to fit. Apply wood glue beneath each piece and nail it in place using ¾-inch finish nails. (Note: Note all miters are 45-degrees except the miter near the front edge of the top tread (ours was a 17½-degree miter) and the miter near the bottom tread (ours was a 28-degree miter). Fill the nail holes with wood filler and sand before finishing.
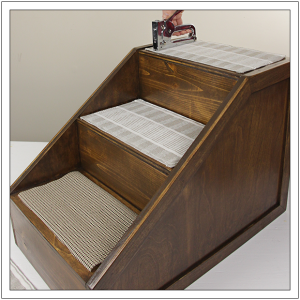
15. Secure the Runner (optional)
I chose to line the steps with fabric layered over rubber drawer liner (or padding). I left a half inch boarder around each piece, and secured it using a hand stapler so it could be easily removed and replaced, if needed.
MORE BUILDING PLANS


Owain Chilton
This worked very well. You do have to trim the 1×6 risers down to 1x 5 1/2.
Cyndie Camp
Love the design. Will this hold an 80 lb dog?
Wildrum
For the 8” cuts, you need to compensate for saw cut. Each should be 7 7/8”. If you don’t, you’ll have (2) 8” and (1) 7 3/4” pieces. Not the end of the world but not ideal either.
Dane
Great little build, simple to follow instructions. Took me about 4 hours by myself, including trim, stain and carpeting the stairs. I have some woodworking experience but by no means am I an expert. Height ended up being perfect for our bed but could easily modify to add another step for something higher. Thanks for the instructions! I find it so much easier when you have a set materials list and plan.
Ashleigh Kervel
Came out great! Thanks! Very simple
60962409526__35C7326F-9756-40F1-932C-ABF2F9656219.JPG