Geometric Lazy Susan Tray


*This post is sponsored by The Home Depot and contains affiliate links.
This year I’ve been working on handmade gifts for our friends and family—a token of our love shipped to those we miss so much, especially this time of year.
And to create this geometric lazy susan tray, I’m teaming up with one of my most favorite partners, The Home Depot! This season they are doing such an amazing job sharing easy-to-make handmade gift ideas and instructions so you can stress less and share the spirit of the holidays more with the ones you love. And with the holiday right around the corner, these projects make perfect last-minute gifts!
Click HERE to see their gift ideas and how other bloggers customized this lazy susan!
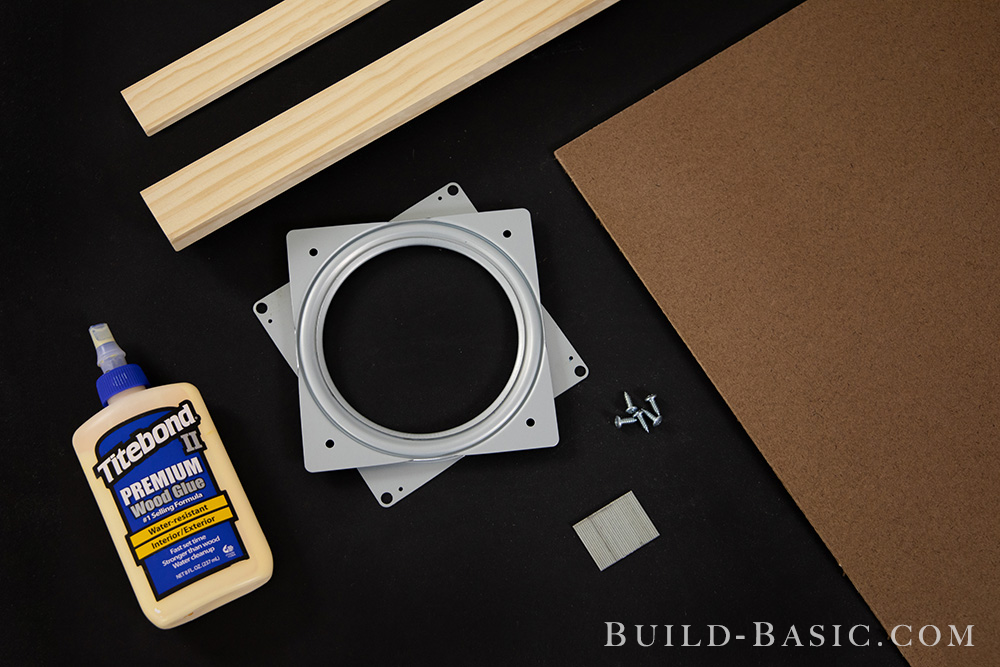
For this project I picked up two 1x2x6 boards, a MDF project panel and a 6-foot piece of thin lattice molding. I also grabbed a rotating lazy susan to attach to the underside of the finished tray.
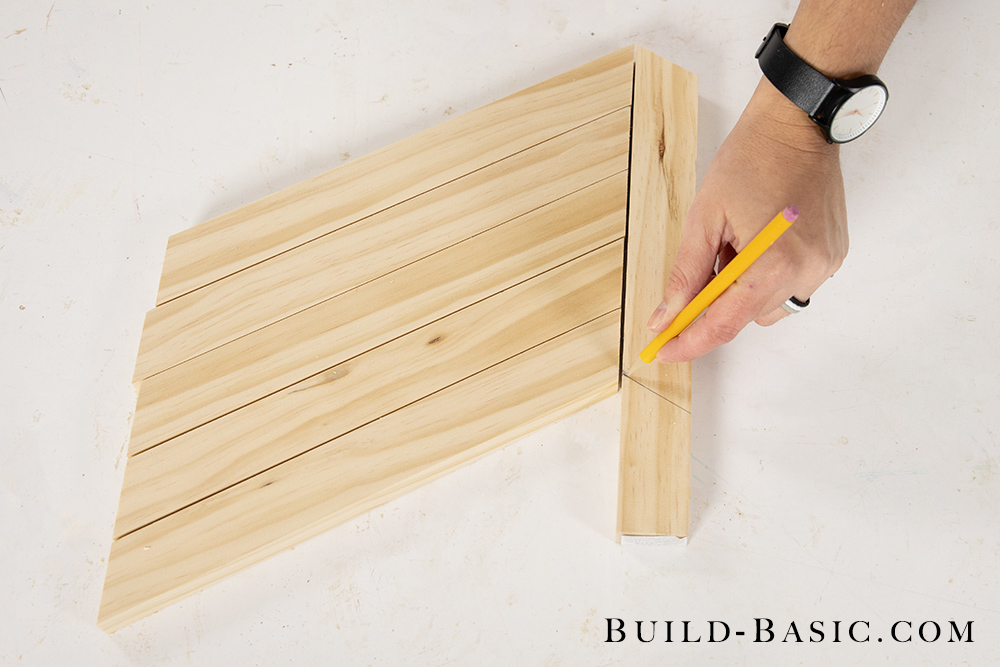
To build the tray I first cut six lengths of 1×2 board to a rough measurement of about 10 inches with parallel 30-degree angles on each end. I laid five boards side-by-side and marked their collective width on the sixth board.
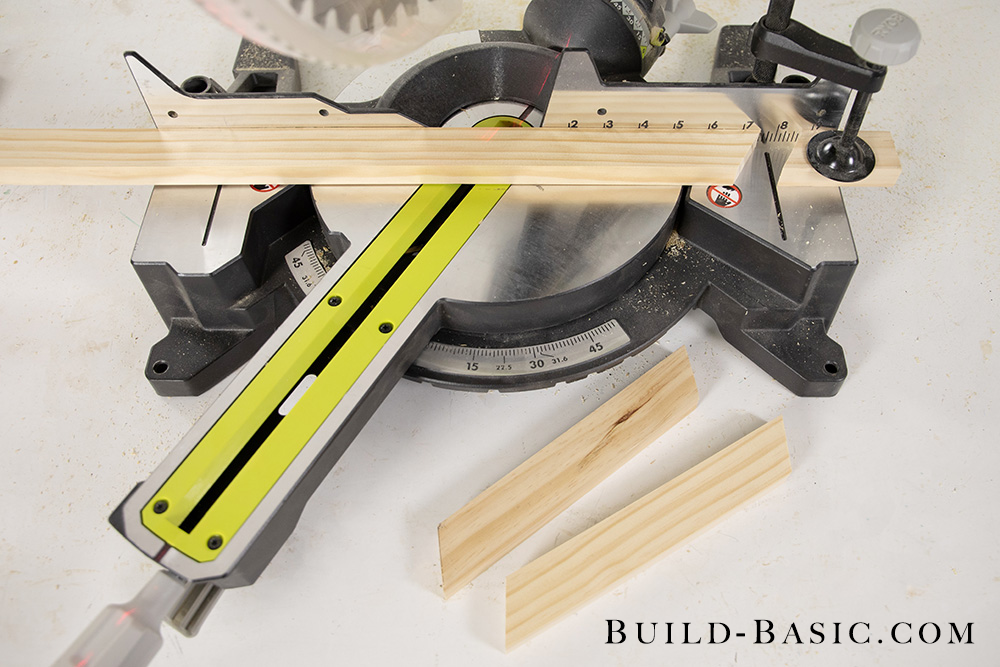
I then cut the marked piece to length, and clamped the cutoff to the saw to create a stop block. I used this setup to cut all fifteen boards used to make the inlay pattern on the base of the tray.
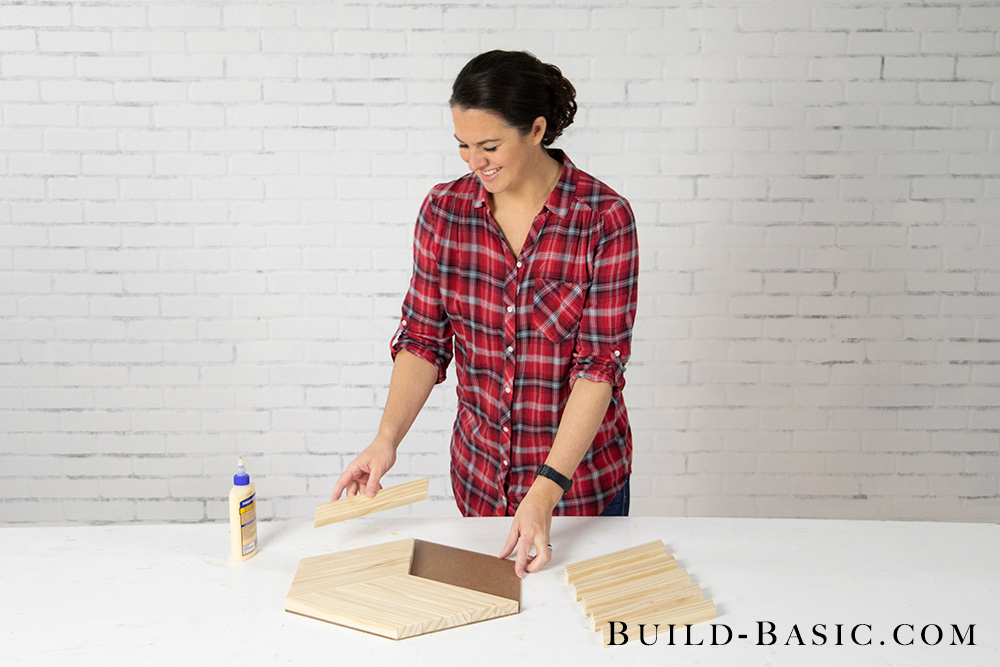
Next I laid all the pieces in place on the MDF board and marked the perimeter of the tray. I used my sliding compound miter saw to cut the MDF to size, but you can also use a circular saw or jigsaw to trim the edges—they don’t have to be perfect since the edge of the tray will hide your cuts;) Next I glued all the pieces to the MDF board.
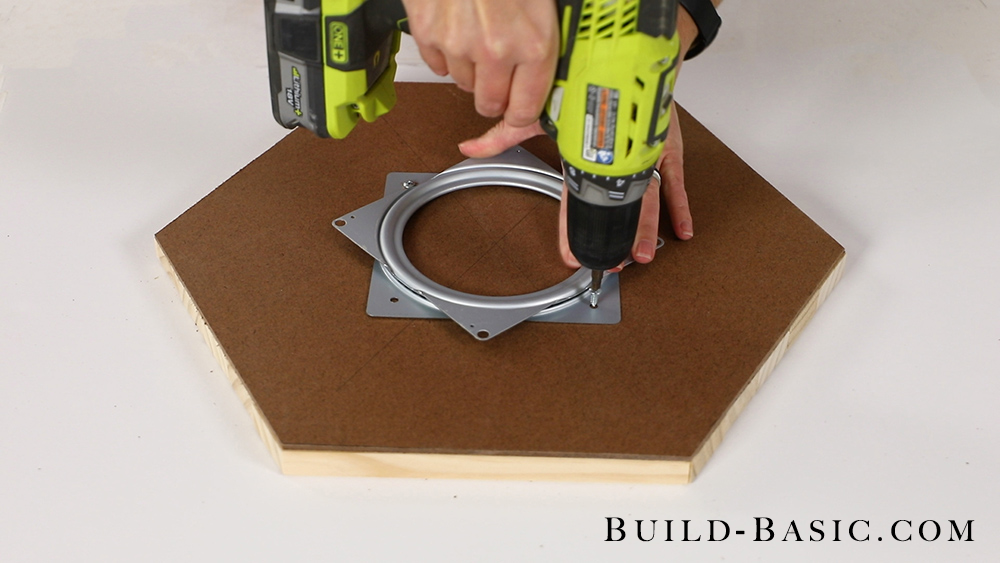
In the morning I flipped the tray over to center and then attached the lazy susan hardware with 3/4-inch wood screws.
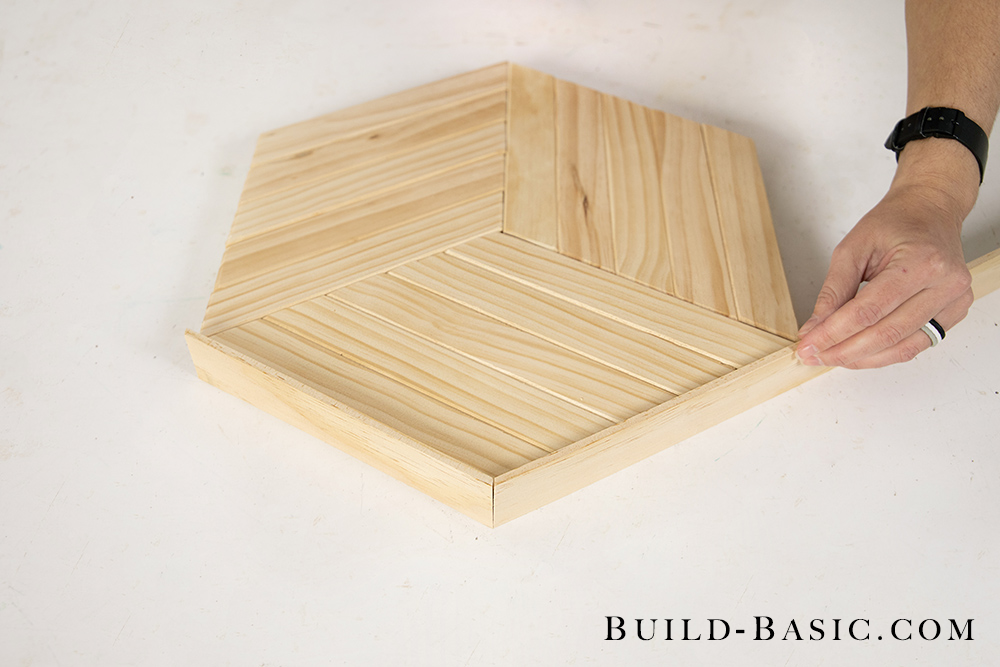
To finish the edges, I mitered sections of the lattice strip on edge at 30-degrees, and then glued and nailed them to the edges of the tray to hide the layers and the gap created by the lazy susan hardware.
Don’t forget to check out the amazing ways these talented bloggers customized their lazy susan project!


TOOLS
MATERIALS
(2) 1 x 2 x 6 Boards
1/4 x 1 1/4” Lattice Molding. Get 6 feet
1/4” x 2’ x 4’ MDF Project Panel