*This post is sponsored by Rust-Oleum. All opinions are my own.
Click here to read my full disclosure policy.
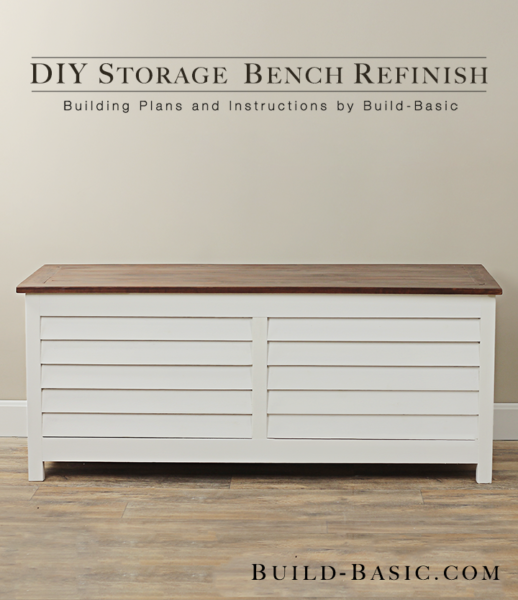
Awhile back I built this DIY Outdoor Storage Box to house seat cushions by the pool at our first home. We’ve since moved to a home with less outdoor space, but I couldn’t give up this handy storage solution that doubles as a bench seat.
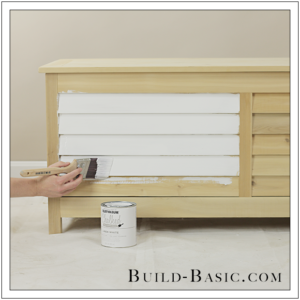
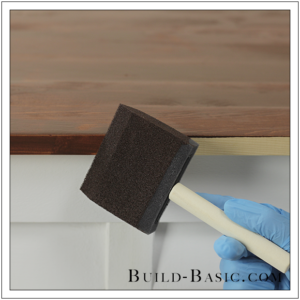
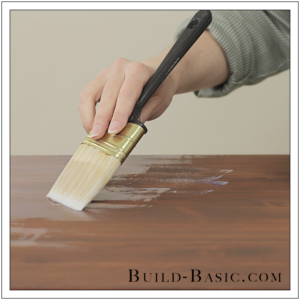
To move the box inside, it first needed a good cleaning and a fresh finish. For the base, I chose a matte white paint. But for the top, I wanted a warm wood-toned finish that only stain can achieve. I was lucky enough to team up with my friends at Varathane to incorporate their 3X Wood Stain in American Walnut. The stain was easy to apply, and dried incredibly fast. And to protect my finish, I chose Varathane Triple Thick Poly—it’s a water-based product (so cleanup is easy) and goes on so thick that I don’t need to waste time applying multiple coats to build up the finish.
TIP: Click the tabs below to see the tools, materials and cut list.
NOTE: This tutorial may contain affiliate links. To see our full disclosure policy, click HERE
Time: 2 Hours with Drying Time in between
Difficulty: Easy. Applying the stain and polyurethane is surprisingly straightforward.
Sponge Brush
Lint-free rags
High-quality synthetic Bristle Brush
Varathane Satin Triple Thick Polyurethane
Rust-Oleum Linen White Ultra Matte Interior Chalked Paint
Nitril or neoprene gloves (Get at least two pair)
Safety glasses
Face Respirator
Mineral Spirits (optional for cleanup of stain)
Steps
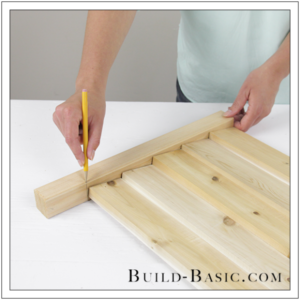
1. Build the Outdoor Storage Box
FREE PLANS: DIY Outdoor Storage Box

2. Coat the Base
3. Apply the Stain
4. Wipe-Off the Stain
5. Apply the Topcoat
MORE BUILDING PLANS