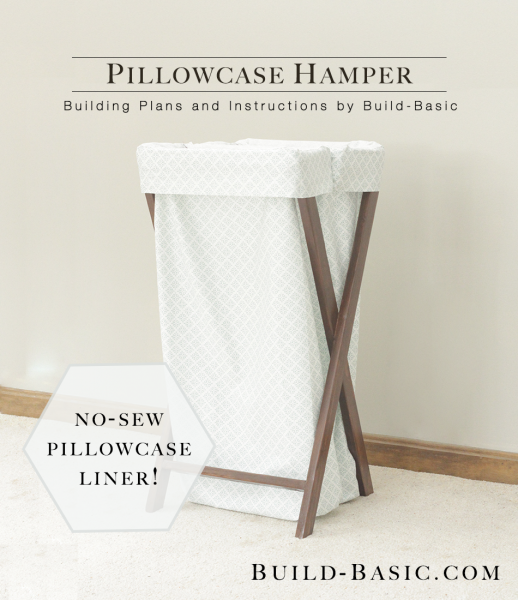
Create this simple no-sew hamper using only a few 1x2s and two queen pillowcases! With slots to separate whites from colors, you’ll be enjoying a clean room and less sorting in no time.
Cost: $8
Time: 1½ hours
Difficulty: Moderate. The cuts are simple, but it takes some time to install the legs and make sure they sit level.
(3) 1x2x6 Boards
(2) Queen Pillowcases
1¼ inch Pocket Screws
1¼ inch Wood screws
Wood Glue
1×2 Pillowcase Frame (Front and Back) – 4 @ 11 inches
1×2 Pillowcase Frame (Sides) – 4 @ 7 inches
1×2 Center Support – 1 @ 7 inches
1×2 Legs – 4 @ 31 5/8 inches (ends mitered at parallel 23.5-degree angles)
1×2 Leg Supports – 2 @ 12½ inches
Steps
1. Cut and Prep the Parts
Using the cut list above, cut all piece to size except the Legs. Using a Kreg Jig (We use the Kreg Jig R3) drill two pocket holes in the ends of the Pillowcase Frame’s Front and Back pieces and the Leg Supports.
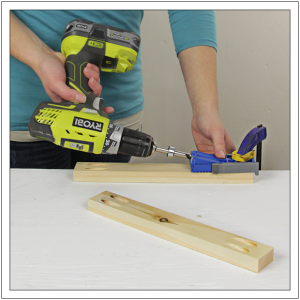
 2. Layout the Pillowcase Frames
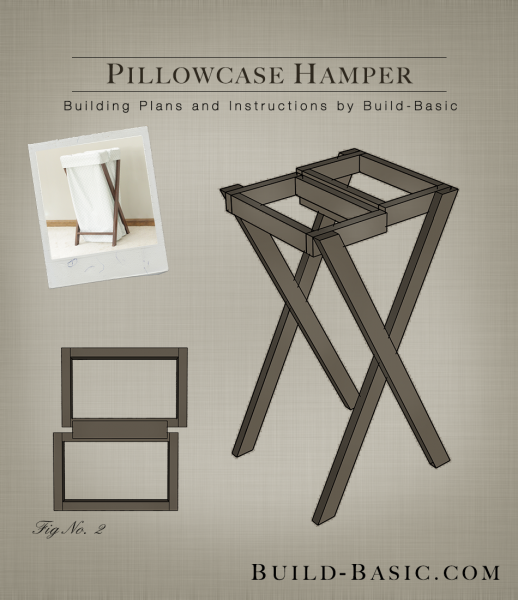
Layout the two Pillowcase Frames by placing the Front and Back pieces between the Sides, flush with their ends. Position the pocket holes facing inwards toward the center of each frame.
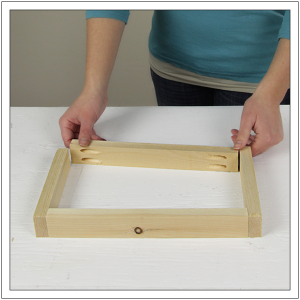
3. Assemble the Frames
Apply wood glue to the ends of the Front and Back pieces, and then clamp them in place between the Sides. Using a drill/driver, drive 1¼-inch pocket screws through the Front and Back pieces, and into the Sides to secure the parts of each frame.
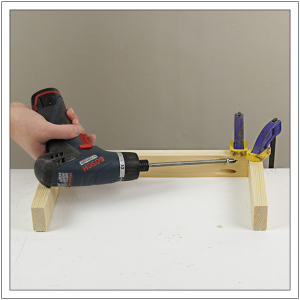
4. Add the Center Support
Position the Frames one in front of the other with a ½ inch gap between them. Now offset the front Frame ¾-inch to the right. This will offset will match that of the crisscrossed Legs later in the assembly. Now place the Center Support across the gap, centered on the width of the Frames. Apply wood glue to the underside of the Center Support and then position it back in place. Using a drill/driver, drive two pilot holes through the Center Support and into each Frame piece. Sink four 1¼-inch screws into the pilot holes to hold the piece securely in place.
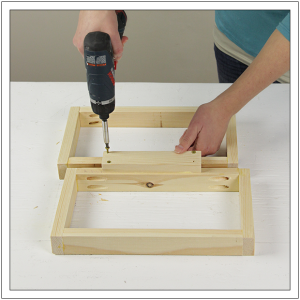
5. Cut the Legs
Using a miter saw, cut the first Leg to length with parallel 23.5-degree miters at each end. Note the length of the legs is from the long point on one end to the short side on the opposing end. Mark the first Leg as a “template”, and then use it to mark, and then cut the remaining Legs.
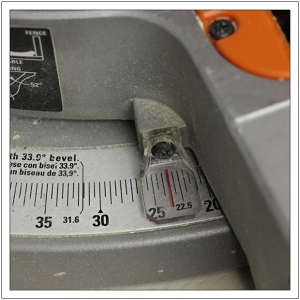
6. Mark the Legs
Place a pair of Legs facing each other (i.e. long points outward). Place a scrap 1×2 across each Leg, flush with the mitered end. Trace a line along the opposing edge of the scrap block.
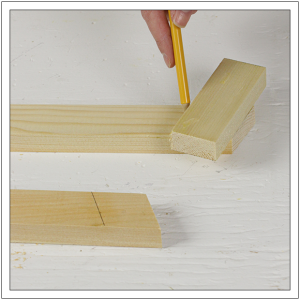
7. Position and Install the First Leg
Place the first Leg on the work surface. Position the Frame assembly on the Leg so that its top edge is flush with the miter cut and its bottom edge is flush with the line drawn in Step 6. Prop the opposing side of the Frame up on two scrap 1x2s so that it rests level on the Leg. Drill two pilot holes through the inside wall of the Frame and into the Leg. Lift the frame to apply a dab of wood glue on the Leg, and then sink two 1¼ inch wood screws through the pilot holes.
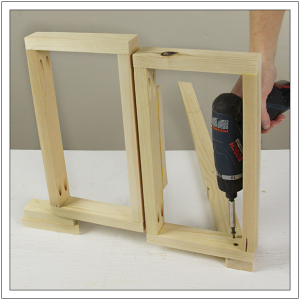
8. Add the Second Leg
Repeat Step 7 to install the second Leg. Use one scrap 1×2 beneath the Leg to hold the frame level during assembly.
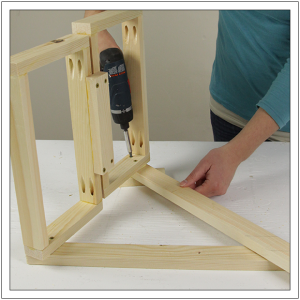
9. Adjust the Legs
Mark the edge of a scrap board (or your work surface) with a length of 14¼ inches (the depth of the Frame assembly). Stand the attached Legs upright. From long-point-to-long-point, the legs should sit 14¼ inches with the mitered ends resting flat on the board. Clamp the legs in place and then mark a line where they intersect.
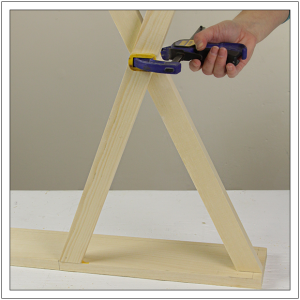
10. Assemble the Legs
Using a drill/driver, create two pilot holes that run through the inside of the innermost Leg and into outer Leg. Separate the Legs just enough to squeeze a dab of wood glue between them. Now drive 1¼-inch woodscrews though the pilot holes to hold the Legs securely in place.
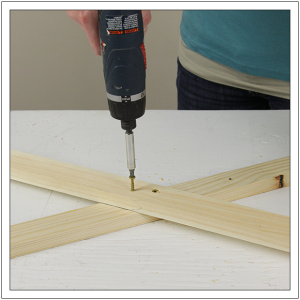
11. Attach the Remaining Legs
Follow the instructions is Steps 7-10 to install the Legs on the remaining side of the Frame assembly. Don’t forget to use scrap blocks to hold the assembly level during installation.
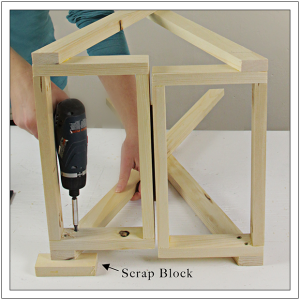
12. Attach the Leg Supports
Mark the inside of each Leg 3 inches above its long point. Apply wood glue to the ends of a Leg Support, and then position it, pocket holes face down, beneath the mark on two Legs and flush with the edges of the Legs, as shown. Using a drill/driver, sink four 1¼-inch pocket hole screws into the holes in the Support to secure it between the Legs. Repeat to install the second Leg Support between the remaining Legs.
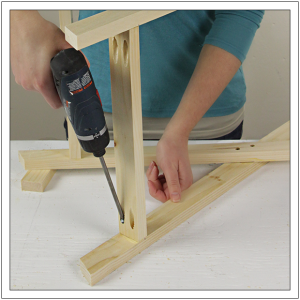
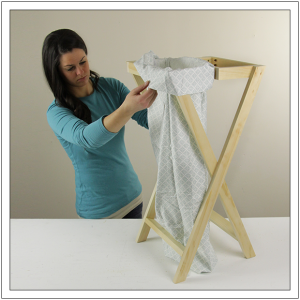
13. Add the Pillowcases
Pull the open end of the first pillowcase up through the front Frame. Fold the fabric up and over the frame to hold the Pillowcase in place. Repeat to install the second pillowcase. Since the slot is somewhat small (because of the size of the pillowcase opening), once the “hamper” is full, just unfold the top edge and let the pillowcase drop through the Frame rather than trying to lift the bag up and through the frame. Our pillowcase fit tightly over the frame, but you may chose to secure it with elastic or rope. To do so, make a small slit thought the first layer of the double-sided “band” on either side of the seam. Run rope or elastic through the opening in the band, and then secure with a loose tie over the seam.
MORE BUILDING PLANS






more powerfull than ThoughtTrace
I feel that is among the so much important info for me.
And i am satisfied reading your article. However want to remark on some
basic things, The website style is ideal, the articles is in point of fact excellent :
D. Excellent job, cheers
melissa
It’s totally fine. I appreciate all you do! I just wanted to make sure I wasn’t doing anything wrong. Love your site and ideas.
Jenn Post author
Thank You, Melissa! And thank you again for your patience! Hopefully we’ll have it worked out soon.
melissa
are you plans available in pdf or do we just need to print each page and section?
Jenn Post author
Hi Melissa,
We’ve been working on a quick and easy way to make the project plans printable, but we’re not quite ready to roll it out. So sorry! I know it’s a pain to take screenshots:/ –Jenn