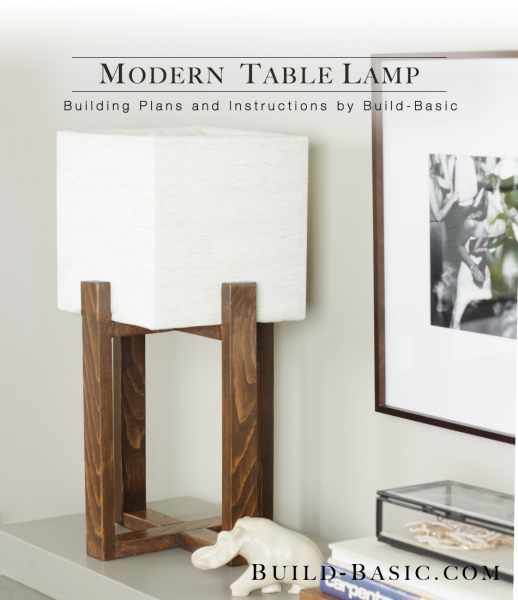
When I spotted the lamp that inspired this design, I was sure I could just build the base and purchase an inexpensive square shade to fit. After hours of research, I realized that the least expensive square-shaped shade I could find would set me back over $35. After going back to the drawing board several times, I found I could just create a frame for a custom shade using ½ inch square dowels. Securing such thin pieces can be tricky, but wood glue and staples seemed to create a sturdy enough frame to hold the fabric in place without collapsing. If you own a pneumatic nailer, that could also be used. After adding an inexpensive piece of fabric to the bill, this little lamp comes in at just nine dollars!
Cost: $9
Time: 1 Hour and 15 Minutes
Difficulty: Easy. The base parts are just a handful of 1×2 pieces screwed together using concealable pocket holes, and the shade is framed with square dowels stapled and glued into a cube shape.
(1) 1 x 2 x 8′ to make the lamp base
(2) ½ x 3′ Square Dowel to make the frame of the lampshade
¼ inch Staples
1 ¼ inch Kreg Jig Screws
Wood Glue
Light Socket Kit
Fabric
1×2 Lamp Base Legs – 4 @ 11 ½ inches
1×2 Lamp Base Crosspiece (Long) – 2 @ 8 inches
1×2 Lamp Base Crosspiece (Short) – 4 @ 3 ¼ inches
½ inch dowels – 4 @ 8 inches
½ inch dowels – 8 @ 7 inches
Fabric – 1 @ 10″ H x 34″ W
Steps
1. Cut the Lamp Base Parts
Using a hand or miter saw, cut the lamp base parts to size using the cut list above.
 2. Prep the Long Crosspieces
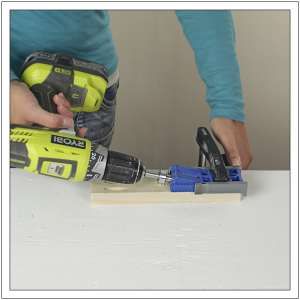
Using a Kreg jig and drill/driver, drill two pocket holes in each end of both of the long crosspieces.

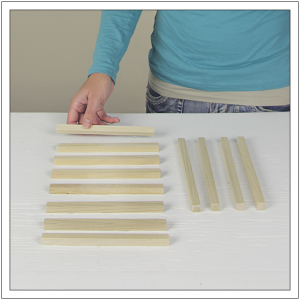
3. Prep the Short Crosspieces
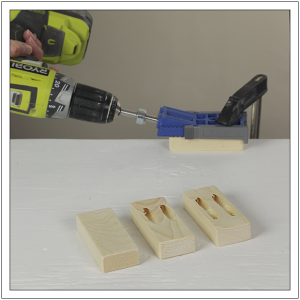
Using a Kreg jig and drill/driver, drill two pocket holes in each end of both of the short crosspieces. When complete, each of the short crosspieces should look like the third block in the photo.

4. Position the Crosspieces
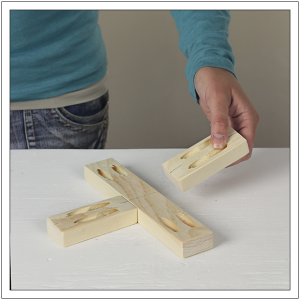
Mark a line in the center of one of the long crosspieces. Apply a bead of glue to one end of two short crosspieces. With all the pocket holes facing upwards, place the glued end of a short crosspiece against the side of the longer crosspieces, centered on the line. Repeat on the other side of the long crosspiece to complete the assembly. Repeat the entire step to create a second assembly.

5. Assemble the Crosspieces
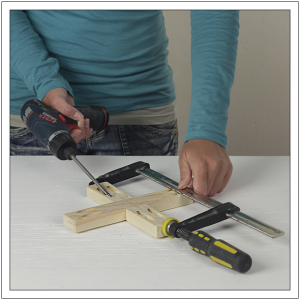
Using a clamp, hold the short crosspieces tight against the longer crosspieces. Using a drill/driver and the Kreg bit, drive 1¼ inch screws into the pocket holes in the short crosspieces to secure them to the long crosspieces.

6. Drill the Hole for the Light Socket
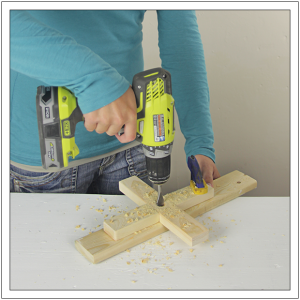
Place one of the crosspiece assemblies on the work surface on top of a scrap block of wood. Using a drill/driver and a paddle bit, drive a 5/8 inch hole through the center of the tee. This will be the upper assembly and will allow the lamp socket to set into the hole while the wires to pass through the tee.

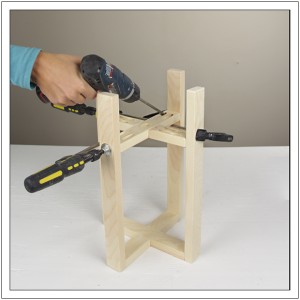
7. Clamp the Legs in Place
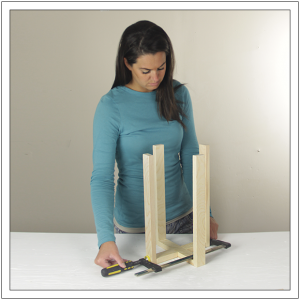
Place the remaining tee on the work surface with the pocket holes facing down. Position the legs upright against the ends of the tee, and then clamp them in place.

8. Attach the Legs
Flip the clamp assembly over and, using a drill/driver and 1 ¼ inch screws, secure the legs to the tee.

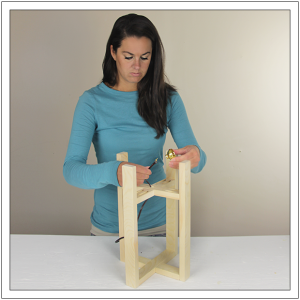
9. Attach the Upper Tee
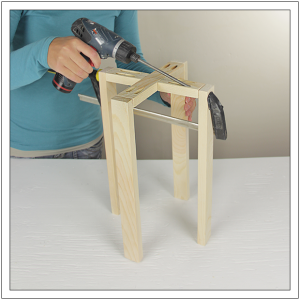
Make a light pencil mark 2 inches from the top of each leg. Position the upper tee so that the pocket holes are facing upward and the top edges align with the pencil marks on the legs.

10. Insert the Wires
Pull the end of the wires up through the hole in the upper tee. Using the instructions provided with your light socket kit, attach the wires to the socket and set the bottom of the socket in place in the hole.

11. Cut the Pieces for the Lampshade Frame
Using a miter saw or handsaw, cut the ½ inch square dowel pieces to size using the cut list above.

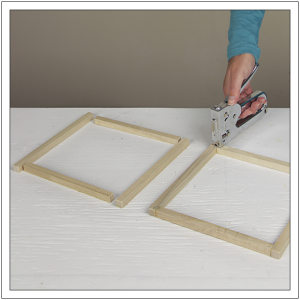
12. Position the Lampshade Frame Pieces
Create a square by placing two 7-inch-long square dowel pieces horizontally between two vertical 8-inch pieces. Apply wood glue to the ends of the horizontal pieces. Using a hand stapler and ¼-inch staples, secure the joints with two staples on each side of the joint. Repeat to create a second square.

13. Assemble the Lampshade Frame
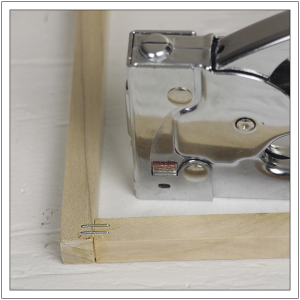
Once the two square sides of the shade are assembled, a hammer can be used to set the staples deeper into the wood, as shown.

14. Finish Assembling the Lampshade Frame
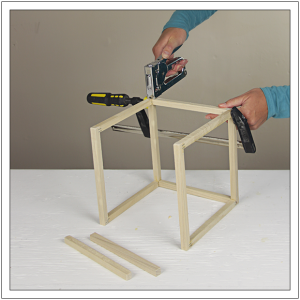
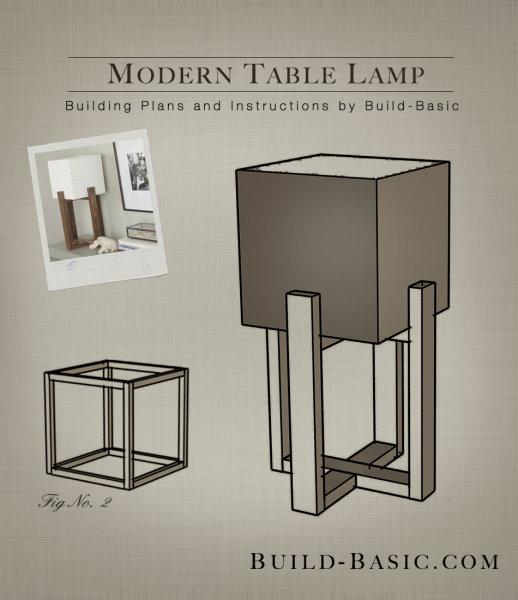
Attach the two assembled frames to one another to create a cube by placing 7-inch dowels between their corresponding corners. Using glue and a hand stapler, secure the joints and set aside to dry.

15. Cut and Position the Fabric
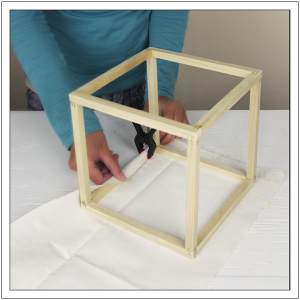
Cut the fabric to size and lay face-down on the work surface. Position the cube centered on the fabric. The fabric should roll equally around the top and bottom of the cube.

16. Secure the Fabric
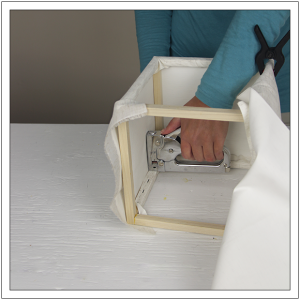
Roll the fabric around the top and bottom of the cube and secure it in place using the hand stapler and ¼-inch staples. Pull or clamp the fabric taunt as you move around to the remaining sides of the cube. Fold over excess fabric near the corners, and staple in place.

17. Place the Assembled Lampshade in the Base
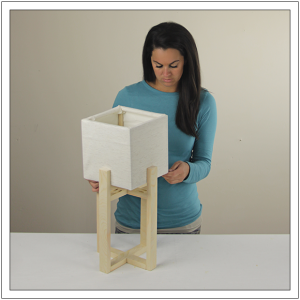
Slide the lampshade between the legs of the lamp base so that the shade rests on the upper crosspiece.

MORE BUILDING PLANS
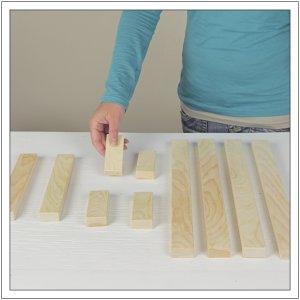
 2. Prep the Long Crosspieces






Pingback: 25 Awesome DIY Wooden Lamp Ideas
Carlos
AWESOME LAMP. QUESTION , WHAT TYPE OF FABRIC ARE YOU USING HERE? THANKS
Pingback: 20 Unique DIY Wood Lamps - diycandy.com
Tarun Sehgal
Thanks for putting together this easy to follow guide. Almost finished making two of these. Simple yet elgant design.
Minor correction in material list. A little more than 7 feet of dowel is needed for this project. So 2.5 numbers of 1/2″ x 3′ dowel is needed per lamp.