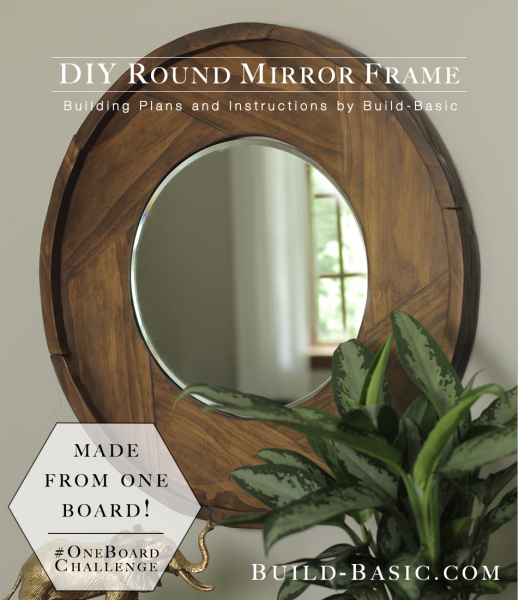
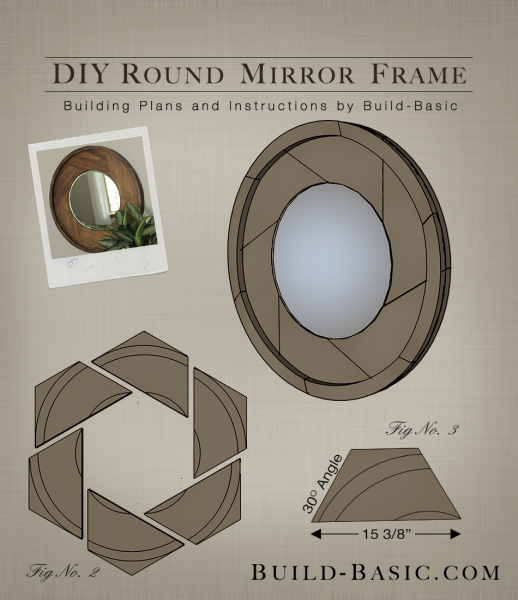
I love projects that “look” complicated, but are secretly easy. Take this round mirror frame made from just ONE 1×8 board! I created it as part of a cool #OneBoardChallenge. Click HERE to see my post about the challenge and see what crazy, awesome ideas the 16 other woodworking bloggers came up with!
Pssst: Click the image above to rotate it to the Free Building Plans!
Cost: $20
Time: 2 hours
Difficulty: Moderate. Arranging the pieces is easy, but cutting the circular shapes with a jigsaw takes some finesse.
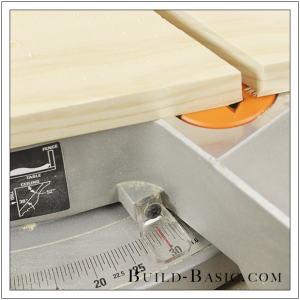
1 x 8 Frame Sides – 6 @ 15 3/8 inches (Ends mitered at opposing 30-degree angles)
Steps
1. Cut the Frame Sides
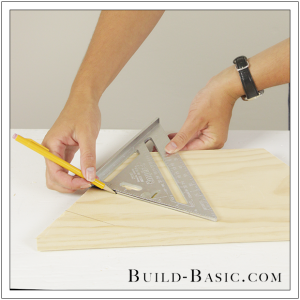
Using a miter saw and the cut list above, cut the 1 x 8 frame sides to size with opposing 30-degree miters.
2. Arrange the Frame Pieces
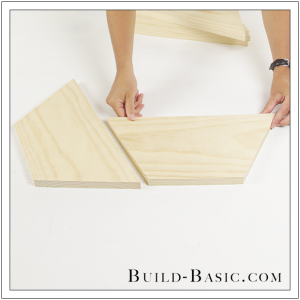
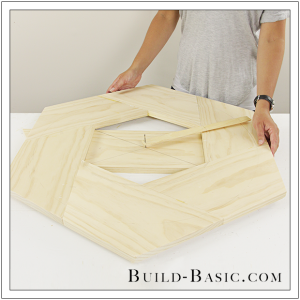
There are several ways to arrange the pieces to make a circular frame. To create our frame, we positioned the short edge of each Frame Piece facing outward, and butted the right side of each piece against the long edge of the piece beside it.
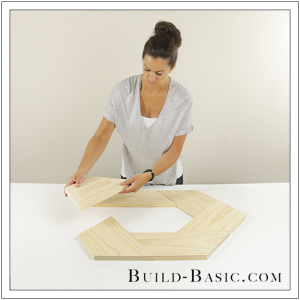
3. Finish Dryfitting the Pieces
Finish positioning the pieces so that the top edge of each piece runs flush with the mitered edge beside it, as shown.
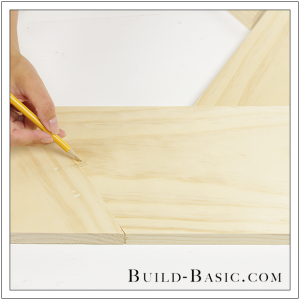
4. Make Registration Marks
On each joint, mark a unique registration line so that it’s easy to quickly reassemble the pieces later on.
5. Mark the Pocket Hole Placement
On the backside of each piece–along the same edge as the registration marks on the front side–mark lines that are 2- and 4½-inches from the long point of the miter.
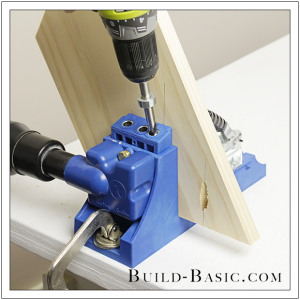
6. Drill the Pocket Holes
Using a Kreg Jig (I’m using the
K4 Master System) drill two pocket holes aligned with the marks from Step 5. Repeat to prep each Frame Piece for assembly.
7. Assemble the Frame Pieces
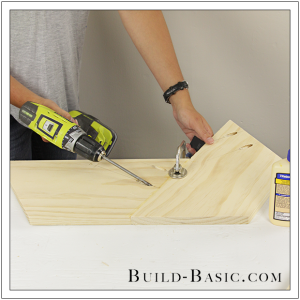
On the first Frame Piece, apply wood glue along the edge with the pocket holes from the long point to the second pocket hole. Using the registration marks on the front side, align the joint, and then clamp the pieces to the work surface. Using a drill/driver, secure the joint with 1¼-inch pocket screws.
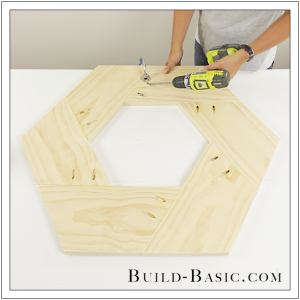
8. Assemble the Remaining Pieces
Continue assembling the pieces until all the joints are secured with wood glue and 1¼-inch pocket screws.
9. Mark a Pivot Point
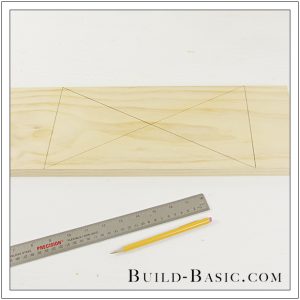
To draw the circles on the assembled frame, we’ll need to create a center point. Because the hole of our frame is empty, we’ll mark and position the leftover from the 1×8 board. On the leftover board, mark two parallel lines that are 12 1/8 inches apart. Now draw lines from corner to corner to create a X. The middle of the X will now be our center point.
10. Prep a Paintstick
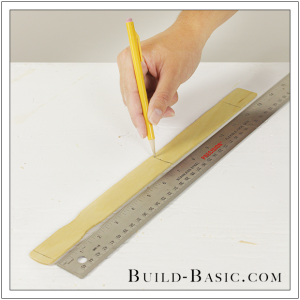
Now let’s mark a paintstick (or scrap piece of wood) with the radius of our circles so that we can draw the new circular boarders of our Frame. Make a mark near the end of the paintstick, and then mark a second line 7 inches from it, and another line 12 ¼-inches from the first line.
11. Drill Holes in the Paint Stick
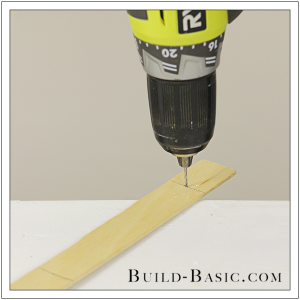
In the center of the width of the paintstick, drill small holes at each line.
12. Position the “Circle Drawing” Tool
Position the scrap board under the Frame so that the parallel lines on the scrap board align with two inside edges of the Frame. Drive a nail through the first line in the paintstick, and then into the center of the X on the scrap board. This will be our pivot point.
13. Draw the Inner Circle
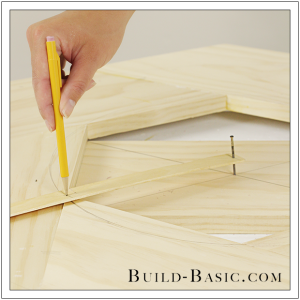
Place the tip of a pencil in the hole in the paintstick that closest to the pivot point. Rotate the paintstick around the nail to draw the first circle.
14 .Draw the Second Circle
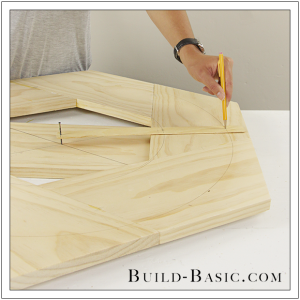
Move the pencil to the last line on the paintstick, and then pivot the paintstick to mark a second “outer” line on the Frame.
15. Cut the Inner Circle
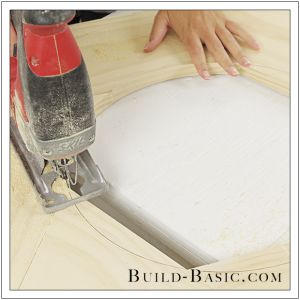
Using a jigsaw, cut along the inner circle marked on the Frame.
16. Cut the Outer Circle
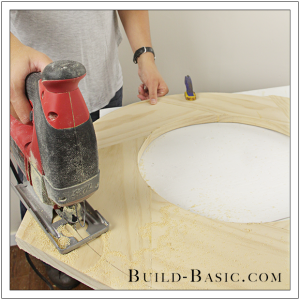
Using a jigsaw, cut along the outer circle marked on the Frame. Keep the cutoff pieces, as they will be reused to make the edge detail.
17. Mark the Frame Boarder
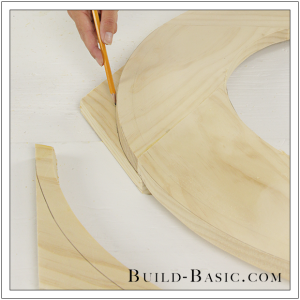
To create the raised border detail, place the cutoffs from Step 16 under the edge of the Frame, as shown, and mark the arc of the Frame’s outer edge.
18. Cut the Border Pieces
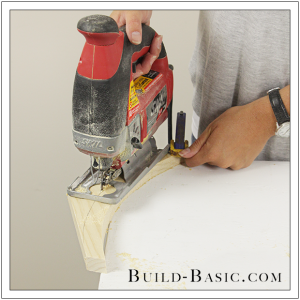
Using a jigsaw, carefully cut along the lines marked in Step 17.
19. Trim the Boarder Pieces
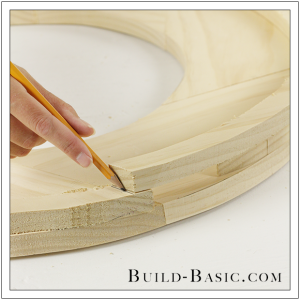
Lay the Boarder Pieces onto the frame with their ends slightly overlapping. Use cutoff to elevate every other piece as needed during this step. Once all the pieces are in place, and flush with the outside edge of the Frame, mark their overlapping ends. Remove this cutoff using a handsaw.
20. Sand the Parts
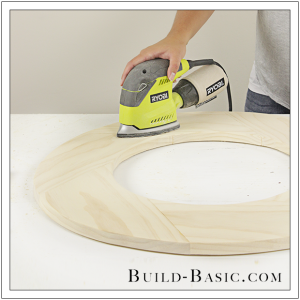
Number the backside of the Boarder Pieces, remove them from the Frame, and then sand all the parts.
21. Attach the Border Pieces
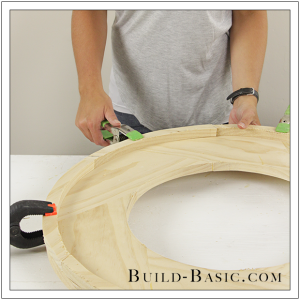
Apply wood glue to the back of the Border Pieces, clamp them in place, and then nail through the backside of the Frame and into the Boarder Pieces with 1¼-inch finish nails to hold them in place.
22. Attach the Hanger
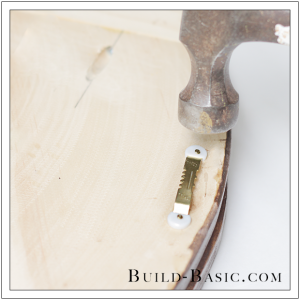
Using a hammer, secure the sawtooth hanger to the back of the Frame.
23. Mount the Mirror
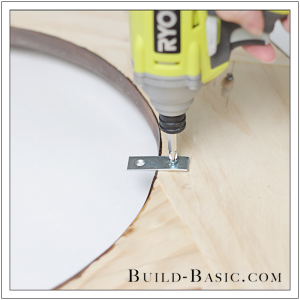
Position and install four mending plates on the back of the Frame, so that half of each plate extends over the inside edge of the Frame. Flip over the Frame, apply mirror adhesive to the front side of each plate, and then press the mirror onto the plates. Allow the adhesive to dry before hanging the assembled mirror and frame.
MORE BUILDING PLANS






Ashley@BiggerthantheThreeofUs
Really love this one!
Traci Shanks
Gorgeous! What wood species and stain did you use? I love the warm honey in the finish
Dawn
That is amazing. You have a wonderful talent.
Alexis
This is beautiful, Jenn! I love your tutorials – so good!
Pingback: one board wood shelves + 17 one board ideas - the space between