NOTE: This tutorial is sponsored by Kreg Tool. All opinions are my own. This post may contain affiliate links. To see our full disclosure policy, click HERE
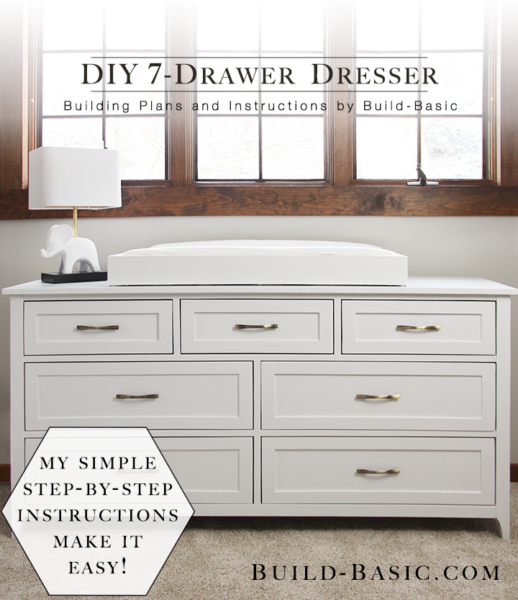
Maybe starting to build a 7-drawer dresser when you’re pregnant isn’t the besssssst option, but when we were filling the nursery, I just COULD NOT bring myself to spend $500+ on something I knew I could build. I was happy to spend the money on a crib (safety regulations and all), but a dresser, I could handle. I knew I had a simple method for building drawers and drawer fronts (the scariest part of building a dresser, amiright?), and I knew the front, back and sides were just frames—so why not dive in. Read on to see how, while it looks like a lot of steps, it’s really just very simple assembly of each part. And with a removable changing-table topper, this dresser can grow with our new little one through the years.
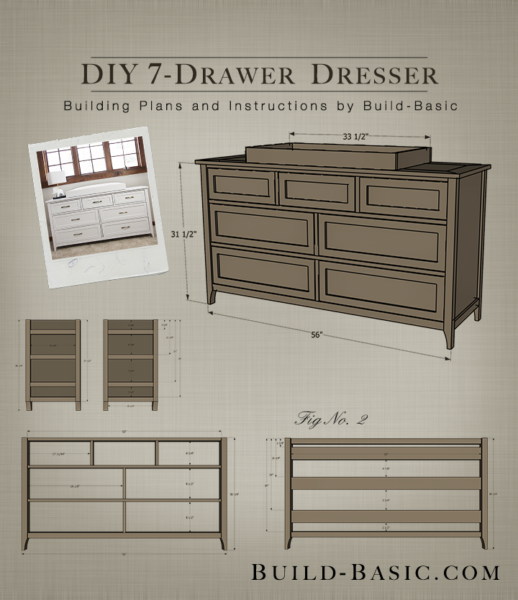
TIP: Click the link in Step 1 to download the free building plans. Click the tabs below to see the tools, materials and cut list.
Cost: $180 (Note: I spent an additional $105 on soft-closing full-extension drawer slides, but more economical options are available)
Time: 6 Work Days
Difficulty: Moderate. My easy assembly methods for the drawers, carcass and drawer fronts make this project easy, but the overall size and scope of the project require commitment.
Note: This list may contain affiliate links
(1) ¾” x 4′ x 8′ Plywood to make the Large Drawers, Side Panels, and Top
(1) ½” x 4′ x 8′ Plywood to make the Small Drawers and Panels in the Drawer Fronts and the Backing
(5) 1 x 4 x 8′ Boards to make the Back Rails and Top
(2) 2 x 2 x 8′ Boards to make the Legs and Rail
(8) 1 x 2 x 8′ Boards to make the Rails and Stiles and the Frames of the Drawer Fronts
(14) 3/8 x 3/8 x 36″ Square Dowels to make the Drawer Cleats
(2) 1 x 3 x 6′ Board to make the Topper (optional)
1¼-inch Coarse Thread Pocket Hole Screws
1 inch Coarse Thread Pocket Hole Screws
¾-inch Finish Nails to attach the Padding Strips to the Side Panels
(6) ¾-inch Wood Screws to attach the Drawer Faces to the Small Drawer Boxes
(8) 1-inch Wood Screws to attach the Drawer Faces to the Large Drawer Boxes
(2) 3-inch Metal Plates to secure the optional Topper
(2) Furniture Anti-Tip Straps
(7) 16-inch Drawer Slides Sets
Body
- 2 x 2 Legs – 4 @ 30¾ inches
- 1 x 2 Rails – 5 @ 53 inches
- 2 x 2 Rails – 1 @ 53 inches
- 1 x 2 Stiles – 2 @ 6¾ inches
- 1 x 2 Stiles – 2 @ 8½ inches
- 1 x 2 Side Rails – 4 @ 15¼ inches
- 1 x 4 Back Rails – 3 @ 53 inches
- 1 x 4 Supports – 4 @ 16 3/8 inches
- ½-inch Plywood Drawer Slide Padding – 6 @ 1½”H x 15¼”W
Top
- 1 x 4 Frame Top – 2 @ 19 inches (miter ends at 45-degrees)
- 1 x 4 Frame Top – 2 @ 57½ inches (miter ends at 45-degrees)
- ¾-inch Plywood Top – 1 @ 50½” x 12″
Topper
- 1 x 3 Topper Ends – 2 @ 16½ inches
- 1 x 3 Topper Front and Back – 2 @ 33½ inches
Small Drawer Boxes
- ½-inch Plywood Small Drawer Sides – 6 @ 6¼”H x 16″W
- ½-inch Plywood Small Drawer Fronts and Backs – 6 @ Cut to fit 6¼”H x 2-inches less than the width of opening
- 3/8 Square Dowel Cleats – 6 @ 14½ inches
- 3/8 Square Dowel Cleats – 6 @ Cut to fit Width of Drawer Fronts and Backs
Large Drawer Boxes
- ¾-inch Plywood Large Drawer Sides – 8 @ 8″H x 16″W
- ¾-inch Plywood Large Drawer Fronts and Backs – 8 @ Cut to fit 8″H x 2½-inches less than the width of opening
- 3/8 Square Dowel Cleats – 6 @ 14½ inches
- 3/8 Square Dowel Cleats – 6 @ Cut to fit Width of Drawer Fronts and Backs
Small Drawer Fronts
- 1 x 2 Small Drawer Front Frames Top and Bottom – 6 @ Cut to fit ¼ inch less than the width of opening
- 1 x 2 Small Drawer Front Frames Sides – 6 @ 3½ inches
- ½-inch Plywood Small Drawer Front Panels – 3 @ Cut to Fit inside Frame
Large Drawer Fronts
- 1 x 2 Large Drawer Front Frames Top and Bottom – 8 @ Cut to fit ¼ inch less than the width of opening
- 1 x 2 Large Drawer Front Frames Sides – 8 @ 5¼ inches
- ½-inch Plywood Large Drawer Front Panels – 4 @ Cut to Fit inside Frame
Backing
- ½-inch Plywood – 1 @ 53″W x 27½”H
Steps
1. Print the Leg Template
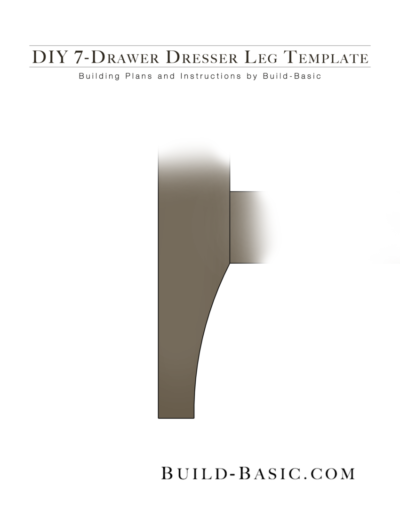
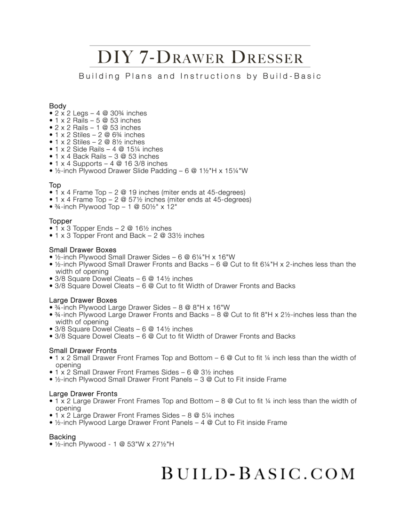
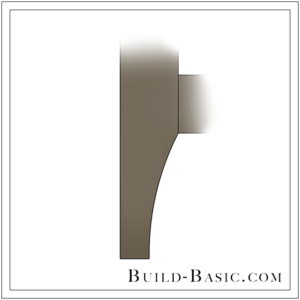
To shape the base of each leg, click the images below to view the Project Plans and free Leg Template. Print the Template page, and then cut out the shape.

2. Trace the Template on the Leg
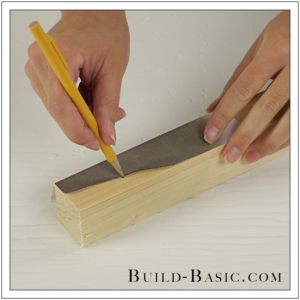
Cut the length of the 2 x 2 Legs using a miter saw. Place the Template onto the base of each Leg, and then trace its outline onto the Leg as shown.

3. Shape the Legs
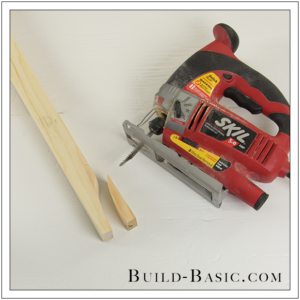
Clamp one of the Legs to the work surface with the outlined detail face up, and overhanging the edge of the table. Using a jigsaw, cut along the line to shape the base of the Leg. Repeat to shape the remaining Legs.

4. Mark the Legs
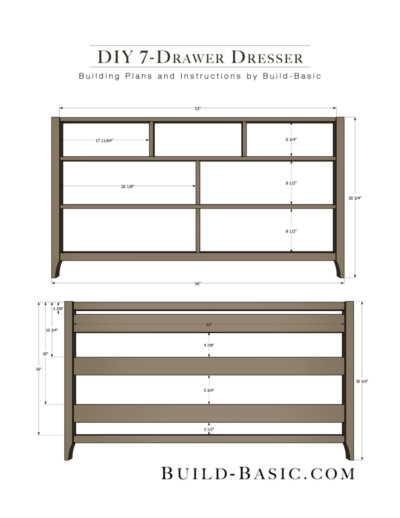
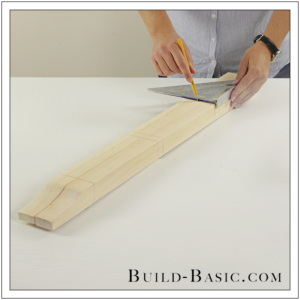
Place two Legs side-by-side with the cut detail facing upward. In this position, the inside of each leg is facing upward. Using a speed square, mark the height of the top edge of each Front Rail at on the Legs at 0 inches (flush with the top of the Legs), 7½-inches, 16¾-inches, and 26-inches. Repeat to mark the height of the Back Rails on the remaining Legs at 0-inches, 2 3/8-inches, 10 ¾-inches, 20-inches, and 26-inches.

5. Prep the Stiles and Rails
Using a miter saw, cut five 1 x 2, one 2 x 2 and three 1 x 4 Rails to a 53-inch-length. Using the cut list above, cut the vertical 1 x 2 Stiles to length as well. Using a Pocket Hole tool (I’m using the
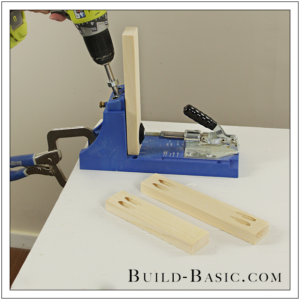
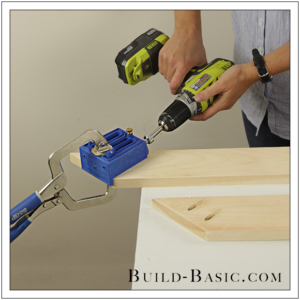
Kreg Jig K4), drill pocket holes into one end of each of the 6¾-inch-Stiles, both ends of the two 8½-inch-Stiles, and both ends of all the 1 x 2, 2 x 2 and 1 x 4 Rails.

6. Layout the Face Frame Rails
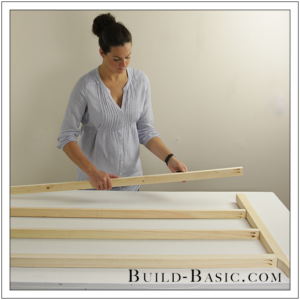
Place three 1 x 2 Rails and the 2 x 2 Base Rail on edge between the front two Legs. Position the Rails so that their top edge sets flush with the marks made in Step 4, with their pocket holes facing downward toward the base of each Leg.

7. Install the Rails between the Front Legs
To create a decorative “reveal” between the Legs and the Rails, I inset the Rails 1/8-inch. To do so, place a 1/8-inch-thick scrap (like a paint stick) under the Leg. Apply glue to the end of the top 1 x 2 Rail. Screw through the Rail and into the Leg using 1¼-inch coarse pocket hole screws to secure the joint. Repeat to attach the opposing end of the Rail to the remaining front Leg.

8. Attach the First Two Stiles
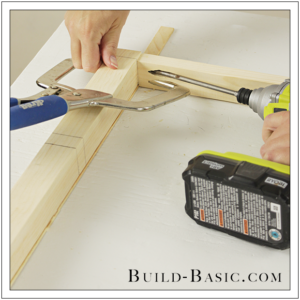
Place the second Rail below the first. Make a mark on the front edge of both Rails that runs 17 11/64-inches from each end. (Sorry this is an awkward measurement, but the goal here is just to create three equally-sized openings for the top drawers.) Now remove the second Rail. Place the vertical Stiles inside the lines with their pocket holes facing upward toward the nearest Leg. Apply wood glue to the top edge of the Stile, and then clamp it into place. Secure the Stile using a drill/driver and two 1¼-inch pocket hole screws.

9. Add the Second Rail
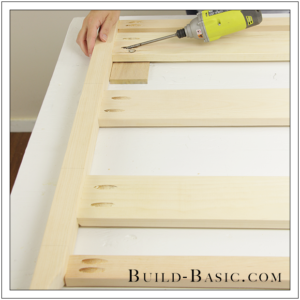
Because most drills wont’s fit in the opening of above the Rail, predrill two holes through the second Rail in line with the bottom edge of each Stile. Apply wood glue to the ends of the second Rail and to the ends of the Stiles. Drive two 1¼-inch screws (I just used the pocket hole screws and countersunk them into the wood a bit) through the Rail and into the end of each Stile to secure it in place. Now screw the second Rail to the Legs. Place the third and fourth Rail against the second Rail to mark the location of the remaining Stiles at 26 1/8-inches from each Leg. Using glue and pocket hole screws, finish installing the remaining Rails and Stiles between the front Legs.

10. Dryfit the Rails between the Back Legs
Position the 1 x 2 and 1 x 4 Rails between the Back Legs as shown to double check their length between the two back Legs.

11. Install the Rails between the Back Legs
Apply wood glue to the ends of the Rails, and then position them in place with their pocket holes facing up. Using a ½-inch-thick spacer, raise the Rails to create an inset for the plywood Backing.
Tip: Lay the assembled Front Frame onto the Back Frame with the Legs perfectly aligned. Mark the location of the vertical Stiles of the Front Frame onto the Rails of the Back Frame. This will help with placement of the Supports later on.

12. Prep the Side Panels
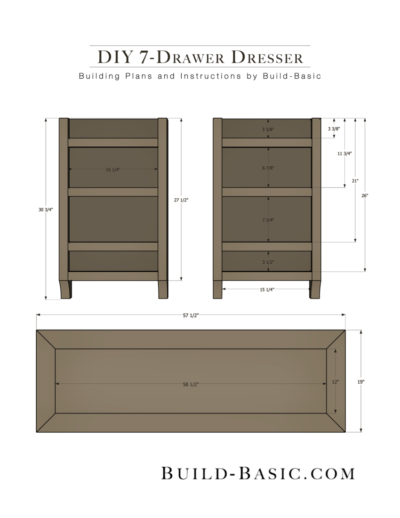
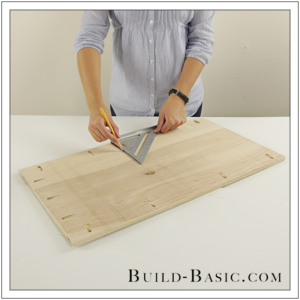
Using a table saw or circular saw, cut the ½-inch Plywood Side Panels to size. Drill pocket holes along the bottom and side edges of each panel. Mark horizontal lines on the inside face of each Panel to designate the height of the Drawer Slide Padding Strips. Mark the lines at 3 3/8-inches, 11¾-inches, and 21-inches from the top edge.

13. Double-up the Side Panel’s Bottom Rail
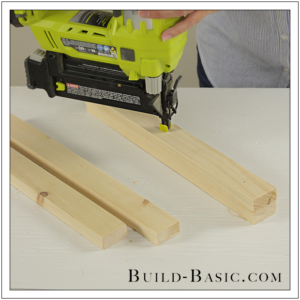
While you could use a 2 x 2 for the bottom Rail on each Side, I chose to save some money and just double-up two 1 x 2 boards. To do so, glue and nail two 1 x 2 boards together.

14. Attach a Bottom Rail the each Side Panel
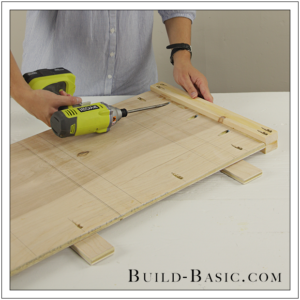
Place a Side Panel onto a ½-inch-thick scrap piece of plywood (I’m using the drawer slide padding strips) to raise it ½-inch. Apply wood glue to the bottom edge of each Side Panel. Place the doubled-up 1 x 2 Rail along the bottom edge of the Panel so that the edge of the panel covers the joint in the doubled-up Rail and the Rail’s pocket holes are face up. Drive 1-inch pocket hole screws through the Panel and into the Rail to secure it in place. Repeat to attach the bottom Rail to the remaining Side Panel.

15. Add the Drawer Slide Padding
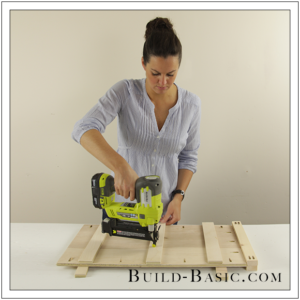
To allow the Drawer Slides to pass freely along the inside of each Side Panel and past the front Legs, the panels need to be “padded-out” by ½-inch. To do so, place ½-inch plywood strips cut to 1½” x 15¼” below each line marked on the inside of the Panels. Secure the strips using wood glue and ¾-inch nails.

16. Mount the Sides to the Front Legs
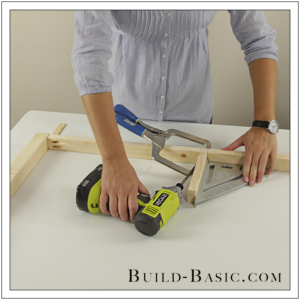
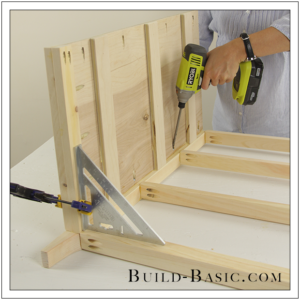
Place the assembled Face of the Dresser’s Body onto the work surface, facedown. Apply wood glue to the edge of the Side Panel. Stand the Panel on edge on the Leg, as shown. Position the top edge of the Panel flush with the top edge of the Leg, adjusting its location until the Padding strips run flush with the inside face of the Leg. Using a speed square and a clamp, steady the Side Panel in place. Using a drill/driver, drive 1¼-inch pocket hole screws through the Side Panel and into the Leg. Finish by driving screws through the bottom Rail on the Side Panel into the Leg. Repeat to install the remaining Side Panel.

17. Attach the Assembled Back Frame
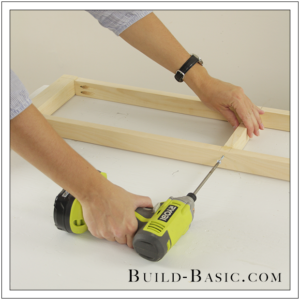
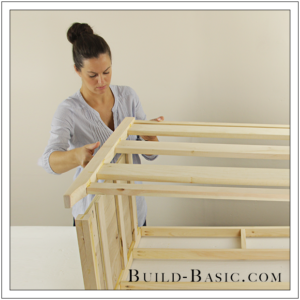
Apply wood glue to the exposed edges of the Side Panels, and then position the assembled Back Frame onto the Side Panels. Clamp the parts in place, and then attach each Side Panel and Rail to its respective Leg.

18. Add the 1 x 4 Supports
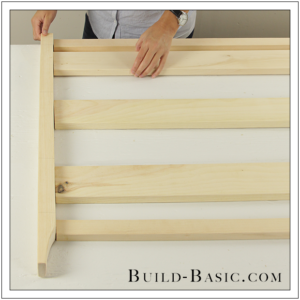
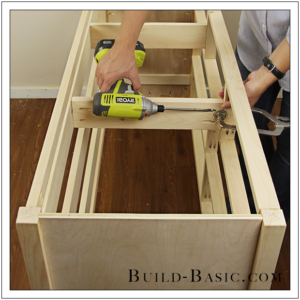
To sturdy the body of the dresser and provide an installation surface for the drawer slides, install support boards between the front and back Frames. To do so, cut the boards to length, drill pocket holes at each end, and then glue and screw them between each front Stile and its adjacent Back Rail. Use the marks made in Step 11 to locate the Supports on the Rails. Each support should run flush with the top and bottom edge of a Back Rail, and be centered on the height of the adjacent Stile.

19. Prep the Top Frame
Using a miter saw, cut the frame pieces of the Dresser Top to length, mitering the ends at 45-degrees. Drive two pocket holes into the ends of each long frame piece.

20. Prep the Top Panel
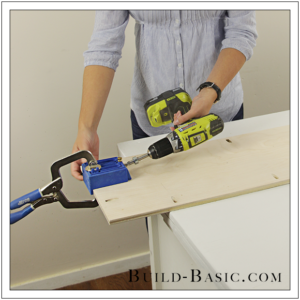
Using a table saw or circular saw cut the ¾-inch plywood panel to size. Drill pocket holes along the edges of the panel.

21. Install the First Top Frame Piece
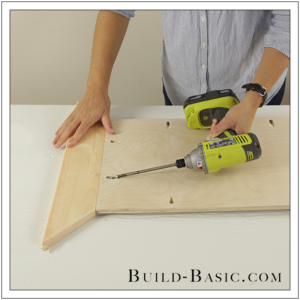
Apply wood glue to one end of the plywood panel. Place a frame piece along the edge of the Panel so that its short ends set flush with the corners of the Panel as shown. Secure the pieces using a drill/driver and 1¼-inch pocket hole screws.

22. Attach the Remaining Frame Pieces
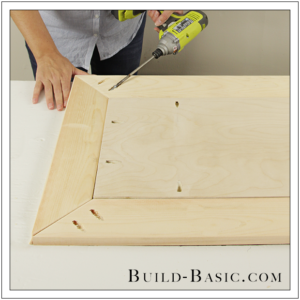
Apply wood glue to the mitered ends of the secured Frame piece, and to the long edges of the plywood Panel. Position and long Frame pieces, and then screw them to the secured Frame piece and the Panel.

23. Assemble the Drawer Front Frames
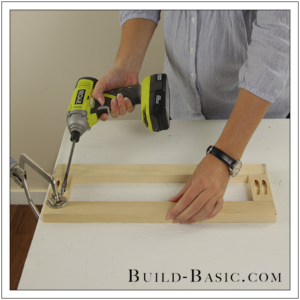
Cut the 1 x 2 Drawer Front Frame pieces to length, and then drive pocket holes into the ends of the Frame End Pieces. Apply glue to the ends of the vertical End pieces, and then place them between the horizontal Top and Bottom 1 x 2 Frame pieces. Secure the parts using a drill/driver a 1¼-inch pocket hole screws. Repeat to assemble the remaining Drawer Front Frames.

24. Add the Drawer Front Panels
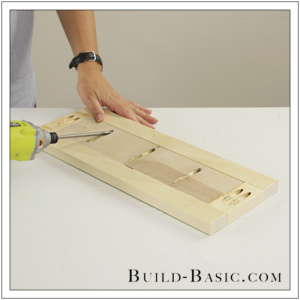
Place the Drawer Front Frames onto ½-inch plywood, and trace the inner edge of each frame. Using a table saw or circular saw, cut the Drawer Front Panels to size. Drill pocket holes along the edges of each Panel. (Note: on the small drawers I only placed pocket holes along the long edges, as shown.) Apply wood glue to the edges of each Panel, and then place it inside its respective Frame, flush with the back face of the Frame. Attach each Panel inside its Frame using 1-inch pocket hole screws.

25. Assemble the Drawer Boxes
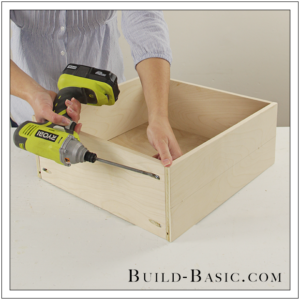
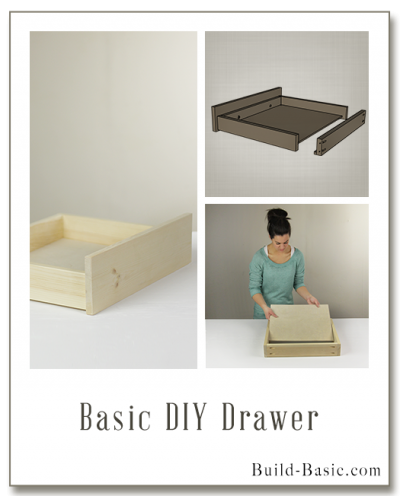
Using the cut list above and my
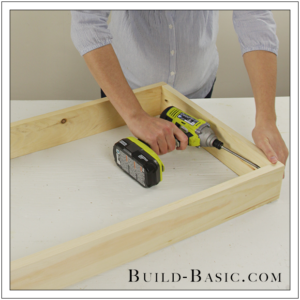
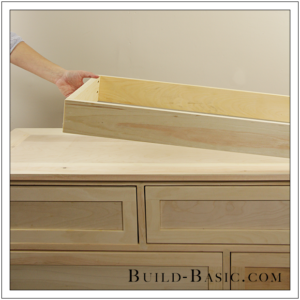
Easy DIY Drawer instructions, assemble the drawer boxes. For this project, I made the front, back and sides of the smaller drawers from ½-inch plywood, and used ¾-inch plywood for the larger drawers. Additionally, I used ¼-inch plywood for the drawer bottoms. The drawers each run 16-inches-deep and 1 inch smaller than the width of their respective openings to allow a ½-inch gap on each side of the drawer for the drawer slides.

26. Attach the Drawer Slides to the Dresser Body
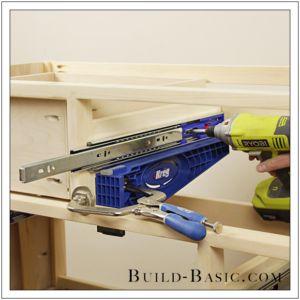
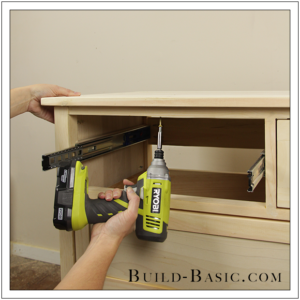
Secure the Drawer Slides to the Dresser body centered on the height of each Padding Strip and Support Board, recessing the front edge ¾-inch from the front edge of the Stiles and Rails (and 7/8-inch from the face of the Legs) to allow room for the inset Drawer Fronts. For this step I’m using Kreg’s
Drawer Slide Jig to hold the slides in place while I work. For more on how to use this handy tool, click
HERE.

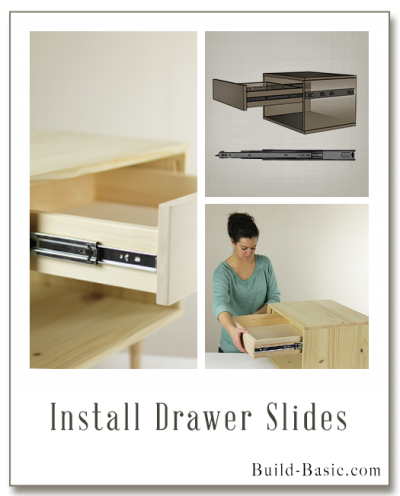
27. Attach the Drawer Slides to the Drawers
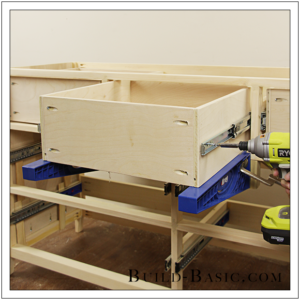
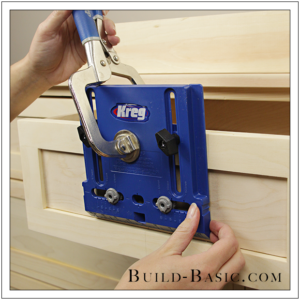
Once the drawer slides are installed inside the Dresser body, reattach the Drawer Slide Jig to the face of the Dresser’s Frame. This supports the drawer in place so that you can now screw the drawer slide, and into the Drawer Box. For more on this tool, click
HERE. If you don’t have this tool, you can also check out my
Drawer Slide installation Tutorial.

28. Position the Drawer Fronts
Starting with the bottom drawers, apply glue to the front of the drawer box. Position the drawer front on the closed Drawer Box with equal spacing around its edges Clamp the drawer face in place against the Drawer Box.

29. Secure the Drawer Fronts
Using a drill/driver, drive two wood screws through the inside of the Drawer Box and into the backside of the Drawer Face to hold the pieces in place. Repeat to attach the remaining Drawer Faces. For the smaller Drawers built with ½-inch plywood, use ¾-inch-long wood screws. For the larger Drawer Boxes made from ¾-inch plywood, use 1-inch wood screws.

30. Position the Dresser Top
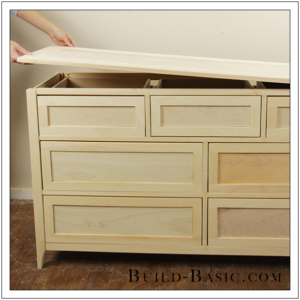
Place the Dresser Top onto the assembled base. Position the Top with equal overhang on each end. Slide the Top forward until its back edge rests flush with the edge of the Back Legs.

31. Attach the Top
Attach the Top to the Base by removing the top drawers and screwing (at an angle) up through the top Rails and into the Top. More preferably, though not pictured here, screw my favorite
Figure Eight Top Fasteners to the top edge of the Rails and underside of the Top to hold the Top in place, but allow for expansion. For photos, see them in installed in Steps 16-19 of
THIS TUTORIAL.

32. Assemble the Topper
Using the Cut List above, cut the 1 x 4 Topper pieces to length, and then drill pocket holes into the ends of the shorter, End Boards. Apply wood glue to the Ends of the End Boards, place them inside the Front and Back Boards with their pocket holes facing inward. Drive 1¼-inch pocket hole screws through the End Boards and into the Front and Back Boards to secure the rectangular Frame.

33. Install the Topper
I wanted my Topper to be secured, but removable without leaving holes in the Dresser Top. To achieve this, center the Topper on the Top, flush with its back edge. Screw two 3-inch metal plates to the backside Topper and the back edge of the Dresser’s Top.

34. Position the Hardware Holes
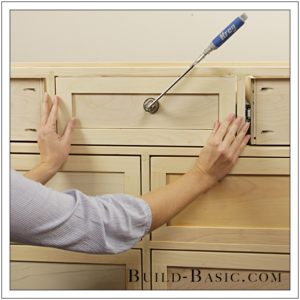
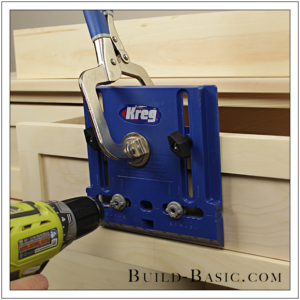
Using a ruler or tape measure, mark the center of each drawer. For perfect hardware placement, I’m using Kreg’s
Cabinet Hardware Jig, which adjusts to the height of the drawer and spacing of the hardware, and can then be reused to drill holes for each handle on each drawer. Bonus: it works the same for cabinet knobs too! I’ve been really impressed with how this jig worked—especially because it makes the drill bit drive straight into the wood versus other templates or jigs that allow the bit to tilt/tip while drilling. To see a quick tutorial of this tool click
HERE.

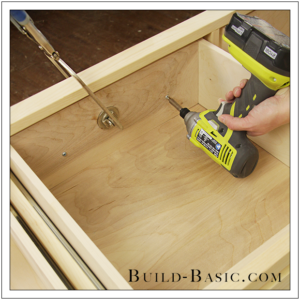
35. Drill holes for the Hardware
Using a Drill/Driver, drill holes centered on the height of each drawer with the desired spacing for the chosen handles or knobs.

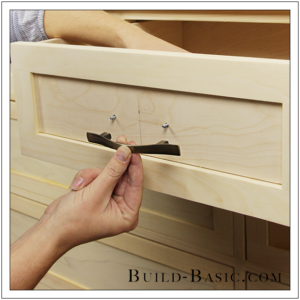
36. Attach the Hardware and Backing
Push the screws provided with the hardware through the holes inside the Drawer. Thread the screws into the hardware, and then tighten using a screwdriver. If the screws aren’t long enough, countersink the hole from the inside of the Drawer Box until they reach the Hardware. Though be careful to countersink no more than ¼-inch, or half the thickness of the Drawer Box.
Place the Plywood Backing onto the Back Rails between the Legs. Using a nail gun, shoot ¾-inch nails through the plywood backing and into the Rails to secure the Backing in place and strengthen the assembly. Apply the finish of your choice and then install the dresser using Anti-Tip Furniture Straps.

MORE BUILDING PLANS






Alex
Question regarding the drawer box front and rear panels, in the cut list it tells you to cut them 2 inches less than the opening, but In step 25 it tells you to cut them 1 inch less than the opening for the drawer. Has anyone figured out which one of those measurements actually works best? Or does it depend on the drawer slides you buy?