*This post is sponsored by Dremel and Gorilla Glue. All opinions are my own.
Click here to read my full disclosure policy.
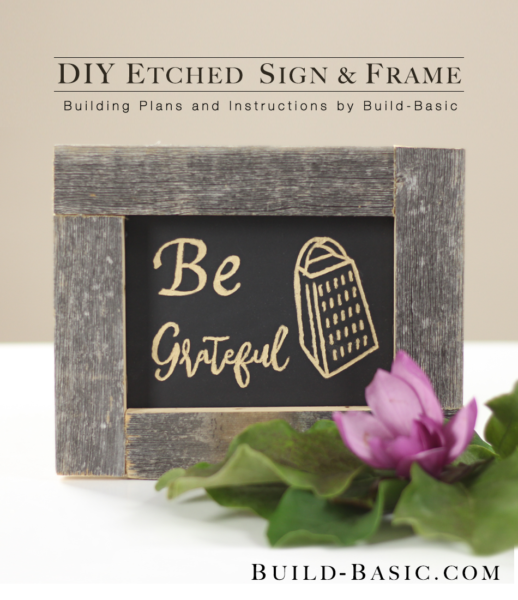
The simplicity of this rustic barnboard frame and etched sign make this a great beginner project! This project was originally created as a class project at Haven (a DIY/designer blogger conference), but I couldn’t resist the chance to share the tutorial with everyone once I got home!
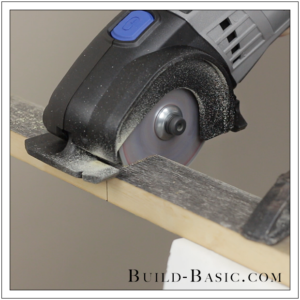
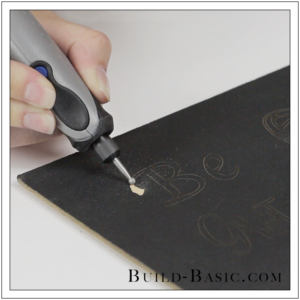
What makes this project even easier is the amazing tools we used (provided by Dremel and Gorilla Glue). If you haven’t tried out Dremel’s new Stylo+, it’s a rotary tool game-changer. It’s their most lightweight and compact design, and really allows you to hold and use the tool just like you would use a pen. We also used the Dremel SawMax to cut the frame pieces. Since the class, I’ve found this tool to be a new go-to for small cuts like this, and especially flush-cutting and specialty cuts in other projects.
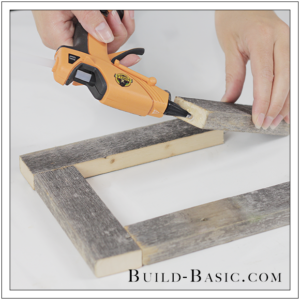
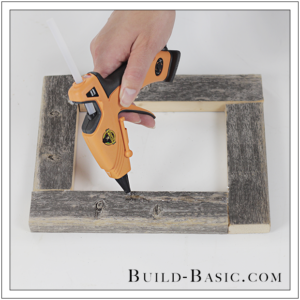
And to bring all the pieces together, we used Gorilla’s new duel-temp hot glue gun—arriving in stores September 2018—and their hot glue sticks, which are 4X stronger than the competition. I have to say, I was extremely impressed by how well the glue held to the uneven surfaces of the barnboard wood. Also, since it’s weather-resistant, I don’t have to worry about humidity weakening the connection.
For more information on this project or the tools we used in class, leave me a note at the bottom on the post! I’d be happy to share my experience.
SCROLL DOWN TO WATCH THE VIDEO
And if you’d like to know more about Haven, or to read about our class, (or if you were in the class and want to see some fun pictures!) Click HERE to read my blog post!
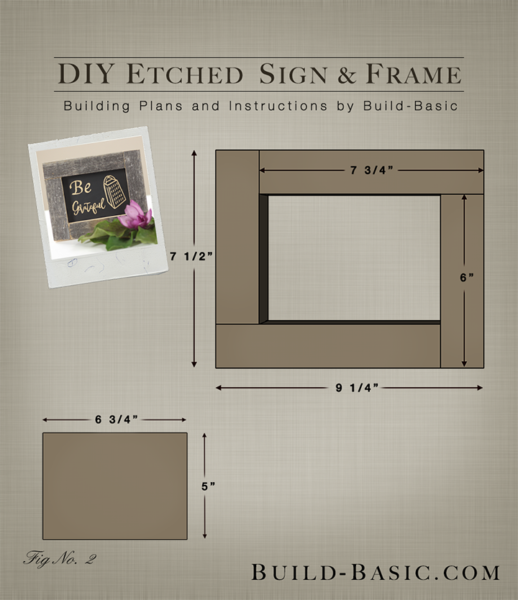
TIP: Click the image above to reveal the free building plans. Click the tabs below to see the tools, materials and cut list.
NOTE: This tutorial may contain affiliate links. To see our full disclosure policy, click HERE
Time: 1 hour
Difficulty: Easy. The cuts and assembly are easy, and the etching with the rotary tool is fun!
Dremel Bit 191
Dremel Saw Max
Dremel SM500 Cutting Wheel
Gorilla Glue Hot Glue Gun
Gorilla Glue Hot Glue Sticks
1/8-inch Hardboard
1 x 2 Frame Sides – 2 @ 7 ¾-inches
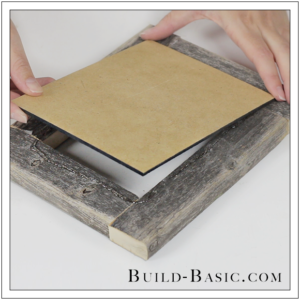
1/8-inch Hardboard – 1 @ 6¾”W x 5”H
Steps
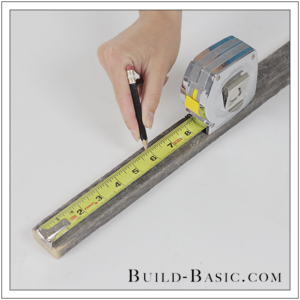
1. Size the Parts

2. Cut the Pieces
3. Assemble the Frame
4. Etch the Sign
5. Prep the Frame
6. Attach the Sign
MORE BUILDING PLANS