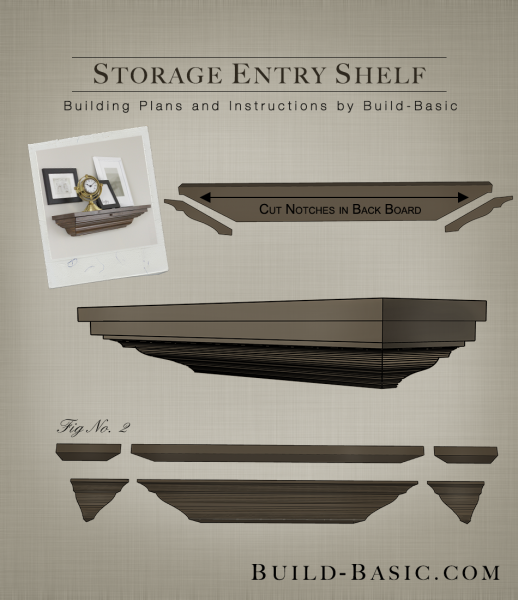
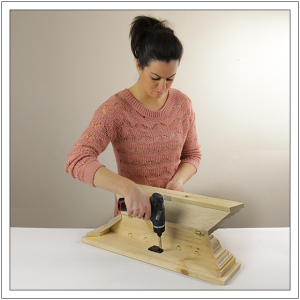
This classic crown molding shelf gets a bit of a twist with a flip-down door for hidden storage. With just a few extra steps to install the hinges and hooks, this decorative accent now checks the boxes for both form and function.
Cost: $18
Time: 2 hours
Difficulty: Moderate. While the parts are fairly easy to assemble, mitering the crown molding and notching the backer board requires a level of comfort with the miter saw and jig saw.
(1) 4 5/8″ Crown Molding. Get at least 4 feet (to allow for waste)
(1) 1″ x 6″ x 2′ board to make the shelf. Get a two-foot piece
(1) 1″ x 5″ x 2′ board to make the backer board. Get a two-foot piece
1″ x 2″ x 4′ Get a 4-foot piece
1 inch Finish Nails
1 ¼ inch Finish Nails
(2) ¾ inch hinges
(1) Magnetic Door Catch
(4) Cup Hooks
Wood Glue
Wood Filler
1 x 6 – 1 @ 24 inches
Crown Molding Front – 1 @ 23 inches (ends mitered at opposing 45-degree angles)
Crown Molding Sides – 2 @ 4 ½ inches (one end mitered at 45-degrees)
1 x 2 Front – 23 inches (ends mitered at opposing 45-degree angles)
1 x 2 Front – 2 @ 5 inches (One end mitered at 45 degrees)
1 x 5 Back Board – 1 @ 20 inches (notched each end to fit along backside of crown molding)
Steps
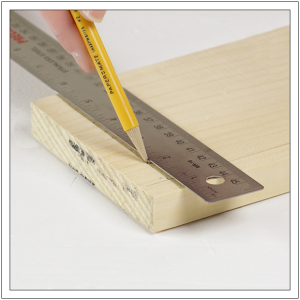
1. Cut and Mark the Shelf Board
Using a miter saw and the cut list above, cut the 1 x 6 shelf board to size. Using a tape measure and a straightedge, mark a line ½ inch from the front edge and ends of the board.
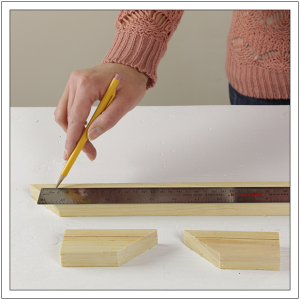
 2. Cut and Mark the 1 x 2’s
Using the cut list above, measure and cut the 1 x 2 boards to size, mitering the ends of the long piece at opposing 45-degree angles, and one end of each shorter piece at 45-degees. On the longest 1 x 2, measure and mark a line ½ inch from the longest edge. Repeat on the smaller pieces.
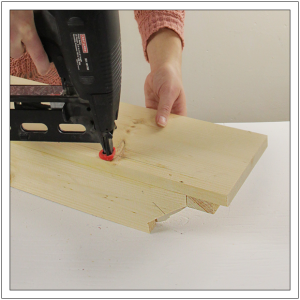
3. Position the 1 x 2’s
Place the 1 x 2 pieces on the Shelf Board positioned inside the lines marked in step one. Rest the square-cut end of the shorter 1 x 2 pieces flush with the back edge of the Shelf Board. Apply glue to the two shorter 1 x 2 pieces. Using a pneumatic nail gun, nail the two shorter 1 x 2 pieces into place. The longer 1 x 2 piece will be attached directly to the flip-down door, and can be set aside for now.
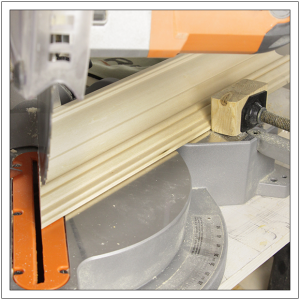
4. Cut the Crown Molding
Set the crown molding on a miter saw. While there ways to cut the crown flat, today we’ll be taking a bit more simplified approach and tipping the crown up against the back fence of the saw and using basic a 45-degree cut. The key is to tilt the molding until the back of the flanges rest flush against the horizontal and vertical surfaces on the saw. I used a block to help prop the molding in place. Holding the molding securely, cut it at a 45-degree angle so that the top edge of the molding runs to the long point. Repeat on the opposite end of the molding to create opposing 45-degree miter cuts.
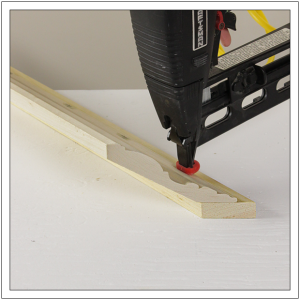
5. Assemble the “Door”
Apply a bead of glue to the surface of the 1×2. Position the top edge of the molding on the 1×2, flush with its ends and behind the marked line, as shown. Nail through the molding and into the 1×2 using 1-inch finish nails.
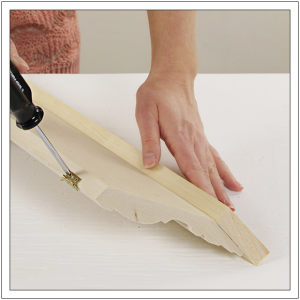
6. Attach the Hinges
Place the knuckle of the hinges along the bottom edge of the crown molding, 2 inches from each end. Using the screws provided, secure the hinges on the crown molding.
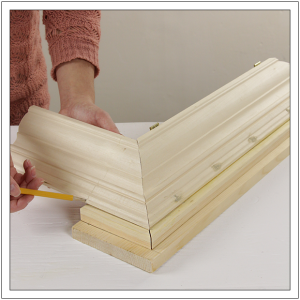
7. Measure the Side Piece of Crown
Set the assembled crown molding and 1×2 “door” onto the Shelf Board. Cut another 45-degree angle on a remaining piece of crown, and then slide it into place against the end of the “door”. Create a tight joint, and then mark length of the molding.
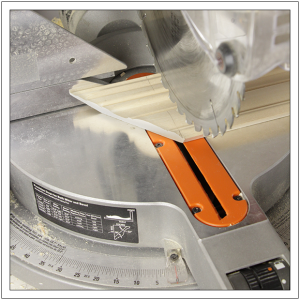
8. Cut the Crown Side Piece
Place the crown molding flat on the saw. Set the saw back to zero degrees, and then cut the line. Repeat steps 7 and 8 to mark and cut the second side piece of crown molding.
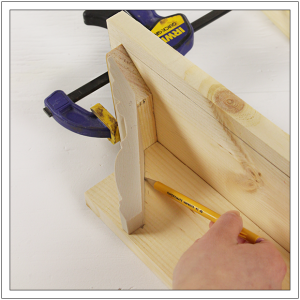
9. Mark the Back Board
Using the cut list above, cut the 1×4 Back Board to size. Set the Shelf Board on its back edge, and then slide the Back Board between the installed 1×2 pieces. Position the square cut edge of the crown molding against the Back Board. Align the top edge of the molding with the lines marked on the 1 x 2’s. Now mark a line on the Back Board that follows the backside of the molding on each side.
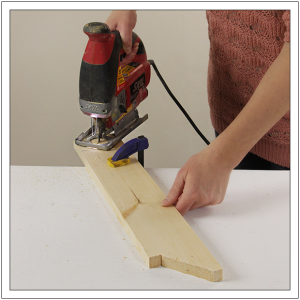
10. Notch the Back Board
Using a jigsaw, cut along the lines marked in step nine.
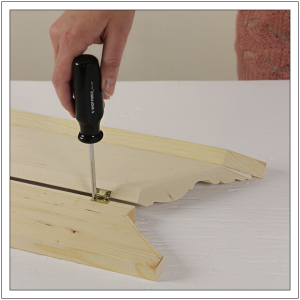
11. Assemble the Back Board and Door
Position the short edge of the notched Backer Board against the bottom edge of the “Door”. Attach the hinges to the face of the Back Board as shown.
12. Position the Door
Place the Back Board on the Shelf Board flush with its back edge. Tilt the Door down and into place between the side 1 x 2’s as shown.
13. Attach the Back Board
Apply wood glue to the top edge of the Back Board, and then clamp it in place against he Shelf Board. Using a pneumatic nail gun and 1 ¼ inch finish nails, nail through the Shelf Board and into the top edge of the Back Board to secure it in place.
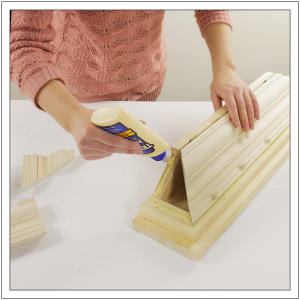
14. Prep for the Side Molding Pieces
Apply glue to the notched edges of the Back Board and side 1 x 2’s. Remember not to add glue to the edge of the door so that it can flip open.
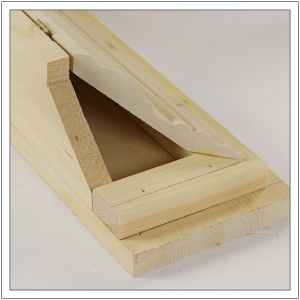
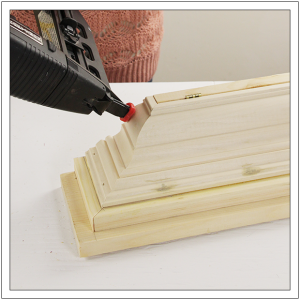
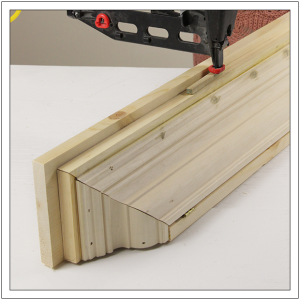
15. Add the Remaining Molding
Position the side molding pieces against the notched edges of the Backer Board and aligned with the marked lines on the 1 x 2’s. Using a pneumatic nail gun and 1 ¼ inch finish nails, nail through the molding and into the Back Board and corresponding 1×2 to secure the molding in place.
16. Attach the Handle
Center the 3-inch-long ¼-inch square dowel (or knob) on the front edge of the 1×2 connected to the Door. Apply wood glue to the back of the Handle, and then nail it into place using 1-inch finish nails.
17. Add the Hooks and Catch
On the inside of the assembly, center a magnetic catch on the underside of the Shelf board, recessed 2 inches from its front edge. Screw cup hooks into the face of the Back Board. Once the shelf is in place on the wall, screw through the Back Board and into a wall stud to hang securely.
MORE BUILDING PLANS


Deborah
The small handle and magnetic catch are nice, but could you leave off the handle and use a spring loaded catch instead? Then you would have a hidden storage space.
Rusty Russell
What type of “latch” do you use to prevent the “door” from falling open?
Jenn Post author
Hi Rusty, I think I listed a Magnetic Door Catch in the “Materials List” above, but really most any door catch could be used. I just like the magnetic catch because it’s inexpensive, and easy to install. Hope this helps!