Note: This tutorial contains affiliate links, but all opinions are 100% my own.
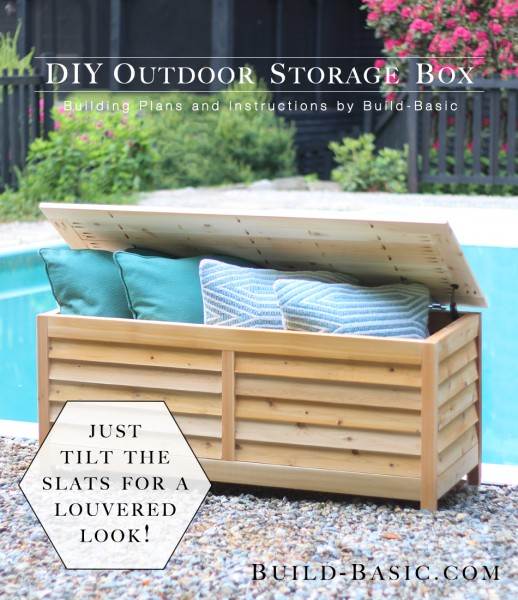
Create a stylish way to store outdoor décor with this slatted deck box. While creating the louvered look may seem complicated, I’m here to tell you, it’s as simple as tilting the slats. Even better, assembly requires little more than a saw, drill, and a Kreg Jig. I recently just switched from the Kreg Jig R3 to the K4 (check out my video about the K4), but you can use either.
GIVEAWAY ALERT: I’m teaming up with Kreg Jig to give a Kreg Jig K4 Masters System to one lucky Build Basic Subscriber! Contest ends June 11th, 2015. Click HERE to learn more!! GIVEAWAY UPDATE: This Contest Has Ended.
Cost: $120 (for cedar, but you could select a less expensive option)
Time: 6 hours
Difficulty: Easy. The faux louvers may look difficult, but tilting the slats is actually very simple.
(4) 2 x 2 x 3′ Balusters – to make the Legs and Dividers
(21) 1 x 3 x 8′ Boards – to make the Slats, Rails, and Floor Boards
(1) 1 x 2 x 8′ Board – to make the Cleats
1 ¼ inch Kreg Jig Pocket Hole Screws
1 ¼ inch Wood Screws to attach the Cleats
Wood Glue
(3) Hinges
Lid Support Hinge
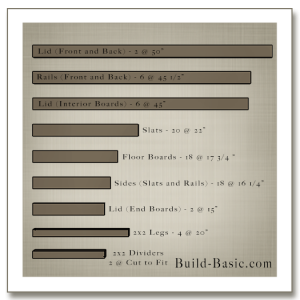
2 x 2 Legs – 4 @ 20 inches
2 x 2 Stiles – 2 @ Cut to Size
1 x 3 Rails (Front and Back) – 6 @ 45½ inches
1 x 3 Rails (Sides) – 8 @ 16¼ inches
1 x 3 Slats (Front and Back) – 20 @ 22 inches
1 x 3 Slats (Sides) – 10 @ 16¼ inches
1 x 2 Cleats – 2 @ 45½ inches
1 x 3 Floor Boards – 18 @ 17¾ inches
1 x 3 Lid (Front and Back) – 2 @ 50 inches
1 x 3 Lid (Sides) – 2 @ 15 inches
1 x 3 Lid (Interior) – 6 @ 45 inches
Steps
1. Cut the Parts
Using the cut list above, cut the 2 x2 legs and 1 x 3 boards to length.
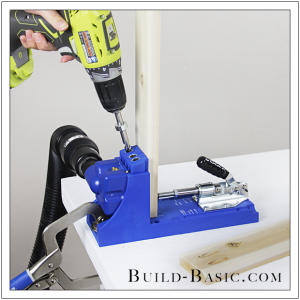
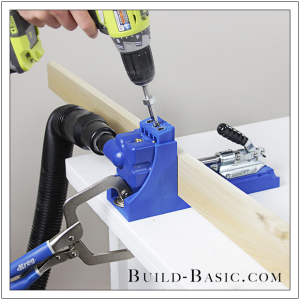
 2. Prep the Slats
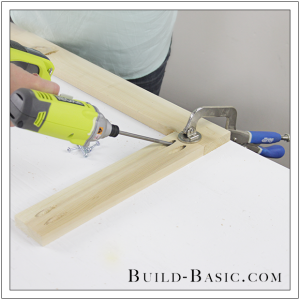
Using a Kreg Jig, drill two pocket holes in the ends of each of the Rails and Slats.
Tip: Check out my new tutorial on How to use Kreg Jig’s K4 featured in this tutorial.
3. Position the First Slat
Mark a line ½ inch from the face of the Front/Right Leg. Make a second mark 2½ inches from the board’s top edge. Now position the end of a 22-inch-long Slat on the Leg, as shown, so that its top edge rests on the crosshair of the two lines, and the bottom edge tilts forward flush with the front edge of the Leg.
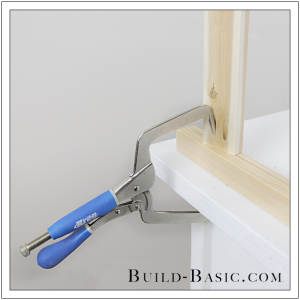
4. Attach the First Slat
Using a Kreg Right Angle Clamp, secure the Slat in place on the Leg. Using a drill/driver, drive 1¼-inch pocket-hole screws through the holes in the Slats and into the Leg.
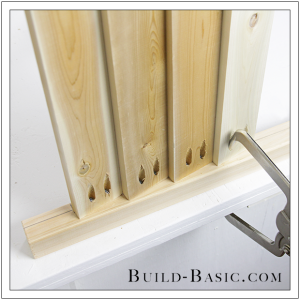
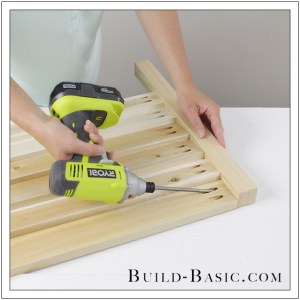
5. Continue Attaching the Slats
Place the next Slat below the first, angling it in the same way. Place the clamp in the pocket hole to hold the Slat in place. Secure the Slat with screws. Secure three additional Slats, for a total of five tilted Slats. Repeat this process to assemble the left side of the box’s front.
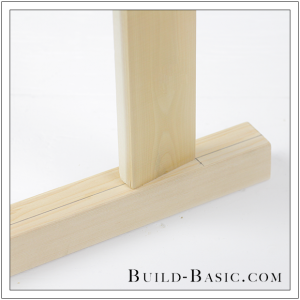
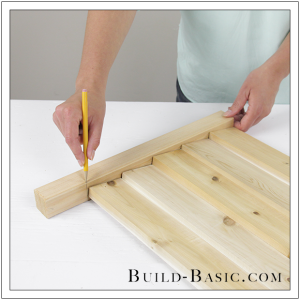
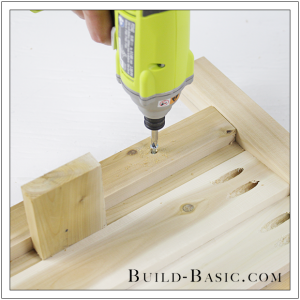
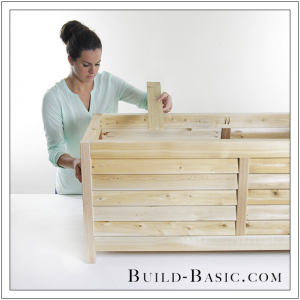
6. Measure and Cut the Divider
Place a 2 x 2 against the unattached ends of the 1×3’s. Mark the top and bottom of the “panel” on the 2 x 2 Divider, and then cut it to length.
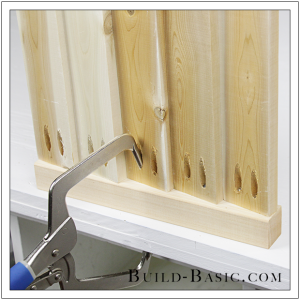
7. Attach the Divider
Mark the ½ inch recess line on the divider. Clamp a set of Slats against it, and then secure them with pocket-hole screws.
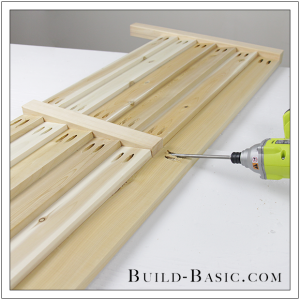
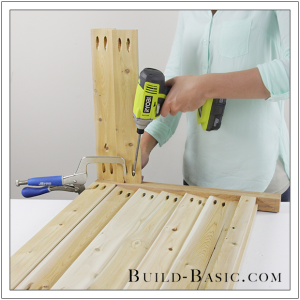
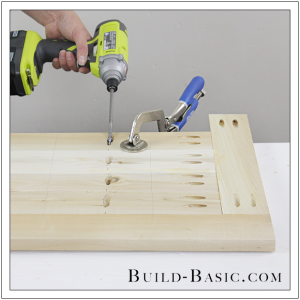
8. Assemble the Panels
Lay the assembled slatted panels face down on the work surface. Clamp the Divider to the table. Drive pocket-hole screws through the Slats in the unattached panel to secure it to the Divider between them.
9. Prep the Rails
Dry fit the doubled-up upper Rail and the lower Rail between the Legs. Mark the location of the Divider on each Rail. Next, drill pocket holes through the thickness of each board so that the screws will run through the Rails and into the ends of the Divider.
10. Install the Rails
Position the face of the top Rail flush with top edge and face of the Leg. Secure the Rail to each leg using pocket-hole screws.
11. Attach the Rail to the Divider
Drive screws through the Rail and into the Divider.
12. Double-up the Top Rail
To create a thicker top edge when the box is open, apply a bead of wood glue to the installed Rail, and then lay a second Rail against it. Attach the Rail to both Legs and the Divider. Lastly, install the bottom Rail against the underside of the lowest Slats and flush with the face of the Legs. .
13. Add the Cleat
Apply glue to the backside of the 1 x 2 Cleat, and then position it in place on the bottom Rail. Place a spacer block between the Cleat and the bottom Slat–this spacing will allow the floor slats to set on the Cleats below the Slats and Divider. Drive 1¼-inch wood screws through the cleat and into the Rail to hold the Cleat in place.
14. Add the Side Rails and Slats
Attach the side Rails and Slats to the Legs using 1¼-inch pocket screws. Make sure to keep the top and bottom Rails flush with the face of the Leg, while tilting the 5 slats between them. On the Slats where the clamp won’t reach, clamp the Leg to the table and firmly hold the Slat in place while securing.
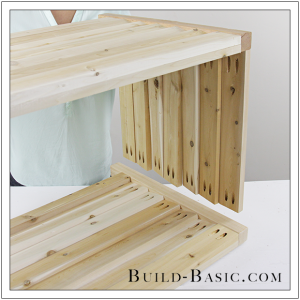
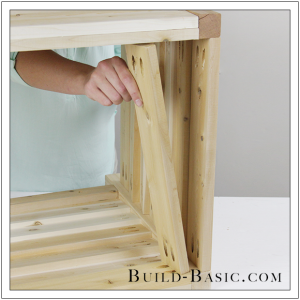
15. Assemble and Add the Back Panels
Following Steps 2-13, assemble the back of the box. Mark the ½-inch recess line on backside each Leg. Set the assembled front wall and sides onto the back.
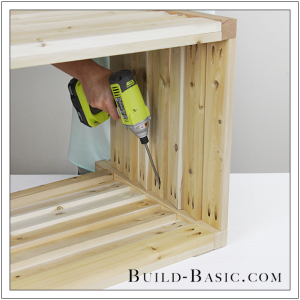
16. Attach the Sides to the Back
One by one, adjust the Slats using the lines on the Legs as a guide, and then screw them into place.
17. Double the Side Rails
Apply glue to the inside of the top and bottom Side Rails. Place a second Rail against each boards, and then screw it to the Legs using pocket-screws.
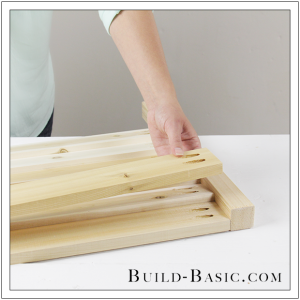
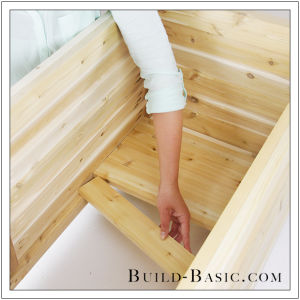
18. Insert the Floor Boards
Place the Floor Boards into the assembled box.
19. Position the Floor Boards
Rest the ends of each Floor Board on the 1 x 2 Cleats. Angle the Board, and then twist it tightly into place. Once complete, the Slats should set tightly together with little gapping.
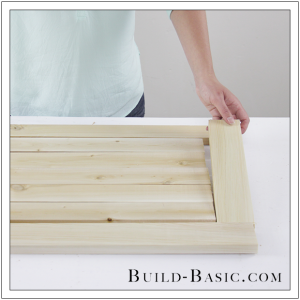
20. Layout the Lid Pieces
On a flat surface, lay out the Lid pieces. On the perpendicular boards, look at the end grain of each board and attempt to alternate the direction the boards’ “cup” (moon-shape of the grain).
21. Assemble the First Pieces
Drill pocket holes in the ends of the interior boards and end boards. Drill additional pocket holes along the interior joints every 8-10 inches. Apply glue to the end of each Side Board, and then clamp and screw them to the Front Board.
22. Assemble the Lid Boards
Continue attaching the Interior Boards using clamps, wood glue and 1¼-inch pocket-hole screws. When the Lid is complete, flip the assembly over, and then sand the surface smooth.
23. Attach the Lid
Using a drill/driver, add three hinges to the underside of the lid and to the top edge of the back of the Box. Add additional lid support hinges, if desired.
MORE BUILDING PLANS


Mike
Hi Jenn,
I am curious if your design was sized around a specific storage size requirement, or the $120 budget and trying to limit the amount of scrap wood leftover? I ask because I am thinking of scaling it up just a bit so the interior dimensions are 60″ x 20″ x 20″.
Great design and instructions, and thanks for the inspiration!
-Mike
Tim D.
I made this for my wife to put her quilts in. She loves it. Thank You so much for allowing me to build this.
Jenn Post author
Tim,
Thank you for your kind words. What a thoughtful gift for you to build for your wife! We’d love to share a photo with our readers, if you’d like to take one! (Email to jenn@build-basic.com). Take Care – Jenn
Tim D.
Pics sent to your email.
SC
If the items you put in the box would be wet, I’d recommend not putting the bottom slats tightly together. Leave them with a slight gap will allow water to drain out.
Great idea. This is going on my summer project list.
Jenn Post author
SC,
That’s a great suggestions! Thank you for reading!
-Jenn
charlie g
this looks great thinking about making it but what does tk refer to in the materials list?
(TK) 1 x 3 x 8′ Boards – to make the Slats, Rails, and Floor Boards.
how many 1x3x8 do i need? (sorry it’s late i might be missing something ) great looking project
Jenn Post author
Charlie,
Thank you for pointing this out! My apologies for the error! “TK” is a publishing term for “to come” (i.e. information that still has to go into the article). My mistake. The number of 1x3x8’s needed for this project is 21, and has now been added to the text above. Thanks again!
charlie g (@g68_charlie)
ahhh ok thanks for the quick reply i have some nice oak pallets i gotta disassemble i think would look great for this project.
Chris
Jenn,
I would like to know what you used for the additional hinge mechanism I see in the first picture?
Also, what kind of kreg screws did you use (i.e. stainless steel)?
Thanks,
Chris
Jenn Post author
Hi Chris,
The visible hinge in the main photo is a “universal lid support hinge”. Here’s a link to the one I used (http://amzn.to/1GaGK97). As for screws, I used Stainless Steel, but Kreg Jig offers several screw types that are acceptable for outdoor projects. Here’s a link to their online store with several options. (https://www.kregtool.com/store/c20/kreg-jigreg-screws/) Hope this helps!