


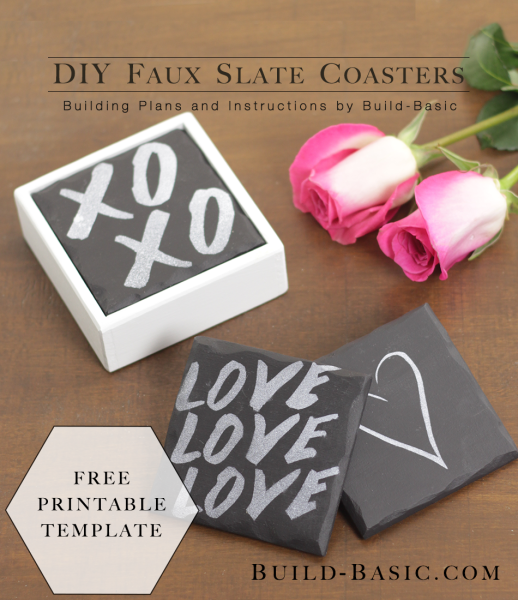
Who doesn’t love the chalky finish and chipped edges of natural slate! For a fraction for the price of the real stuff, make these faux slate coasters using my easy technique for shaping the edges and my FREE PRINTABLE TEMPLATE!
TIP: Click the tabs below to see the tools, materials and cut list.
Note: This tutorial may contain affiliate links. To read our full disclosure policy, click HERE.
Cost: $5 (not including paint)
Time: 20 minutes
Difficulty: Easy. Cut the coasters to size, and then use my easy trick to shape the edges.
¼” x 4 Hobby Board – Get at least two feet
(Note the actual measurements of this material are ¼” x 3½”)
(Note the actual measurements of this material are ¼” x 3½”)
¼” x 2 Hobby Board – To make the edges of the coaster holder
(Note the actual measurements of this material are ¼” x 1½”)
¼” x 4 Coasters – 4 @ 3½ inches
¼” x 4 Holder (Base) – 1 @ 3¾ inches
¼” x 2 Holder (Sides) – 2 @ 3½ inches
¼” x 2 Holder (Sides) – 2 @ 4 inches
Steps
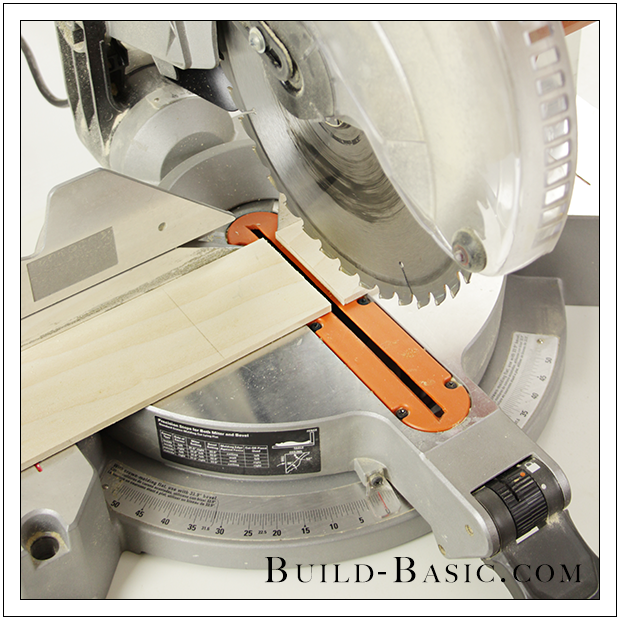
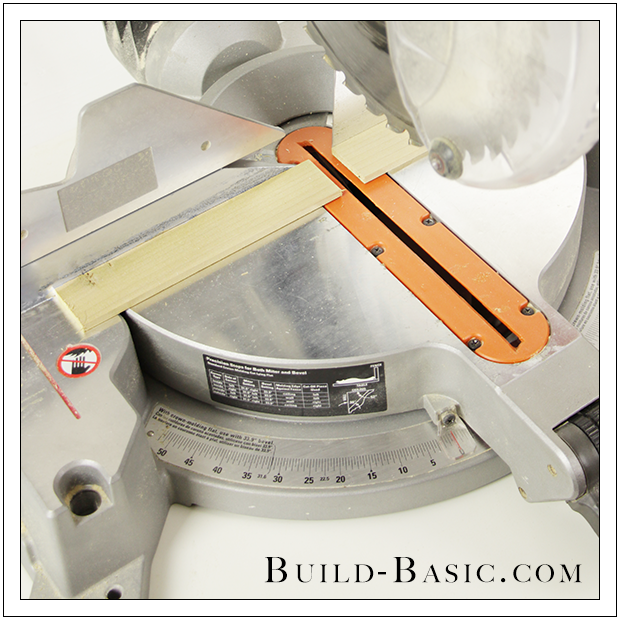
1. Cut the Coasters and Base
Using a miter saw and the cut list above, cut the ¼” x 4 board to size to create the Coasters and Holder Base.

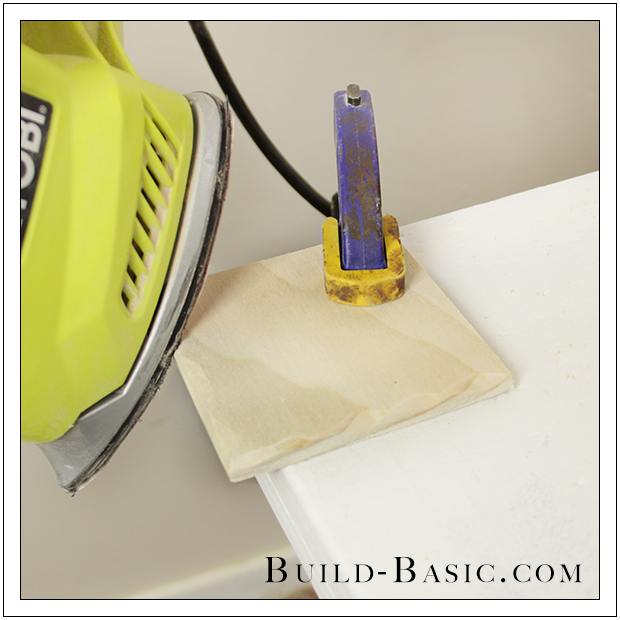
2. Shape the Coaster Edges
Clamp a Coaster to the work surface with one or two edges overhanging the edge of the table. Begin by sanding the surfaces of each Coaster smooth. Now, to create the rough look of chipped slate edges, press the edge of the sander on an angle against the edge of the Coaster to create a gouge in the wood.
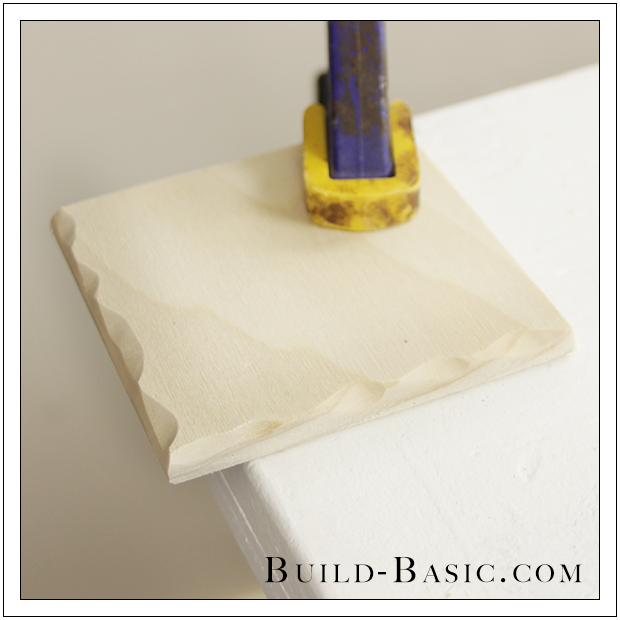
3. Finish Shaping the Edges
Repeat this process to create several gouges and “chips” along each edge of each Coaster, as shown. As with anything, the more you experiment and practice, the better the end result will turn out. The first Coaster I made was a throwaway, but once I got the hang of tilting the sander to create the gouges, and then going back to layer new gouges over the existing gouges, it became very simple!
4. Cut the Holder Sides
To create the Sides of the Holder, cut a ¼” x 2 board to size using the cut list above.
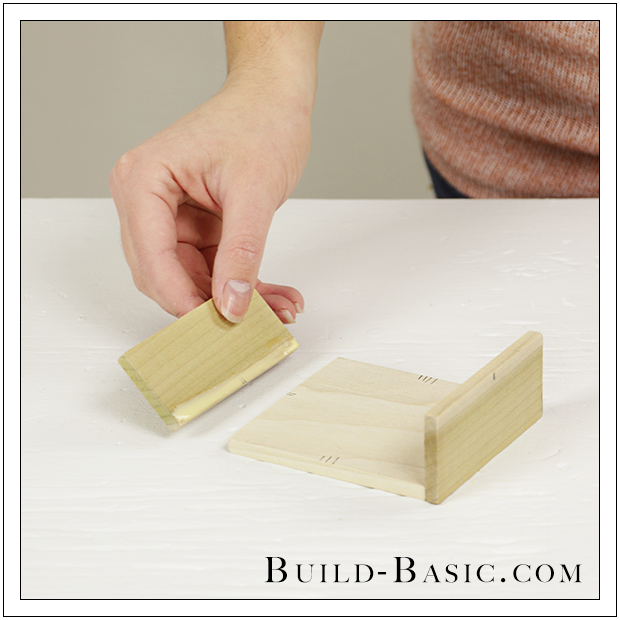
5. Begin Assembling the Holder
Apply wood glue to two opposing edges of the Holder Base. Position the two shorter Sides against the Base, so that their ends set flush with the adjacent edges of the Base.
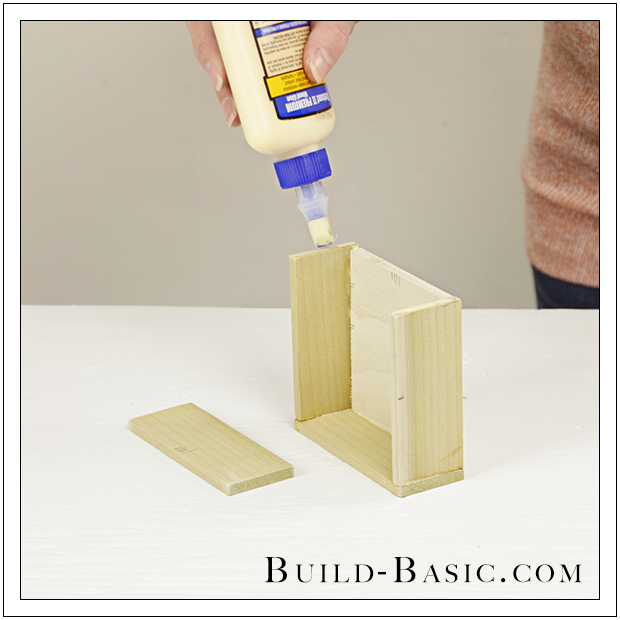
6. Finish Assembling the Holder
Apply glue to the exposed edges of the Base, and the ends of the attached Sides. Position the remaining Sides in place so that their ends set flush with the faces of the shorter Sides. Apply clamps to the box, and let dry.
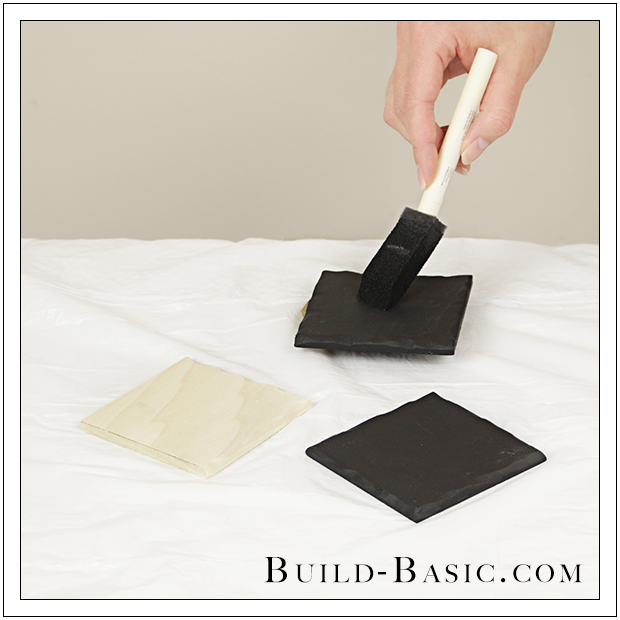
7. Finish the Coasters
Apply a coat of Chalkboard Paint to each coaster. Let dry, and then apply a second coat. Apply two coats of paint or one coat of stain to the assembled Coaster Holder.
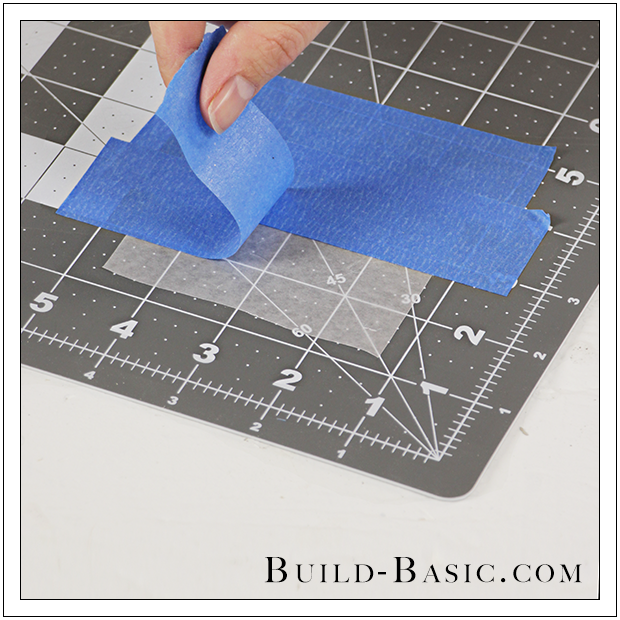
8. Print and Prep the Template
Print my FREE TEMPLATE, and then cut out each square. Position a piece of wax paper about the size of the square onto a cutting mat. Now cover it the wax paper with overlapping rows of painter’s tape to create a footprint of about 4-by-4-inches.
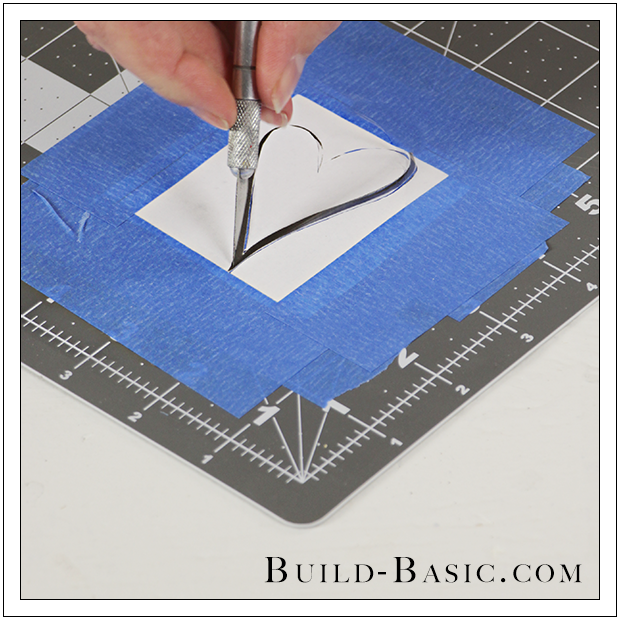
9. Cut out a Stencil
To create a stencil, tape the printed template onto the painter’s tape, and the cut out the design, as shown.
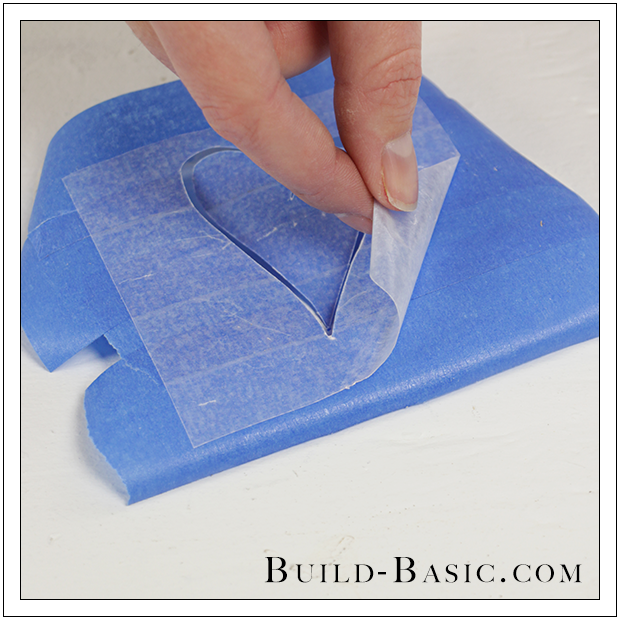
10. Remove the Stencil Backing
To allow the stencil to adhere to the Coaster, carefully remove the painter’s tape from the cutting mat, and then remove the wax paper backing. Tip: If you start with the first piece of tape originally placed on the mat, it will automatically pull the next overlapping layer, and so on.
11. Place the Stencil
Center the stencil on a Coaster. Wrap the edges of the painter’s tape around the edges of the Coaster.

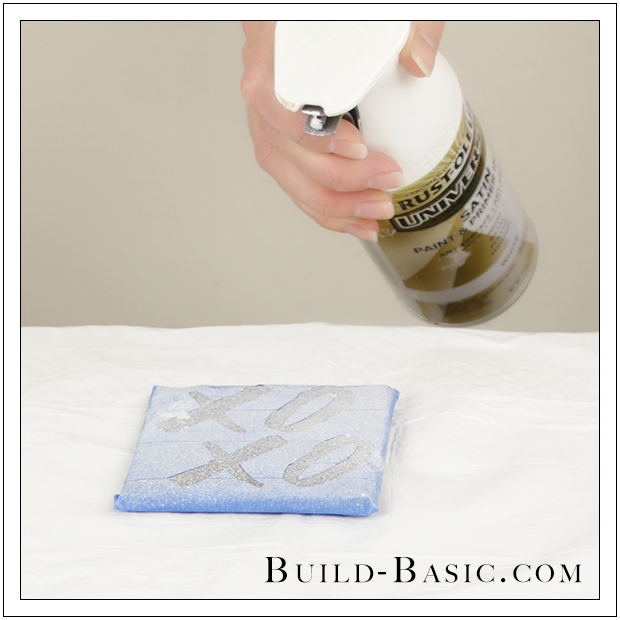
12. Spray the Coaster
Using White Spray Paint, lightly spray a mist over the stencil.
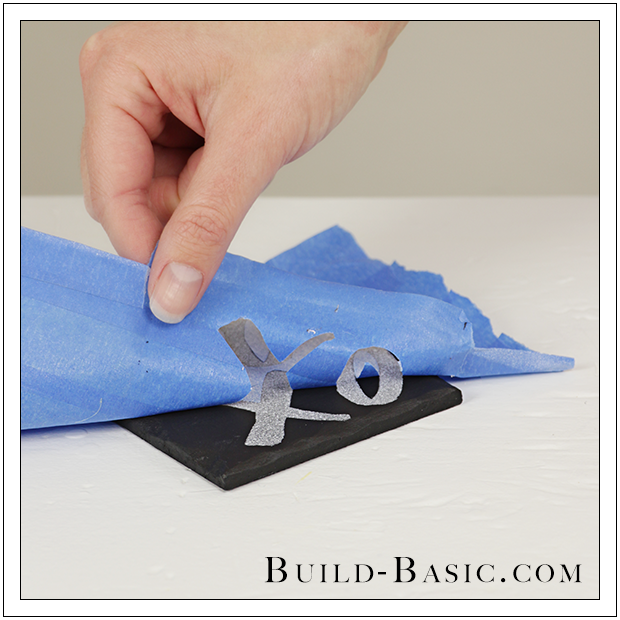
13. Remove the Stencil
Allow the paint to dry, and then remove the stencil. Finish the Coaster with a matte clear coat (optional). Once dry, place the Coasters in the assembled holder.
MORE BUILDING PLANS


Janis
I am so going to make these. Thanks for sharing this protect post. Have a blessed day .
Jenn Post author
Hi Janis,
Thank you for your kind words! You really are too sweet. Let me know if you have any questions during your DIY! –Jenn