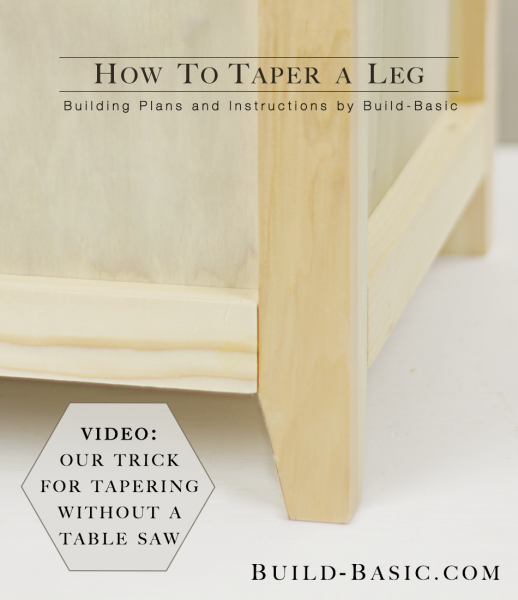
Creating a tapered leg typically requires a table saw and a special jig, but not at Build Basic. Scroll down to see how I make a two-sided tapered leg using only a jigsaw, 1×2 board, and clamps. Oh, and if you’re wondering what that play button is at the bottom of the page…well, that’s our first video here at Build Basic. Scroll down to check it out, or click here to read the full “Our First Video!” blog post.
Cost: $0
Time: 20 minutes
Difficulty: Easy. Clamping a fence board to the leg at an angle eliminates any freehand mistakes.
Tape Measure or Ruler
Jigsaw
(2) Hand Clamps
(1) 2 x 2 Leg
(1) 1 x 2 Scrap Board to mark and support the Leg, and create the Fence
None
Steps
1. Mark the Leg
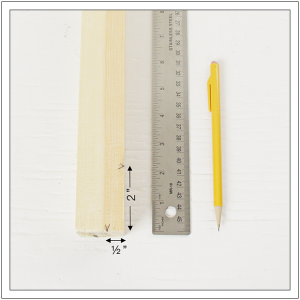
Using a tape measure or ruler, measure and mark the depth and height of the taper on the Leg. The depth of our taper is ½-inch, and the height is 2-inches.
 2. Mark the Taper and Fence Line
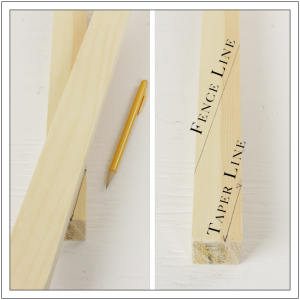
The footplate (shoe) on my jigsaw extends 1½-inches to the left and right of the blade, so I’ll be using a 1×2 (actual width is 1½-inches) to mark my taper and cut lines. To do this, align the 1×2 with the marks made in Step 1, and then mark both sides of the 1×2 on the Leg.
3. Mark the Second Taper
Roll the Leg one turn to the right. Mark the second taper facing the opposite direction as the first.
4. Prep the Cut
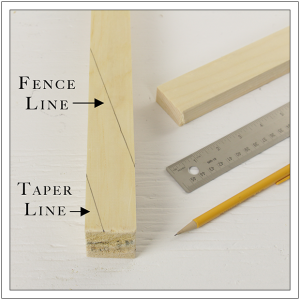
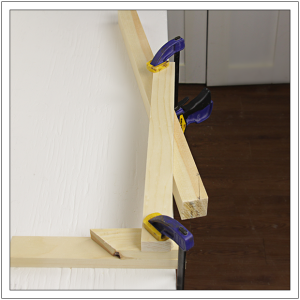
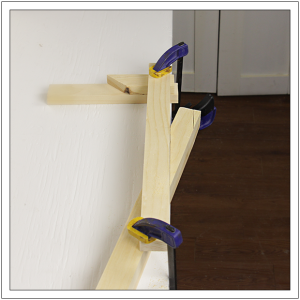
Swing the Taper Line made in Step 2 over the edge of the work surface. Place the 1×2 along the outside of the Fence Line. Position a scrap block under the end of the 1×2 board. Clamp both ends of the 1×2 to the work surface to secure the 1×2 Fence and 2×2 Leg.
5. Cut the Taper
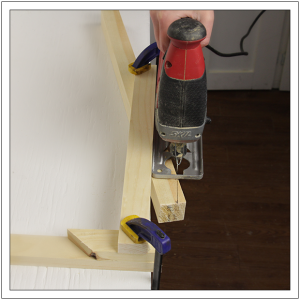
Place the jigsaw facing the end of the Leg with its footplate resting against the 1×2 Fence. Start the saw, and then cut along the Taper Line until the blade exits the Leg.
6. Cut the Second Taper
Clamp the 1×2 and Leg to the work surface facing the opposite direction so that the second Taper Line (made in step 3) hangs over the edge of the table. Cut from the top to bottom of the Taper. Remove the clamps, and then sand all sides of the Leg.
MORE BUILDING PLANS




Sophie
Great job! These tips are very useful and inspirational and the videos a ver clear addition. Keep on the good work…
Jenn Post author
Thanks, Sophie!
lelobo
Hi Jenn,
Congratulations on your first video. You did a great job illustrating and expressing the steps required. The images are very clear and easily understandable.
I’m confident that all will agree that the addition of video to your projects is a major plus to the visual experience and will enhance the interaction 100%. A brave and successful step forward, Bravo!
Till next, Ray R.
Jenn Post author
Thank you Ray!
Phillip Woodard
Your new video is very nicely done. Good show.