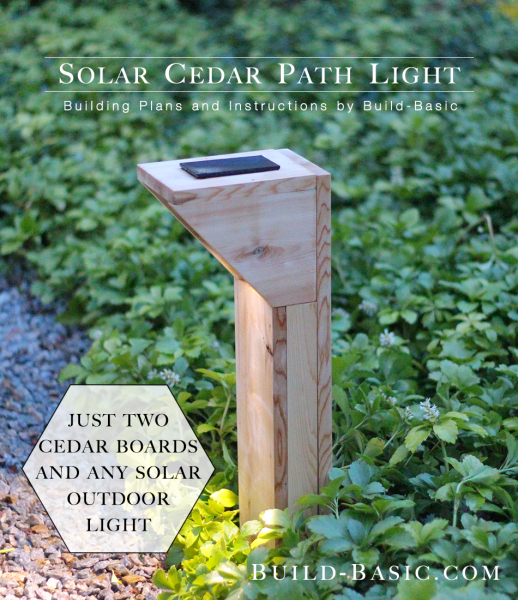
Upgrade the look of inexpensive outdoor solar lights with just a few pieces of cedar. The solar spotlight light I’m inserting is perfect for this installation because it has a pivoting solar panel that can be mounted on the cedar board, while the light remains adjustable below.(Note: I bought my solar spotlight locally, but then found a less expensive online. See link in the materials list below.) Read on to see how easy it is to assemble your own!
Cost: About $15 per light
Time: Less than 1 hour
Difficulty: Easy. The cuts are simple and the pieces come together easily with a few nails.
Note: This list may include affiliate links
Solar Light
(1) 1 x 2 Board. Figure just under 3-feet per light.
(1) 1 x 6 Board. Figure just under 6-feet per light.
1¼ inch Nails
Adhesive Caulk
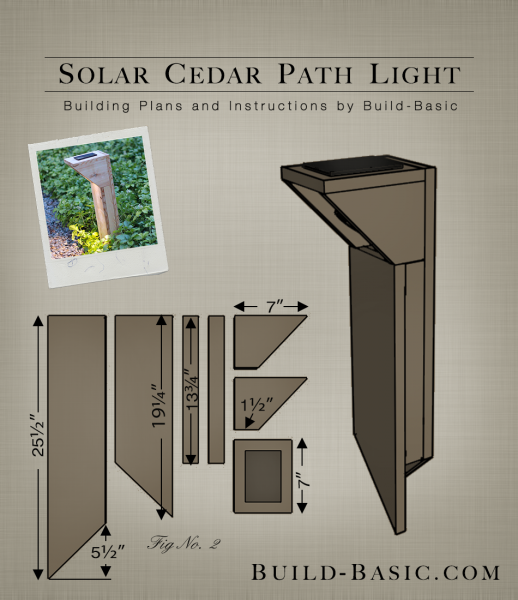
1 x 2 Sides – 2 @ 13¾ inches
1 x 6 Front – 1 @ 19¼ inches
1 x 6 Back – 1 @ 25½ inches
1 x 6 Light Shades – 2 @ 7 inches
1 x 6 Top – 1 @ 7 inches
Steps
1. Cut the Parts
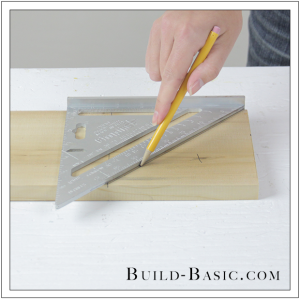
Using the cut list above, cut 1 x 2 Sides and the 1 x 6 Front, Back and Top to Length. On the 1 x 6 Front and Back pieces, mark a line 5½-inches from the bottom edge of each board. Draw a 45-degree line from one end of the line to the opposite corner of the board. On the second board, create a 45-degree cut line running the opposite direction. The lowest “triangle” on each board is the waste side of the cut line.
 2. Mark the Front and Back
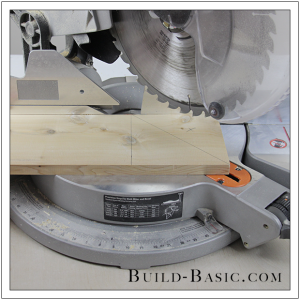
Using a miter saw set to 45-degrees, cut the diagonal line of each board to create spikes that will drive into the ground and hold the light upright.

3. Cut the Light Shades
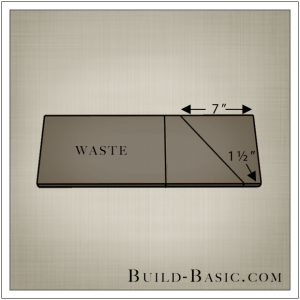
Mark the cut lines of both Light Shades on a 1 x 6 board using the drawing provided. Adjust the angle of the saw blade to match that of the cut line. Cut the angled line, and then the straight line–This will prevent you from mitering short pieces, which can be dangerous.

4. Attach the Sides
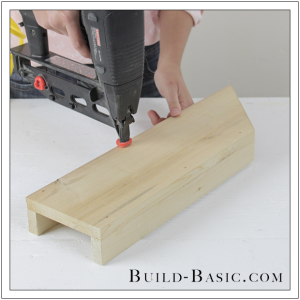
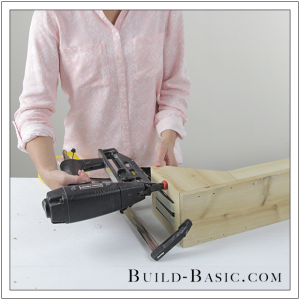
Set the 1 x 2 Sides parallel on the work surface. Set the Front 1 x 6 on top of the Sides. Adjust the Sides so that they run flush with the edges of the 1 x 6, and their ends set even with the square-cut end of the board. Using a pneumatic nail gun and 1¼-inch nails, secure the Sides by shooting three nails through the 1 x 6 and into each 1 x 2.

5. Place the 1 x 6 Back
Flip the assembly over, and then place the 1 x 6 Back onto the exposed edges of the 1 x 2 Sides. Adjust the board until its edges run flush with the outside face of each 1 x 2, and the 1 x 2 Sides end at the beginning of the tapered cut. If done correctly, this should leave a 6¼-inch overhang on the opposite end.

6. Secure the Back Board
Using a pneumatic nail gun and 1¼-inch nails, secure the 1 x 6 Board in place by nailing through the 1 x 6 and into the edges of the 1 x 2 Sides.

7. Place the Light Shades
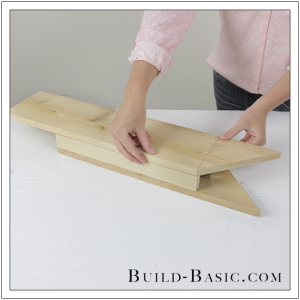
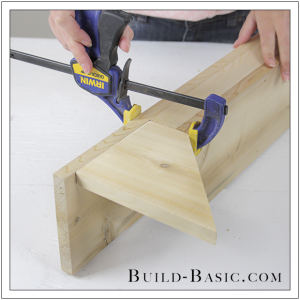
Rest a Light Shade against the assembly, as shown. Clamping the board in place can be a bit tricky, but I was able to get one to hold near the low end of the tapered cut.

8. Secure the Light Shades
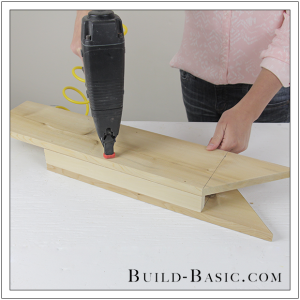
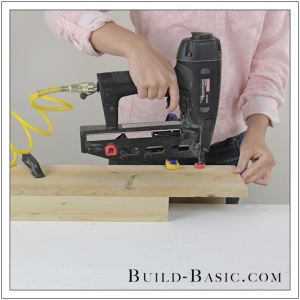
Place the assembly face down on the work surface so that the Light Shade hangs over the edge of the table. Using a pneumatic nail gun and 1¼-inch nails, nail through the 1 x 6 Back and into the Light Shade to hold it in place. Now you can either set the assembly on blocks or on its side to attach the second Light Shade.

9. Modify the Light (Conditional)
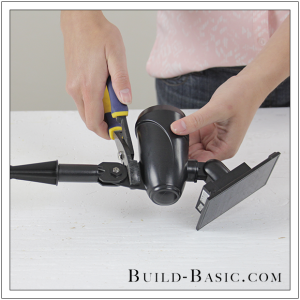
If your light has a lawn spike like mine, feel free to break off the spike using a pair of pliers. With this light, it made it easier to work with for the rest of the build.

10. Mark the Top
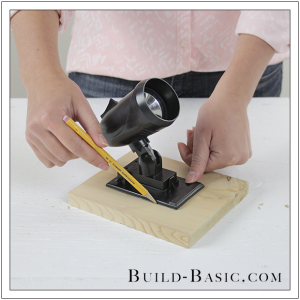
To get sun exposure, the solar panel will be mounted on the top of the assembly, with the rest of the light dropping into the space between the Light Shades. To create the hole in the 1 x 6 Top, first place the solar panel on the Top. Center the solar panel, and then slide it forward until the back of the light has at least ¾-inch clearance from the edge of the Top. Using a pencil, outline the solar panel. Now draw a second line that sets about 1/8-inch inside the outline on all but two sides. If you’re working with the circular solar panel, make a oval so that the panel can slide through, but not fall through once it’s in place.

11. Prep the Cut
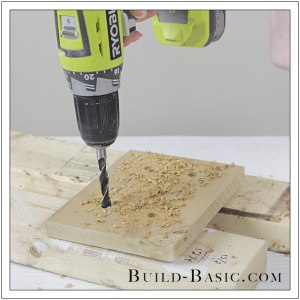
Set the Top on scrap blocks. Using a drill/driver, make a hole inside the circle or near each corner of the rectangle.

12. Cut the Opening
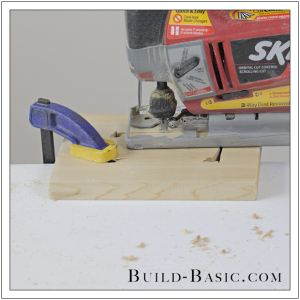
Slide the blade of a jigsaw into a hole drilled in Step 11, and then cut the line(s) until the center piece falls away.

13. Insert the Light
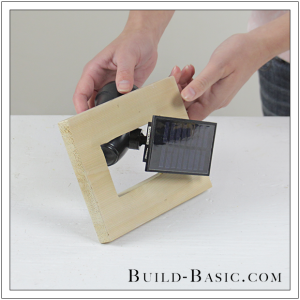
Tip the light so that it slides through the opening. Apply a bead of clear caulk or glue to the ledge, and then press the panel down into place. Allow the adhesive to dry, or apply masking tape to hold it in place while you complete the assembly.

14. Place the Top and Light
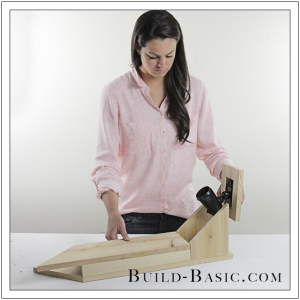
Slide the Light between the Shades and rest the Top onto the Light Shades and against the Back.

15. Secure the Top
Clamp the Top in place. Using a pneumatic nail gun, shoot two 1¼-inch nails through the Top and into the Light Shades to hold it in place. Just be sure to keep the nails closer to the back of the Top so that they don’t drive through the thin part of the Light Shade’s taper.

MORE BUILDING PLANS
 2. Mark the Front and Back






Pingback: 28 Stunning & Easy DIY Outdoor Lights - A Piece Of Rainbow
Melanie
Great project, and love the clear step by step instructions! I can’t wait to get a couple of these done!
Seo
extremely useful 🙂
lelobo
Hi Jenn,
The solar light project is well thought out and will surely save some scrapes and bruises. This project is of special noteworthiness to me because I am one to enjoy doing exactly this type of thing. That is, to take a product that is sold as complete and to modify it some for either personal taste or a new vocation or use.
When time permits I enjoy shopping through the sales or liquidation sections for some great deals on products that could be good candidates for these types of projects. I find this fun because because it is an exercise for the grey matter to try to visualize a possible modification and/or alternate use for different products that are offered. Some products are offered dirt cheap because of missing pieces, used as demo’s, returned and repaired etc.
So there you have it, some folks go for a jog to exercise the legs, this could be seen as a jog for the noggin’. So when I saw this project of yours I thoroughly enjoyed it and welcome the idea that I am not alone out there joggin’, so to speak. Hehee.
Thanks Jenn, Ray R.
The Jewell Family
I love the look of the finished path light. I just bought a home that I am going to close on in August. This will be one of the first outside projects we do for our new country home. Thank you for this idea.
Jenn Post author
What a sweet comment. Congratulations on your new country home. It sounds wonderful! And I’m so glad you liked the project! I’d love to see pictures if you decide to make the path lights!