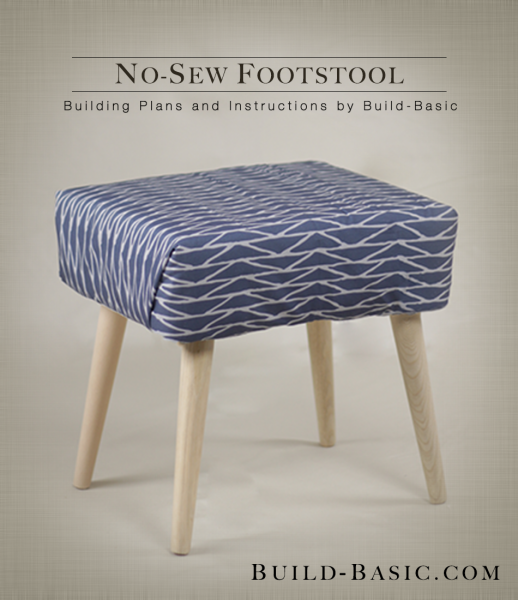
This easy no-sew stool can be adjusted to any size and assembled in under an hour. To create the chunky proportions of our design, I chose thick padding and a bold-patterned fabric. To keep it from looking boxy, I attached the legs using angled top plates, but you could always sub in flat plates and short bulb legs for a more traditional look. Note: Many homecenters offer small 2-by-2-foot plywood pieces called “project panels” that are perfect for making the stool base, and fit more easily in the car–bonus!
Fabric Credit: “Triangle” in Navy by Hitomi Kimura Designs
Time: 1 Hour
Cost: $35
Difficulty: Easy. Wrap and staple the foam batting and fabric to the base and attach the legs.
(4)
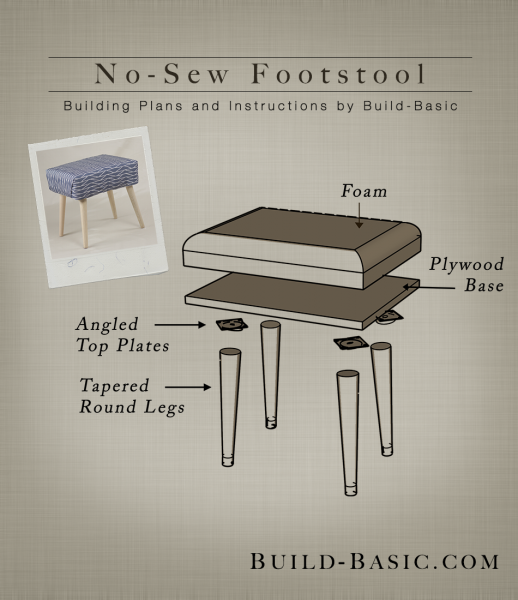
12 inch Round Taper Table Leg
(4) Table Leg Top Plate (Angled)
(1) ¾ inch Plywood Board to make the stool base
½ inch Wood Screws
(1) 12×15 4-inch-thick Foam Pad. (Or stack two 2-inch-thick pads)
(1) Yard of Fabric
(1) Fat Quarter (18×22 inches) of Leftover Fabric for Dust Cover (Optional)
(1) Yard of Batting or Dacron
¾ inch Plywood Stool Base – 1 @ 12 x 15 inches
4 inch Foam – 1 @ 12 x 15 inches
Batting – 1 @ 24 x 27 inches
Fabric – 1 @ 24 x 27 inches
Steps
1. Cut the Base
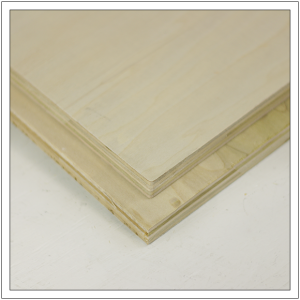
Using a circular saw, cut the plywood base of the stool to size. Sand the rough edges so they don’t snag the batting and fabric. I also like to “knock down” the corners (sand them until they’re a bit rounded). Once complete, the corners should look similar to the top board in the photo.
 2. Mark the Top Plates
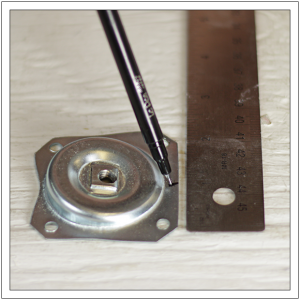
Since we’re using angled top plates, I’ll need to position them carefully so the legs splay (i.e. angle) uniformly. To help align the plates, we’ll mark the center of their front and back edges. Think of the front edge as the edge where the slope is lowest (i.e. thinnest), and the back edge where the plate’s slope is highest (i.e. thickest). Using a ruler and a felt tip pen, mark the center points.
 3. Mark the Stool Base
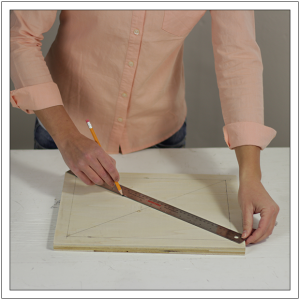
On the plywood stool base, draw a line 1 inch from each edge. Now draw additional lines between the rectangle’s corners to create an X.
 Tool Tip: Using a Combination Square
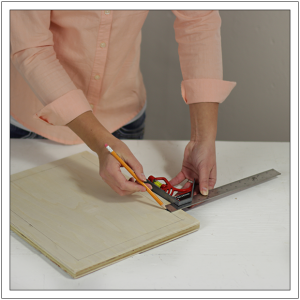
A combination square is a great tool for marking a uniform line along an edge. To do so, just adjust the head to the desired measurement on the ruled blade, in this case 1 inch. Now butt the flat edge of the head against the edge of the board, and use the end of the ruler as your guide to mark the board, as shown. If you want to get fancy, hold the pencil against the end of the ruler as you slide the head along the edge to create one continuous line.
 4. Attach the Leg Plates
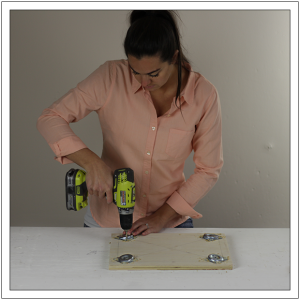
To make the legs splay outward from the corners, align the center marks made in step 2 on the diagonal lines with the outer corners of each plate touching the perimeter lines. Make sure the front edge of each plate (i.e. the lowest point of the slope) is closest to the corner of the stool base as shown. Using a drill/driver, drill shallow pilot holes in the corners of each plate, and then fasten them to the stool base using the ½ inch woodvscrews.
 5. Size the Foam
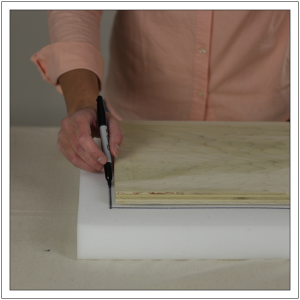
The 4-inch-thick foam was a bit pricy at the store I went to, so I’m doubling up two pieces of 2-inch-thick foam–either is fine. To size the foam, lay it under the stool base and use a felt tip marker to make a line about 1/8-inch from each edge.
 6. Cut the Foam
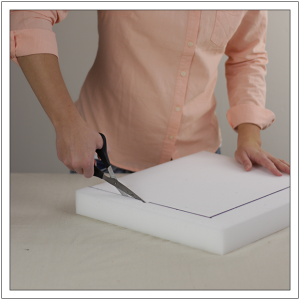
Cut the foam to size using scissors. If you’re using two pieces of foam, like I did, make sure they’re cut to the same size.
 7. Wrap the Batting
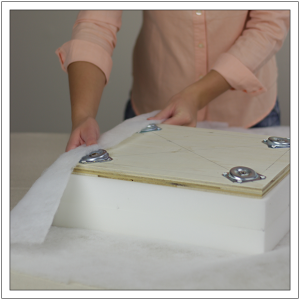
Size a piece of batting to the length and width of the plywood base plus the thickness of the foam (on each side). Add and extra four inches to both the length and width to wrap up and over the plywood base. For example, I cut my batting to 24 inches x 27 inches. Place the foam and plywood base upside down in the center of the batting. Starting at the center of an edge, pull the batting up and around the edge of the foam and base.
 8. Secure the Batting
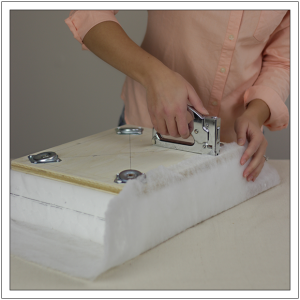
Using the staple gun, secure the batting 1 inch from the edge of the base. Before securing the edge, secure the batting in the center of the opposing edge. Now finish securing the batting along these first two edges before moving on to the remaining edges.
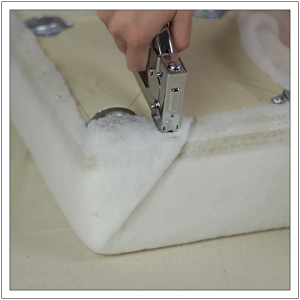
 9. Secure the Batting Corners
On the short ends of the stool, pinch the batting at the corner and fold it over as shown. Staple the batting firmly in place.
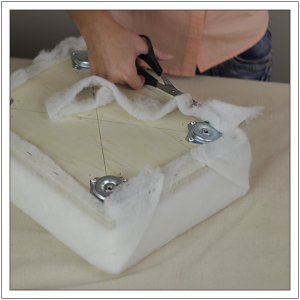
 10. Trim the Batting
Once the batting is stapled to the base along each edge and the corners are secured, use scissors to trim away excess batting.
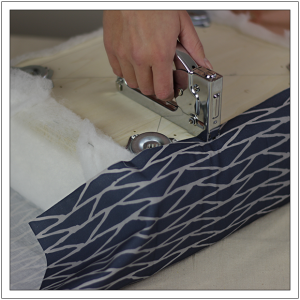
 11. Secure the Fabric
Flip the stool face-up. Lay the fabric over the batting and position the pattern. Now flip over all the layers so you can staple the fabric to the plywood base. Working your way around the fabric in the same way as the batting to secure it in place. Since we’re using thick foam, make sure you’re pulling the fabric taunt to avoid a stretched-out look when the cushion is compressed.
 12. Secure the Fabric Corners
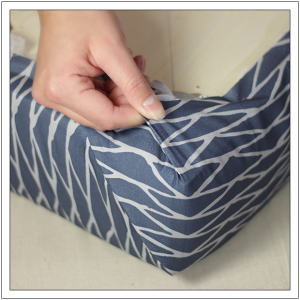
Fold and staple the fabric corners in the same way as the batting. For extra crisp corners, fold the underside of the corner a second time close to the plywood base as shown. Staple it in place.
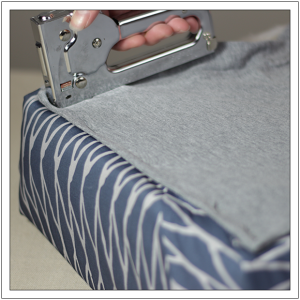
 13. Attach the Dust Cover
Cut a small piece of fabric several inches larger than the exposed plywood on the underside of the stool. Fold the edges of the fabric under to create a finished edge and staple along the fabric’s edge.
 14. Cut the Legs (Optional)
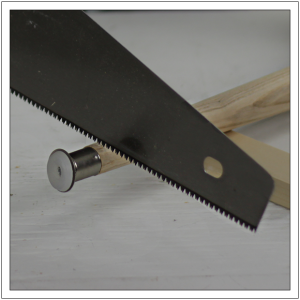
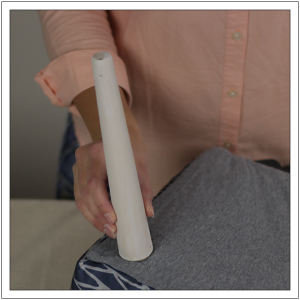
I love buying pre-made legs at the homecenter, but I don’t always love the look of the metal feet. For this project, I cut the metal foot off each leg with a handsaw. (I avoided the miter saw for this cut as a safety precaution.) To finish the look, use a sanding block to round over the edges of the cut.
 15. Cut the Leg Holes
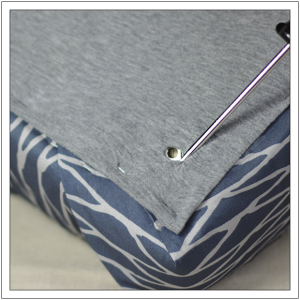
In order to screw the legs into the plates, snip small holes in the fabric. Feel around with your finger to locate the holes, pinch the fabric, and then snip a small slit using scissors. Use a pencil or screwdriver to align the hole in the fabric with the threaded hole in the top plate.
 16. Attach the Legs
Slide the threaded pin on the end of each leg through the slit in the fabric and into the top plate. Turn each leg until it is securely threaded into the top plate.

MORE BUILDING PLANS
 2. Mark the Top Plates
 3. Mark the Stool Base
 Tool Tip: Using a Combination Square
 4. Attach the Leg Plates
 5. Size the Foam
 6. Cut the Foam
 7. Wrap the Batting
 8. Secure the Batting
 9. Secure the Batting Corners
 10. Trim the Batting
 11. Secure the Fabric
 12. Secure the Fabric Corners
 13. Attach the Dust Cover
 14. Cut the Legs (Optional)
 15. Cut the Leg Holes
 16. Attach the Legs






Mariah
Where do you get your materials from? It seems like you get a very good price.
Lucie
Thanks for this great project, I love the look! I have one question, can you sit on this stool? Is it sturdy enough? Thanks