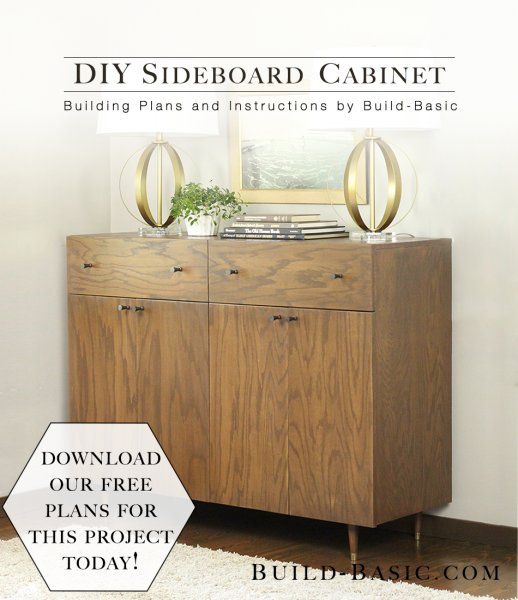
While the footprint of this cabinet is slim, it packs its punch on storage space. Use it as a Sideboard in a dining room, a dresser in the bedroom, or as a storage console near the entryway. No matter the use, you’ll be happy with the clean lines and versatile hideaway spaces. And while we rated this project at a higher difficulty level than most, it’s not necessarily because it requires a higher level of skill, but just that precision is key. But don’t worry, when it comes to positioning and installing the doors and drawers, we’ve got a trick up our sleeve that’ll make you come out looking like a pro!
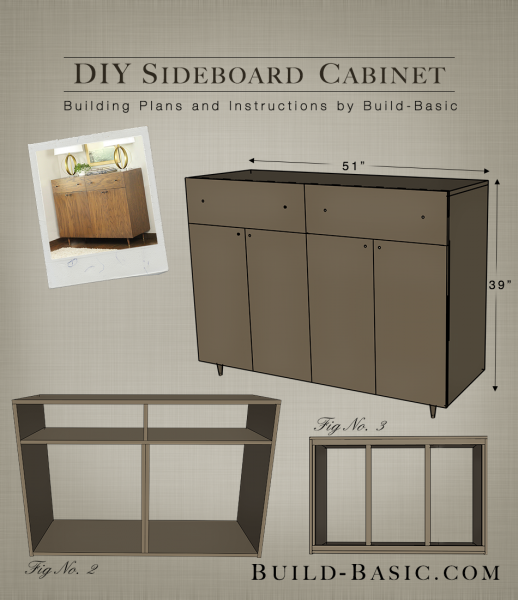
TIP: Click the image above to reveal the free building plans. Click the tabs below to see the tools, materials and cut list.
Cost: $165
Time: 3 Work Days
Difficulty: Difficult. Keeping the cuts square and installing the drawer fronts and doors While the cuts are easy, installing the drawers and full-overlay doors requires patience and accuracy.
(2) ¾” x 4′ x 8′ Plywood
(1) ¼” x 4′ x 8′ Plywood
(8) Full Overlay Hinges
(2) Drawer Slides (sold in sets of two for each drawer)
(8) Door Pulls
(4) 3-inch Table Legs
(4) Footplates
(3) Rolls of Veneer Edge-banding
1¼-inch wood screws
1¼-inch Pocket Hole Screws
1¼-inch Finish Nails
1½-inch Finish Nails
Exterior
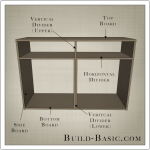
- ¾” Plywood Top Board – 1 @ 51″ x 17½”
- ¾” Plywood Bottom Board – 1 @ 49½” x 17½”
- ¾” Plywood Side Boards – 2 @ 33″ x 17½”
Interior
- ¾” Plywood Horizontal Divider – 1 @ 49½” x 16½”
- ¾” Plywood Divider (Upper) – 1 @ 7″ x 16½”
- ¾” Plywood Divider (Lower) – 2 @ 24¼” x 16½”
Drawers
- ¾” Plywood Drawer Sides – 4 @ 6″ x 16″
- ¾” Plywood Drawer Front and Back – 4 @ 6″ x 21 7/8″
- ¼” Plywood Drawer Base – 2 @ 14½” x 21 7/8″
Back and Support
- ¼” Plywood Back – 1 @ 32″ x 49½”
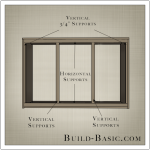
- ¾” Plywood Vertical Supports – 2 @ ¾” x 27″
- ¾” Plywood Vertical Supports – 2 @ 2½” x 27″
- ¾” Plywood Horizontal Supports – 2 @ 2½” x 48″
Door and Drawer Fronts
- ¾” Plywood Doors – 4 @ 8″ x 25 7/16″
- ¾” Plywood Drawer Fronts – 2 @ 25 5/8″ x 12 21/32″
Steps
1. Cut the Parts
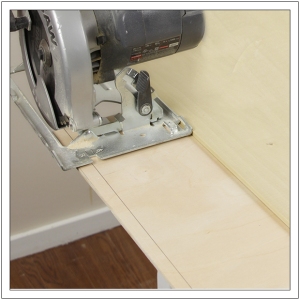
Using the cut list above, size the parts. If possible, aim to have vertical grain pattern on the Door and Sides, and horizontal grain pattern on the Top Board, and Drawer Fronts. If using a circular saw, be sure to check out my
DIY Cutting Fence Tutorial to ensure the cuts are square.
 2. Prep the Parts
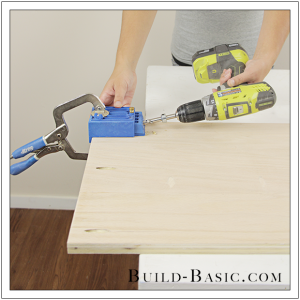
Using a Kreg Jig, drill three pocket holes into the underside of the Bottom Board and Horizontal Divider at each end. Drill additional pocket holes along the top edge of each Side Board, as well as all the Vertical Dividers.

3. Finish the Plywood Edges
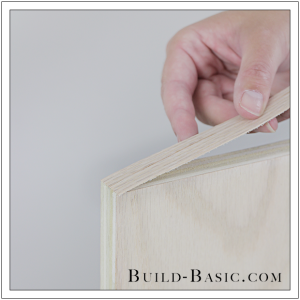
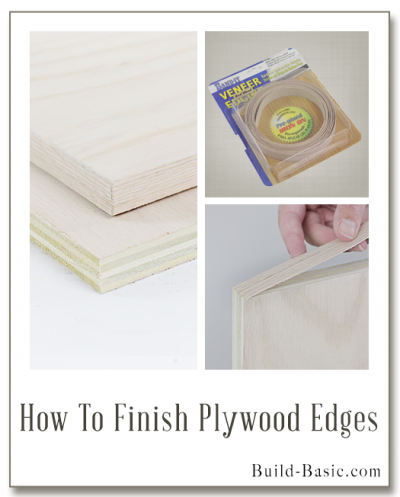
Because we’re building with plywood, and not solid boards, it’s necessary to “finish” the exposed, rough edges. To do so, we’ll stick an adhesive strip of veneer onto the edges. See my full
How To Finish Plywood Edges Tutorial for a quick primer. On this project, it’s necessary to finish the edges of the Doors and Drawer Fronts, as well as the ends of the Top Board. I also finished the front edge of the Bottom Board and each interior Divider, but it’s not necessary.

4. Mark a Centerline
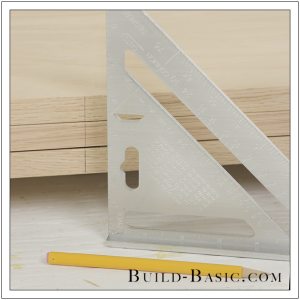
Stack the Bottom Board, Horizontal Divider and Top Board on the work surface. Adjust the boards so that all their front edges set flush, as shown. Center the Bottom Board and Horizontal Divider on the length of the Top Board. Using a speed square, mark a centerline on the front edge of all three boards.

5. Carry the Centerline
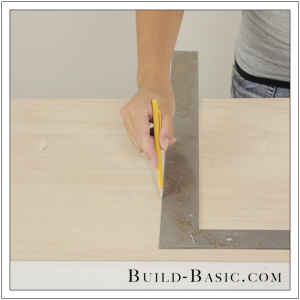
Using a framing square, carry the centerline along both faces of the Bottom Board and Horizontal Divider, and along the underside of the Top Board.

6. Install the Vertical Divider (Upper)
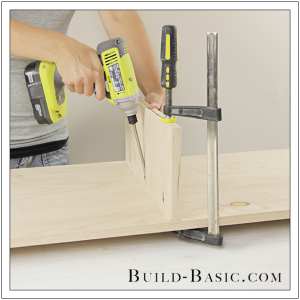
Place the Top Board on the work surface with its underside facing upward. Apply wood glue to the top edge of the Vertical Divider (Upper). Center the board over the centerline marked on the Top Board. Use a framing square to ensure the Divider runs perfectly perpendicular to the frond edge of the Top Board. Clamp the Divider in place. Using a drill/driver and 1¼-inch pocket hole screws, attach the Divider to the underside of the Top Board.

7. Assemble the Top, Bottom and Sides
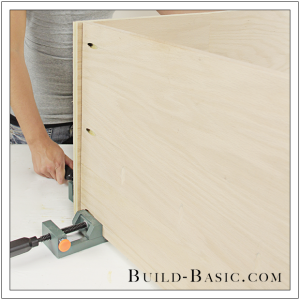
Stand the Top, Bottom and Side Boards on their back edge, and then place them loosely in the corner clamps. Position the Side Boards with their pocket holes facing inward. Rest the Top Board on top of the Side Boards, and the Bottom Board between them. Raise the Bottom Board ¼ inch from the bottom edge of each Side Board, as shown. The ¼-inch inset will help hide the footplate later on. Apply wood glue to the ends of the Bottom Board and to the top edge of the Sides. Clamp the boards in place. Check that joints are square using a framing square. You can also measure corner-to-corner, like an X, to help ensure the parts are clamped square. Using a drill/driver and 1¼-inch pocket hole screws, secure the pieces in place.

8. Attach the Back Supports
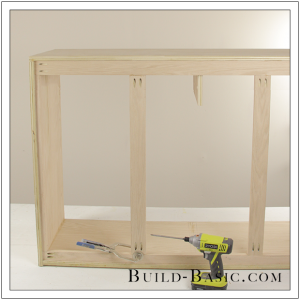
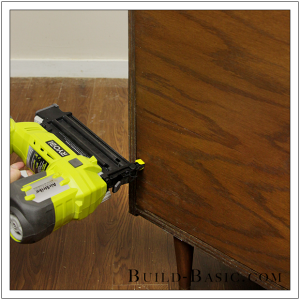
Drill pocket holes at the ends of the 2½-inch-wide Back Support pieces. With the pocket holes facing the back of the assembly, position, glue and screw the pieces into place ¼-inch recessed from the back edge of the walls to allow room for the back panel later on. Finish by nailing the ¾-inch edge pieces using a pneumatic nail gun and 1¼-inch finish nails.

9. Add the Horizontal Divider
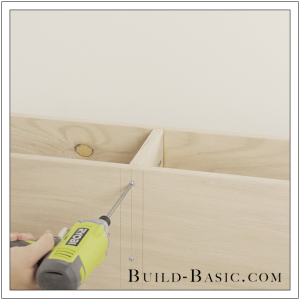
Apply glue to the bottom edge of the Vertical Divider (Upper). Place the Horizontal Divider inside the assembled walls. Butt the Horizontal Divider up against the Vertical Divider (Upper). Drill 3 pilot holes through the underside of the Horizontal Divider and into the bottom edge of the Vertical Divider (Upper). Using 1¼-inch wood screws, secure the center of the Horizontal Divider in place.

10. Level the Horizontal Divider
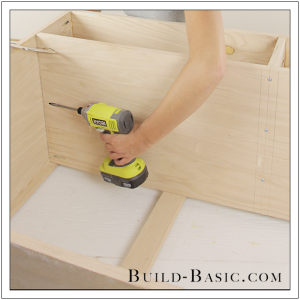
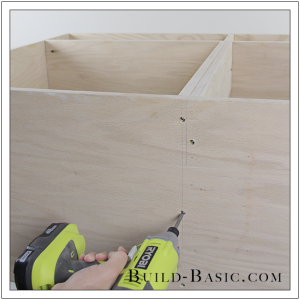
Position and clamp the ends of the Horizontal Divider to the Side Boards equal distance from the Top Board. Using a drill/driver and 1¼-inch pocket hole screws, attach the ends of the Horizontal Divider to the Side Boards.

11. Insert the Lower Vertical Divider
Begin by sandwiching the two Vertical Dividers (Lower) together–with the pocket holes facing outward–using wood glue and several 1¼-inch finish nails. Center the joined Dividers inside the assembly using the marked centerlines. Using a drill/driver and 1¼-inch pocket hole screws, attach the top of each Divider to the underside of the Horizontal Divider. Finish by drilling pilot holes up through the underside of the Bottom Board and into the bottom edge of the Dividers. Secure the bottom edge of the Dividers using 1¼-inch wood screws.

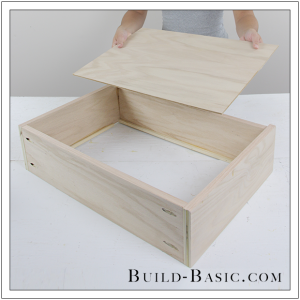
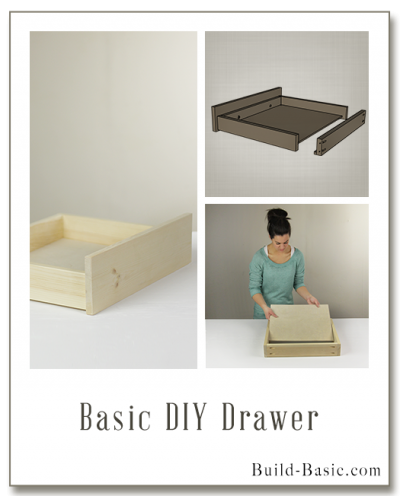
12. Assemble the Drawers
Using the cut list above and my
Easy DIY Drawer Tutorial, assemble both drawers. Set the assembled drawers aside for now.

13.Dryfit the Drawer Fronts and Doors
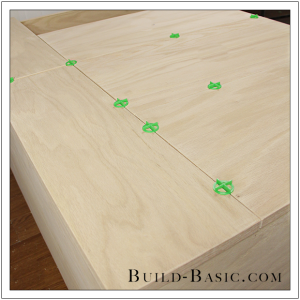
Lay the assembled cabinet on its back, and then rest the Drawer Fronts and Doors in place. To keeps the parts from shifting, clamp the Drawer Fronts flush with the surface and ends of the Top Board using bar clamps. Position and adjust the Doors below.
Jenn’s Tip: Use 1/8-inch tile spacers as placeholders for the necessary expansion gaps between the Doors and Drawer Fronts.

14. Prep and Stain the Parts
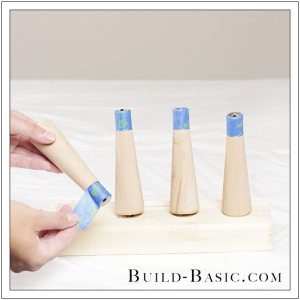
Before inserting the Drawers and attaching the Doors and Drawer Fronts, sand, stain, and polyurethane all the parts. If you’re modifying stock legs like I did, be sure to remove the adjustable footplate with a pair of pliers, and then tape off the metal base of each foot.

15. Attach the Drawer Slides to the Cabinet
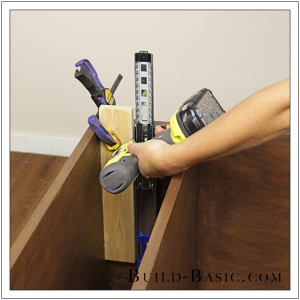
Clamp a spacer block–I’m using 1×3 board with an actual width of 2½ inches–inside the drawer cavity, butted up against the underside of the Top Board. Remove the cabinet section of the drawer slide from each pairing. Hold the Drawer Slide firmly against the underside of the spacer block, and flush with the front edge of the cabinet. Using a drill, make shallow pilot holes at the front, middle and back of the drawer slide. Attach the drawer slide using the screws provided. Repeat to attach one slide to each side of both drawer cavities in the cabinet.

16. Attach the Drawer Slides to the Drawers
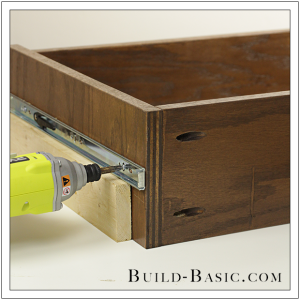
Clamp the spacer block to the side of the drawer, flush with its bottom edge. Place the rail on the spacer block. Position the rail flush with the front of the drawer. Using a drill, make shallow pilot holes at the front, middle and back of the rail. Attach the rail using the screws provided. Repeat to attach the remaining rails to each side of both drawers.

17. Insert the Drawers
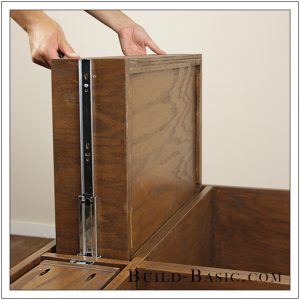
Align the rails on either side of the drawer with the slides inside the cabinet. Lower the drawer evenly into place.

18. Attach the Drawer Faces
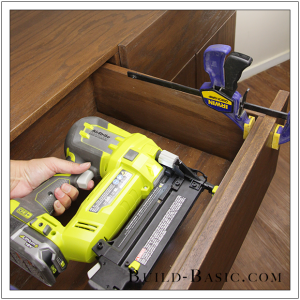
Apply wood glue to the front of each Drawer. Position the Drawer Fronts, and then lightly clamp them in place. Allow glue to dry completely before lifting the cabinet upright. Using a pneumatic nail gun and 1½-inch finish nails, nail through the Drawer and into the Drawer Front to hold the pieces securely in place.

19. Install the Doors
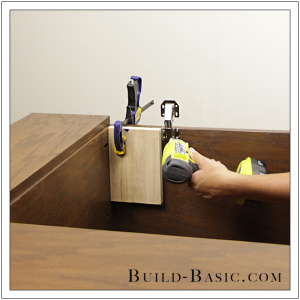
The small expansion gaps between the Doors and Drawers on the face of this cabinet leave little room for error. This means, the installation of the doors can get a bit tricky. With some trial and error, I found the easiest way to get the Doors into position is to first attach the hinges to the cabinet. I used a 1×5 spacer block to position my hinges, as shown. Next, close the hinges, position the Doors, and then clamp the Doors in place against the cabinet. Lastly, reach through the open back of the cabinet and screw the hinges to the backside of each door using the screws provided.

20. Add the Feet
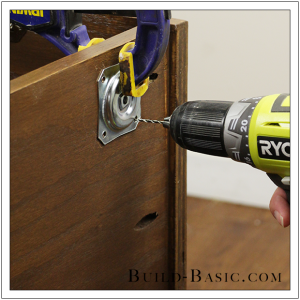
Position the footplates ½-inch from the front and back edges and 2 inches from the ends of the Bottom Board. Drill shallow pilot holes through the plate and into the board. Secure the plates using the screws provided. Twist the threaded rod on each foot into a footplate. Now have a helper lift and set the cabinet on its feet.

21. Drill Holes for the Knobs
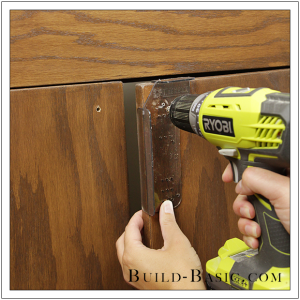
Using an Installation Template, drill pilot holes for each knob into the Doors and Drawers. On our Drawers, I centered the knob on the height of the 8-inch-tall Drawer Front, and brought each knob in 4 inches from the ends. On the Doors, I created my own hole in the template at 1¼-inches from each adjacent edge.

22. Insert the Knob
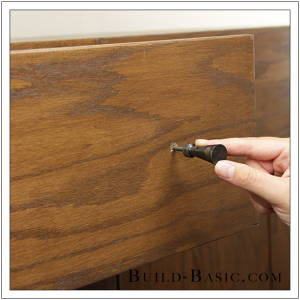
Insert the threaded rod on each knob into the holes. If the knob has a long thread like mine, it’ll work perfectly on the Drawers, but need to be trimmed on the Doors. Trim the rod after installation using bolt cutters or a hack saw, and then lightly file the cut end to get rid of any sharp points. If your knob has a short rod, you can always use a paddle bit to drill a countersink hole inside the drawer so that the nut can make it onto the threads.

23. Attach the Back
Apply wood glue to the backside of each Back Supports. Place the ¼-inch plywood Back Panel onto the Supports. The edges of the plywood should set inside the walls of the cabinet, and be hidden from view. Using a pneumatic nail gun and 1¼-inch inch finish nails, attach the Back by nailing though the plywood and into each of the Supports.

MORE BUILDING PLANS
 2. Prep the Parts






Chelsea
Also could not see where to download the plans?
What Bri's Cooking
Could not download plans. Please help! Thanks,
Free From Burdens
Hi. I clicked on the image to download the plans. Instead, it just changed images. Is there another way I can get the plans? Thanks.