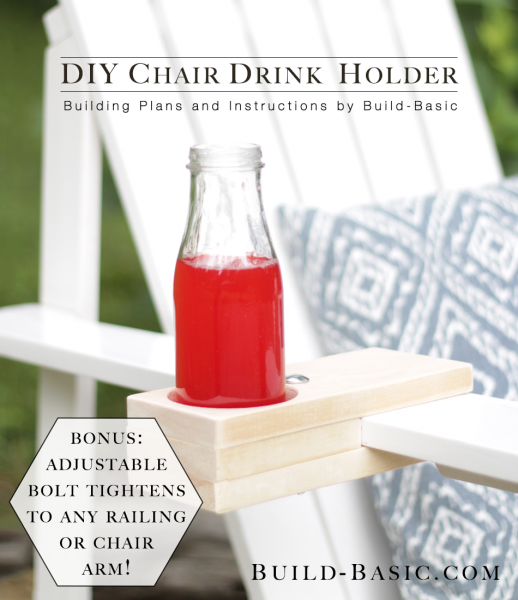
Grab a scrap piece of 1×4 and assemble this simple drink holder in under 15 minutes! With an adjustable wing nut, the holder can clamp onto the arm of just about any chair, or onto a deck railing. Worried about using a hole saw? Check out my tool tutorial or make the cut using a jigsaw.
Pssst: Did you know you can click the image above to reveal Free Building Plans, or the “tabs” below to view the Tools, Materials and Cut Lists for this project? Try it!
Cost: $3
Time: 15 Minutes
Difficulty: Easy. Make three cuts, drill the holes, and then slide a bolt through the parts to hold them together.
1 x 4 – Get a 2-foot board
3-inch 3/8-inch carriage bolt with Washer and Wing Nut
1¼-inch Finish Nails. You’ll only need four.
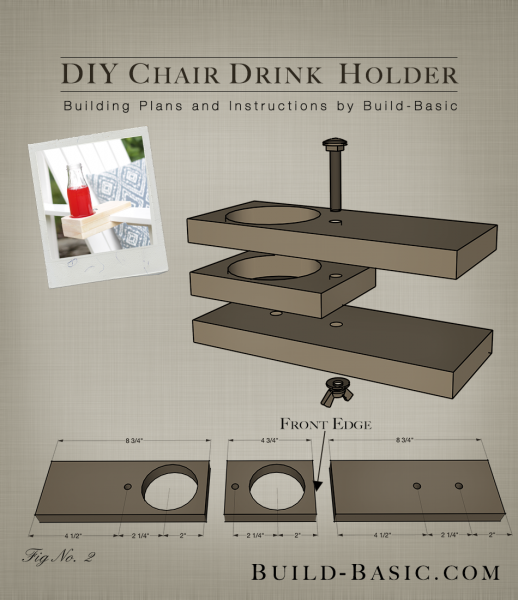
Top Board – 1 @ 8 ¾ inches
Spacer Block – 1 @ 4 ¾ inches
Bottom Board – 1 @ 8 ¾ inches
Steps
1. Prep the Parts
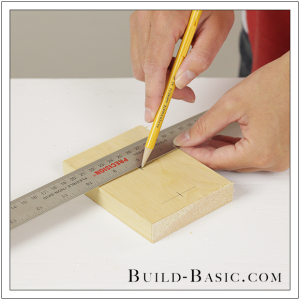
Using the cut list above, cut the pieces to size. On the Spacer Block, mark the location of the pilot 2-inches and 4¼-inches from the front edge of the board.
 2. Drill the Pilot Holes
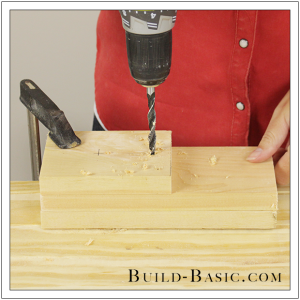
Clamp all the pieces together so that their front edges set flush. Using a drill/driver and a 3/8-inch drill bit, drill into the marks on the Spacer Block, and then through all three boards. (Note: While the Bottom Board doesn’t need a pilot hole for the hole saw, the 3/8-inch pilot hole works nicely as drainage.)

3. Cut the Hole in the Spacer Block
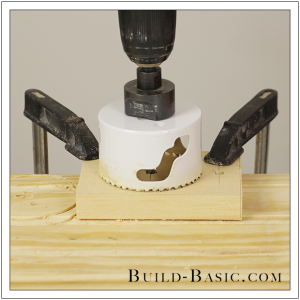
Using two clamps, secure the Spacer Block to the work surface on top of a scrap piece of wood. Place the hole saw’s drill bit into the pilot hole that’s 2 inches from the board’s front edge. Drill through the board, and then remove the cutout.
Tip: Check out my How to Use a Hole Saw tutorial. Alternatively, you could make this cut using a jigsaw.

4. Drill a Hole through the Top Board
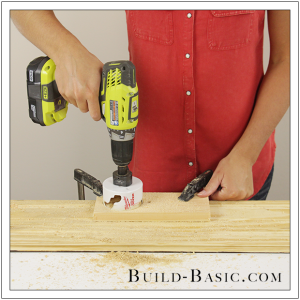
Now clamp the Top Board in place on the scrap piece of wood. Place the hole saw’s drill bit into the pilot hole that’s 2 inches from the front edge of the board. Drill through the board, and then remove the cutout.

5. Attach the Spacer to the Bottom Board
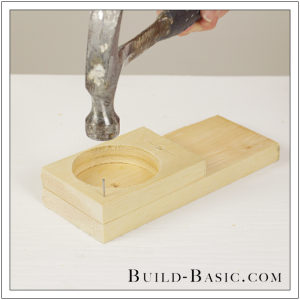
Place the Spacer Block on the Bottom Board, flush with its front edge. Using a hammer, drive 1¼-inch finish nails through the corners of the Spacer Block and into the Bottom Board.

6. Insert the Carriage Bolt
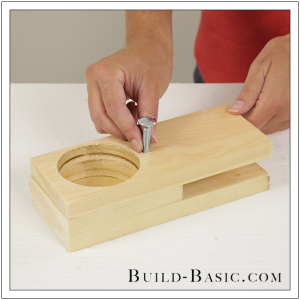
Place the Top Board onto the assembled Spacer Block and Bottom Board. Push the carriage bolt through all three boards, as shown. The Top Board can now be lifted to accomodate the thickness of a chair arm or deck railing up to almost 1½-inches. If the surface is thicker, you can always swap in a longer carriage bolt.

7. Set the Carriage Bolt
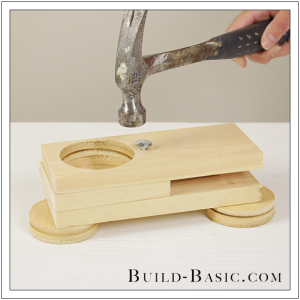
Place the assembly on scrap blocks with the carriage bolt protruding beyond the Bottom Board. Using a hammer, pound the square section of the carriage bolt into the wood to set the bolt and prevent it from spinning.

8. Secure the Carriage Bolt
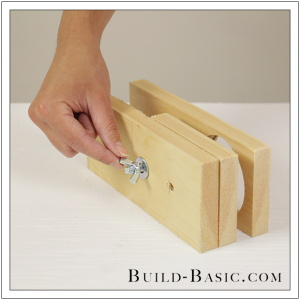
Place the washer and wing nut onto the end of the carriage bolt to finish the assembly.

MORE BUILDING PLANS
 2. Drill the Pilot Holes






Pingback: What to Make This Weekend: Catcus Balloons, a Scarf Top + More
kati@housefulofhandmade.com
Now I just need to adjust it so it can hold a wine glass!
Anonymous
I love all the ideas, thanks
lelobo
Hey Jenn,
Cool quicky project. A great idea for a host gift to a garden party or BBQ someone is invited to this summer. Would’nt cost much either using wood from the cut-off bin or even pallet wood, a bit of personalized detailing geared towards the host and voila.
Great useful idea Jenn, Thanks.
Till next, Ray R.
Anonymous
do you have a plan for a checkerboard