Last week I flew to Florida to team up with one of my very best friends Corey from Sawdust 2 Stitches. You no doubt already know her work, as she’s an amazing woodworker, builder, designer, and stylist. She just finished building a new workshop that’s #goals, and is getting it setup for shooting video of her new projects.
In the past, she has shot everything like the rest of the world, using a tripod. But she has young boys that often play in the shop while she’s working making it pretty hazardous to have a camera perched on a stand, or top-heavy lights that can easily get knocked over.
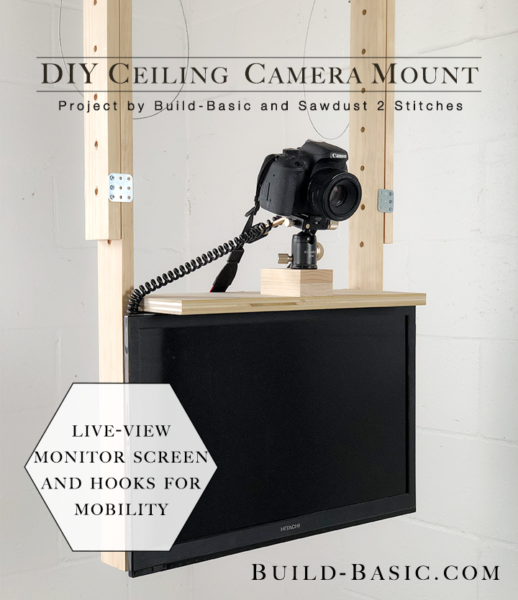
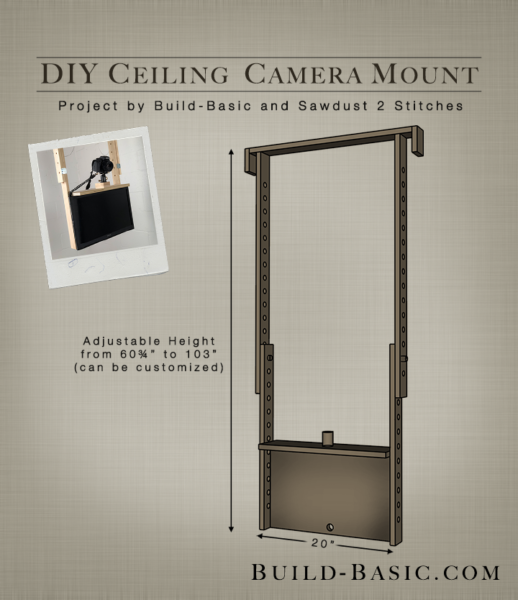
The goal for this project was to give her an option to mount the camera to the ceiling while keeping it mobile if she moves to a different station in the shop. Because her shop has open rafters, we drafted up plans for a mount that would hook across the rafters and hang down to hold her camera and a monitor (so she can see what she’s shooting when she’s working alone). We also created hooks to hang her light boxes, while leaving them connected to the top portion of their stands to maintain their adjustability.
Click below to watch the full project—and all the laughs in between—and subscribe to Sawdust 2 Stitches on YouTube so you can see her new setup in action on upcoming videos!
TIP: Click the image above to reveal the free drawing. Click the tabs below to see the tools, materials and cut list.
Time: 3 Hours
Difficulty: Moderate. The cuts and assembly are straightforward, but drilling the holes takes some precision.
Miter Saw
Circular Saw
Drill Press
Pocket Hole Jig
(1) ¾” Plywood Project Panel
(2) 3/8-inch locking pins
(1) Wire Rope – Get six feet
(4) Wire Rope Clips
(1) Tripod Head
(1) 2½” Threaded bolt (fitted to tripod thread)
(1) Fixed TV Wall Mount and screws
(1) TV with HDMI port
(1) HDMI to mini HDMI cable
1 x 3 Hooks – 2 @ 3 inches
1 x 3 Upper Rails – 2 @ 60 inches
1 x 3 Lower Rails – 2 @ 43 inches
¾” Plywood Camera Shelf – 1 @ 7 x 18½ inches
¾” Plywood TV Plate – 1 @ 13 x 18½ inches
Video


MORE BUILDING PLANS


