


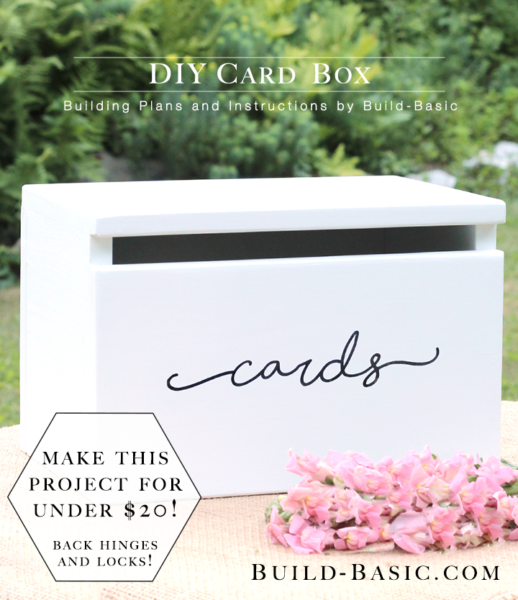
A card box needs to be three things: sturdy, secure and pretty. That last one is optional, but hey, it’s the one décor piece every guest will likely come in contact with! Luckily, you can save you $100+ and build your own using just one board! Customize the box to match your wedding décor, kids favorite character, or elegant party theme. Read on to see how easy it is to assemble the parts!
TIP: Click the image above to reveal the free building plans. Click the tabs below to see the tools, materials and cut list. Click HERE to see an enlarged version of the building plans.
NOTE: This tutorial may contain affiliate links. To see our full disclosure policy, click HERE
Cost: $20
Time: 30 minutes
Difficulty: Moderate. While the pieces are easy to assemble with glue and a few nails, you’ll need to rip their width with a circular saw, jigsaw, or table saw.
Time: 30 minutes
Difficulty: Moderate. While the pieces are easy to assemble with glue and a few nails, you’ll need to rip their width with a circular saw, jigsaw, or table saw.
Note: This list may contain affiliate links
Tape Measure
Tape Measure
Note: This list may contain affiliate links
(1) 1 x 10 x 6′ Board
(1) 2 Inch Butt Hinges
(1) Lock Clasp
(1) Lock (Optional)
1 ¼-inch finish nails
Wood Glue
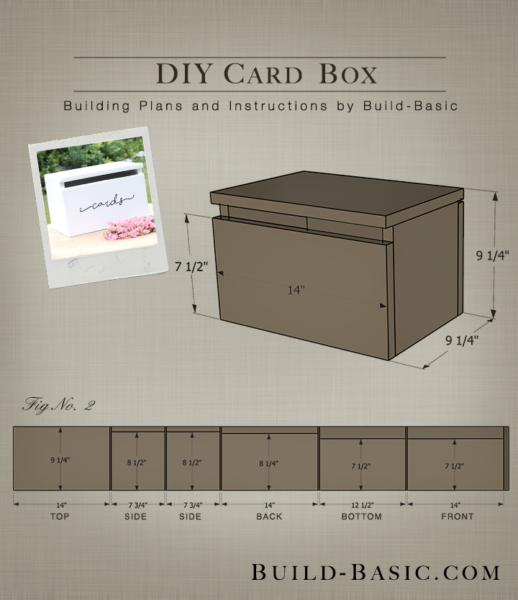
1 x 10 Top – 1 @ 9¼” H x 14″ W
1 x 10 Sides – 2 @ 8½” H x 7¾” W
1 x 10 Back – 1 @ 8¼” H x 14 ” W
1 x 10 Bottom – 1 @ 7½” H x 12½” W
1 x 10 Front – 1 @ 7½” H x 14 ” W
Steps
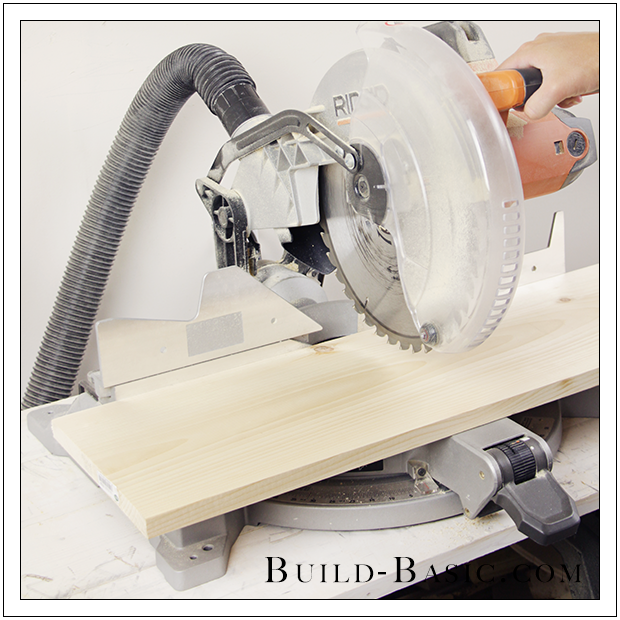
1. Cut the Parts
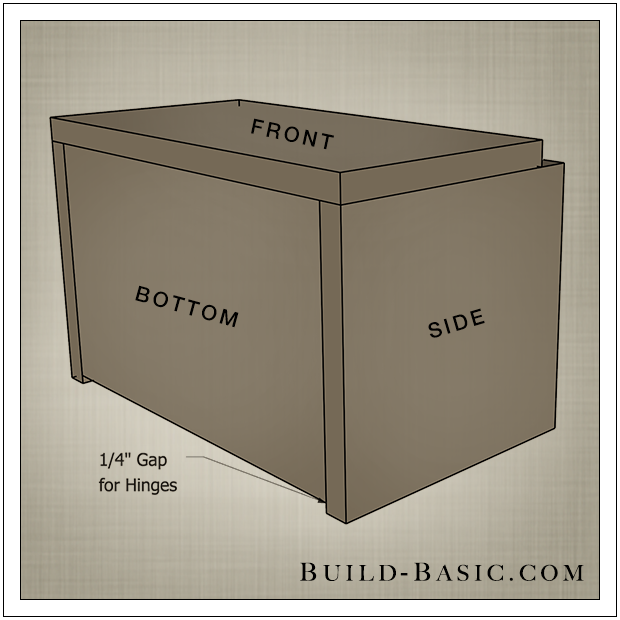
On a 1 x 10 board (actual dimensions of 72″L x 9¼”W x ¾”D), mark the cuts according to the diagram on the building plans above. Note: To view the Building Plans, click the main image. Cut all the sections to length before using a miter or circular saw to rip their width.
Tip: To account for the material lost due to the thickness of your saw blade, always measure mark and cut each line before measuring and marking your next cut.

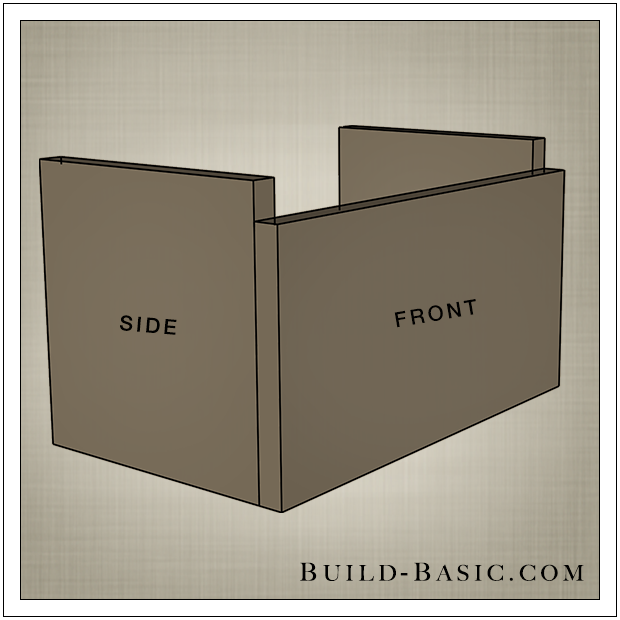
2. Assemble the Sides and Front
Stand the Sides upright, and then position the Front against the panels as shown. The top edge of the Front should rest one inch below that the height of the Sides—this will create the slot for the cards to slip into the assembled box. Apply wood glue to the edge of the Sides, and then position the Front Panel. It may be easier at this point to set the Sides on their back edge, and rest the Front on top. Using a pneumatic nail gun and 1¼-inch finish nails, nail through the Front and into the Sides to hold the pieces in place.
3. Attach the Bottom
Place the Bottom Panel between the Sides, butted against the Front Panel—This will create a ¼-inch gap near the back for the hinges to be installed later. Apply wood glue to the edges of the Bottom Panel, position it in place, and then nail through the Sides and Front with 1¼-inch finish nails to secure the Bottom in place.
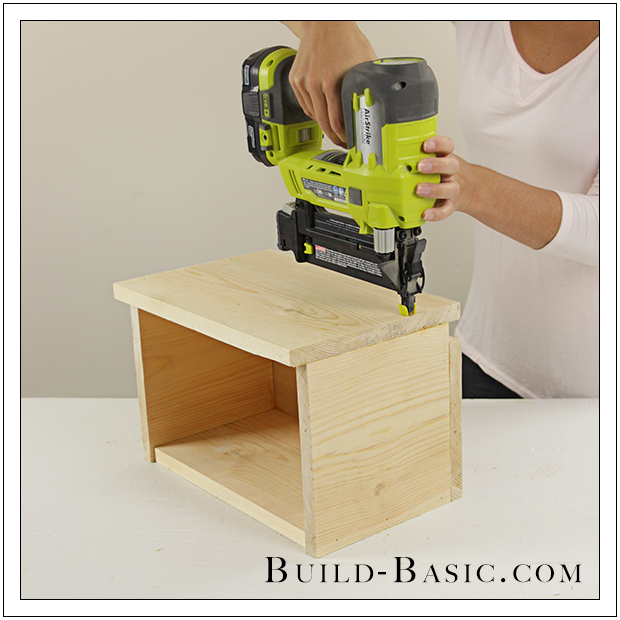
4. Mount the Top
Apply wood glue to the top edges of the Side Panels. Place the Top Panel onto the assembly. Slide the Top forward until the front edge overhangs the Sides ¾-inch, and sets flush with the face of the Front Panel. Nail through the Top and into the Sides to secure the Top Panel in place.
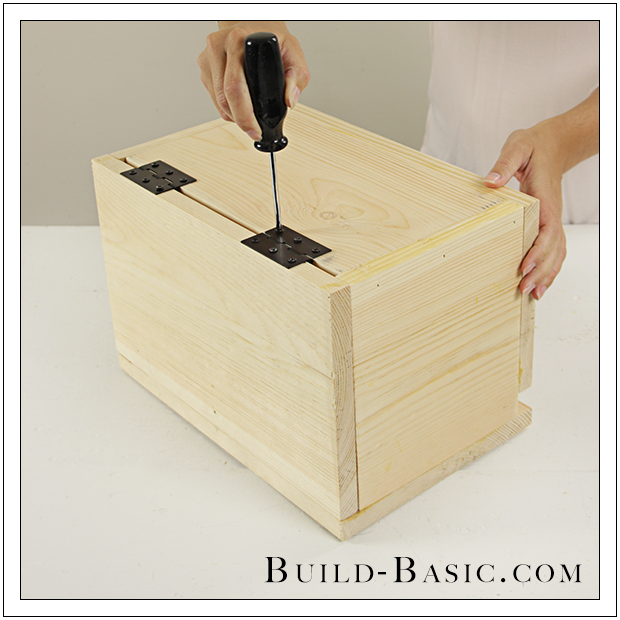
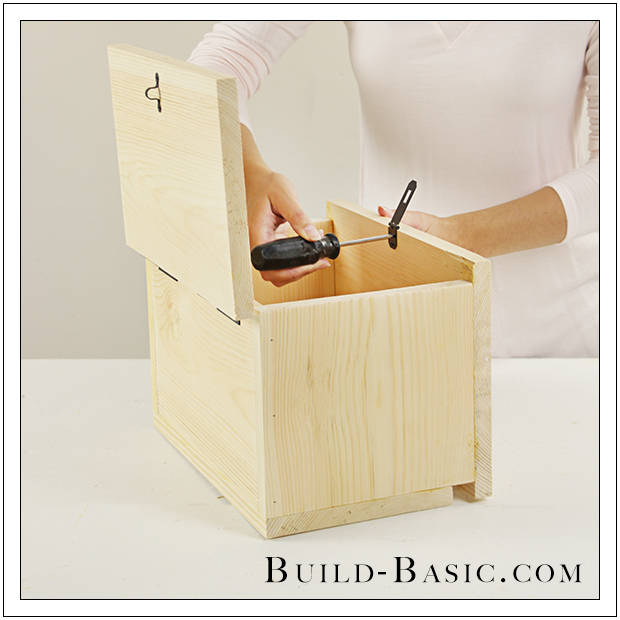
5. Secure the Back with Hinges
Place the Back Panel onto the assembly to that its bottom edge sets flush with the underside of the assembled box. Secure the Back with painters tape, if needed. Place the hinges onto the bottom of the box about one inch from the edges of the Bottom Panel. Position the knuckle of the hinge resting downward into the ¼-inch gap between the Bottom and the Back. Predrill pilot holes, and then secure the hinges with a screwdriver and the screws provided.
6. Attach the Latch Hook
Place the hinged latch onto the assemble box with its mounting plate sandwiched between the top edge of the Back Panel and the underside of the Top Panel. Center the latch. Position the latch hook inside the hole in the latch, and then remove the latch. Secure the latch hook using a screwdriver and the screws provided.
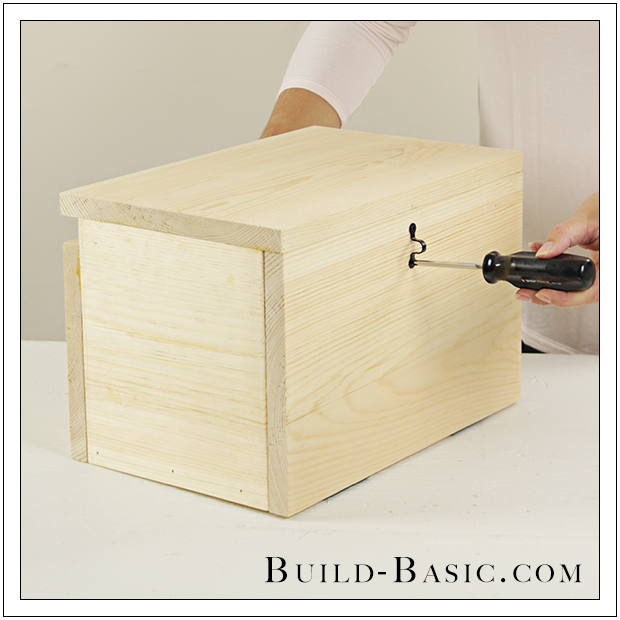
7. Secure the Latch Plate
Reposition the latch plate, and then open the hinged Back Panel. Secure the latch plate to the underside of the Top Panel using a screwdriver and the screws provided. Close the Back Panel and add lock, if desired.
MORE BUILDING PLANS


