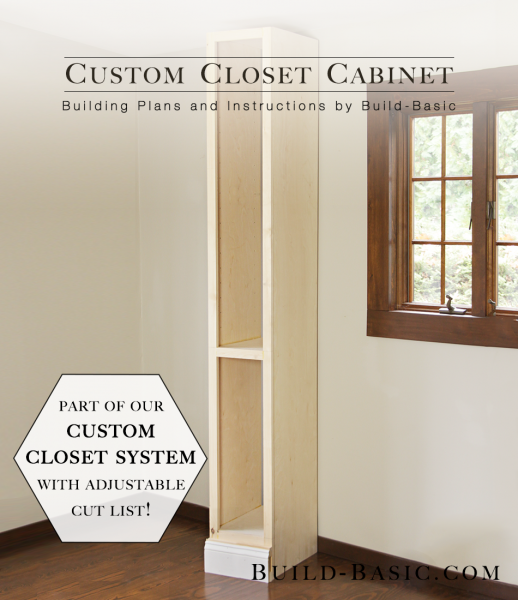
Welcome to The Build Basic Custom Closet System! In this Series, I’m showing how to make a handful of simple DIY components that come together to create a functional, beautiful custom closet space. Even better is that ALL of the cut lists are adjustable so you can quickly and easily pick and choose the type of storage you need, and size it to fit your space!
In this first tutorial, I’m showing how to create a simple “cubby” that can house add-ons like like adjustable shelves, hanging rods, a tilt-out hamper, and a pull out shoe organizer. I also have plans for an easy hideaway ironing station and built-in closet drawers that don’t require a table saw or router! Click around to see which organization options you’d add to your dream closet!
This post is sponsored by PureBond Plywood, the makers of the beautiful formaldehyde-free plywood I’m using to build this project. To learn more about their great products and how this series came about, click HERE.
NEW! Download the Plans!
Plans are split into Part One and Two
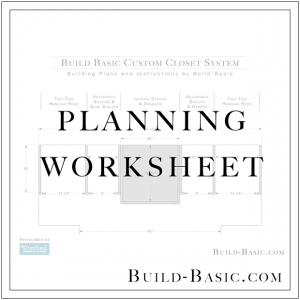
The Build Basic Custom Closet System
Series Introduction
Basic Closet Cabinet
Adjustable Shelves and Hanging Rods
Tilt-out Hamper
Pull Out Shoe Organizer
Hideaway Ironing Station
Built-in Closet Drawers (the easy way)
TIP: Click the tabs below to see the tools, materials and cut list.
Time: 2 hours
Difficulty: Easy. If you have the plywood sheet cut into strips at the store, then it’s all about drilling pocket holes and screwing the pieces together.
*We cut our 4′ x 8′ plywood into three 16-inch-wide strips to create cubbies walls with an interior depth of 16-inches.
¾-inch Plywood Cubby Walls – 2 @ 16″ Deep x 2 inches less than the Closet Height
¾-inch Plywood Cubby Shelves – 3 @ 16″ Deep x The Interior Width of the Cubby
1 x 2 Face Frame Stiles – 2 @ – 2 @ Height of the Cubby Walls
1 x 2 Face Frame Rails – 3 @ – Distance between the Face Frame Stiles
1 x 2 Padding – 2 @ Total Width of Cubby and Face Frame
5¼-inch Baseboard – 1 @ Total Width of Cubby and Face Frame
Steps
1. Layout the Cubbies
Measure the width of the closet and then separate it into usable “openings” that will set between the Walls of each Cubby.
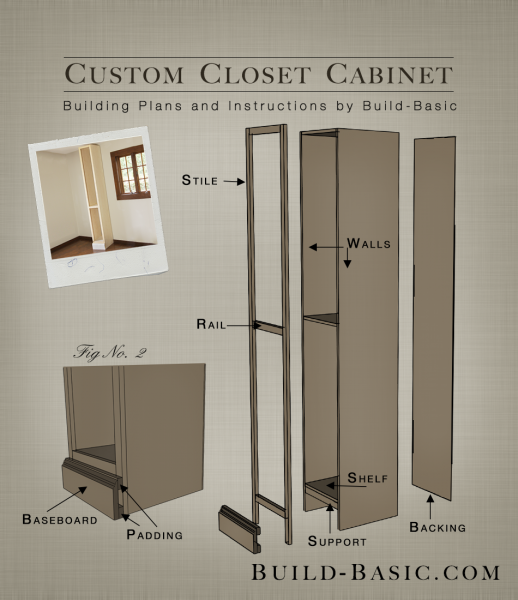
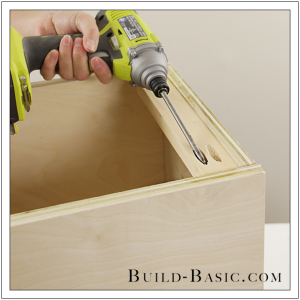
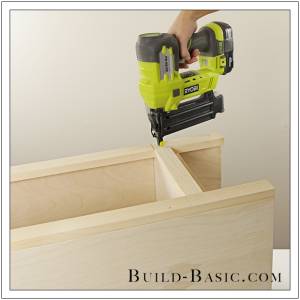
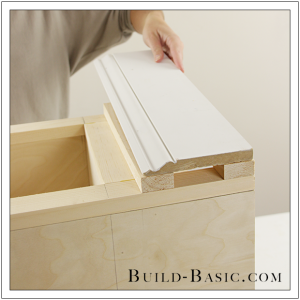
HERE is a layout of my closet, for reference. Now “cap” the front edge of each Wall with a 1 x 2 –these are the Face Frame Stiles seen in the opening image. Typically these boards are
centered on the thickness of each Wall, but in my design, I made a few adjustments to account for the bump out in the center of the closet, and to gain maximum usable space in the Cubbies that set against the ends of the closet.
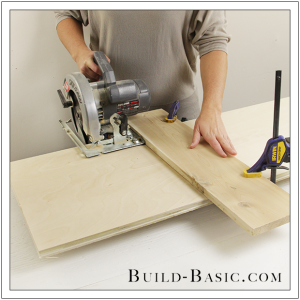
 2. Cut the Height of the Cubby Walls
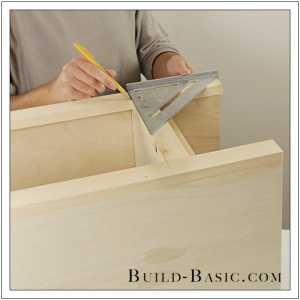
To mark the height of the Cubby Walls, measure from the bottom edge of the plywood to the height of the Wall at both the front and the back of the panel. Using a framing square, mark a line across the two measurements, double-checking that the marked line runs perpendicular to the edges of the panel. I cut the height of my walls 2 inches shorter than the full height of the closet so I could tip the Cubby into place once assembled. If you don’t have a table saw for this step, use my easy
DIY Cutting Fence (shown) to cut a perfectly straight line across the panel.
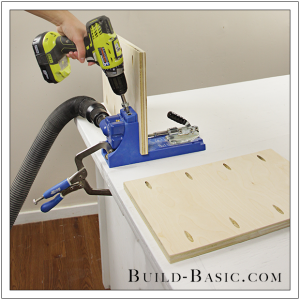
3. Prep the Shelves
Each Cubby has three stationary “Shelves” to hold the Walls in place. Beyond the stationary pieces, adjustable shelves and other add-ons can be installed. To prep the shelves for installation, drill four pocket holes along the side edges of each Shelf. Wondering how to use a Kreg Jig like mine? Watch my
video tutorial.
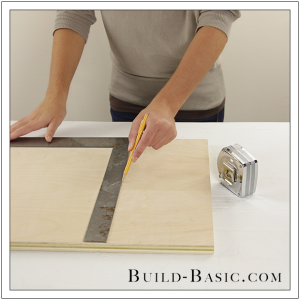
4. Mark the Height of the Shelves
Mark the height of the Shelves on the inside face of each Wall, always measuring from the bottom edge of the Wall to stay consistent. These lines also act as a guide during installation to make sure the shelves stay level. For reference, my bottom Shelf is 7-inches from the base of my panel–This accounts for the height of my baseboard assembly and Face Frame. The middle Shelf can either be placed at 38-inches to accommodate my
tilt-out hamper or
pull out shoe shelf designs, or centered between the top and bottom shelves to create a
two-tier hanging rack. My top Shelf runs flush with the top edge of the panel, so there’s no need to mark it in this step. If you’re installing
adjustable shelves, it’s best to drill the holes before assembling the Cubby. Click
HERE to see how.
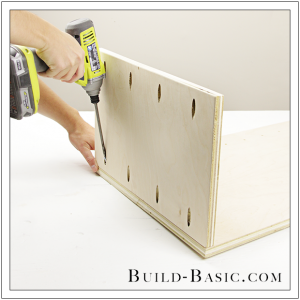
5. Install the First Shelf
Apply wood glue to one edge of the bottom Shelf, and then place it below it corresponding line. I’m using a Kreg Right Angle Clamp to hold the Shelf in place while I drive the 1¼-inch pocket hole screws through the Shelf and into the Wall to hold the Shelf securely in place.
6. Install the Remaining Shelves
Install the middle Shelf in the same way as the bottom Shelf, with the pocket holes facing downward. To install the top Shelf, flip the shelf over so that the pocket holes are facing upward, and then position the Shelf flush with the top edge of the Wall. Drive the pocket hole screws through the Shelf and into the Wall to secure the pieces in place.
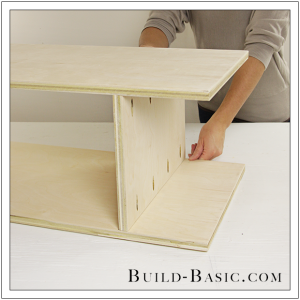
7. Add the Second Wall
Apply wood glue to remaining side edge of each Shelf. Flip the assembly onto the remaining Wall. Alight the Shelves with the lines on the Wall, and then screw them into place using pocket hole screws.
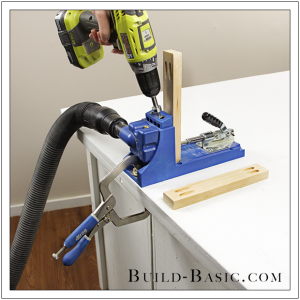
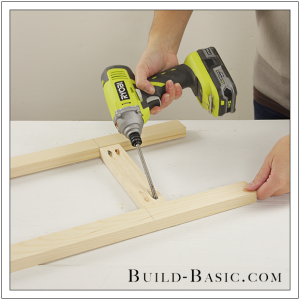
8. Prep the 1 x 2’s
Cut the 1 x 2 Face Frame pieces and Supports to length. Using a pocket hole jig, drill two pocket holes at the ends of each of the Face Frame Rails, and both Supports.
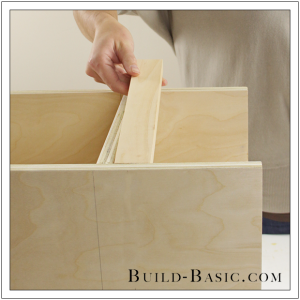
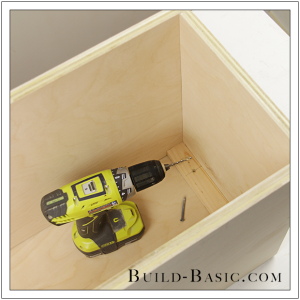
9. Install the Bottom Support Piece
Installing 1 x 2 Supports will help prevent the Cubby from “racking”, or leaning to the side. To install the bottom Support, apply wood glue to the ends and top edge of a 1 x 2 board cut to the inside width of the Cubby. Position the piece below the bottom Shelf between the Cubby Walls, as shown. Using a drill/driver, screw the Support piece into place using 1¼-inch pocket hole screws.
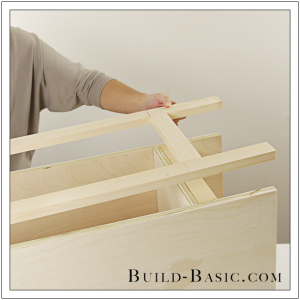
10. Install the Top Support Piece
Position the top Support piece so that it sets along the back edge of the Cubby, flush with the underside of the top Shelf. Adjust the block so that its pocket holes are facing the back of the Cubby. Screw the 1 x 2 into place.
11. Mark the Face Frame Rails
Lay the vertical Face Frame Stiles onto the front edge of the assembled Cubby. Use a piece of masking or painter’s tape to temporarily hold the boards in place. Place the horizontal Face Frame Rails between the Stiles so that the top edge of each Rail rests flush with the surface of its corresponding Shelf. Using a speed square, mark the top edge of each Rail on both Stiles. Now remove the pieces and transfer the lines to the backside of the Stiles using the speed square.
12. Install the Face Frame Rails
Lay all the Face Frame pieces flat on the work surface facedown. Apply glue to both ends of each Rail, and then place them between the Stiles, aligned the marks made in Step 11. Drill pocket holes screws through the Rails and into the Stiles to assemble the Face Frame.
13. Position the Face Frame
Flip the assembled Face Frame over so that the pocket holes are on the backside. Apply wood glue to the front edge of the Cubby Walls and Shelves. Place the Face Frame onto the Cubby.
14. Attach the Face Frame
Using a pneumatic nail gun loaded with 1¼ -inch finish nails, secure the Face Frame to the Cubby Walls and Shelves. Wipe away any excess glue.
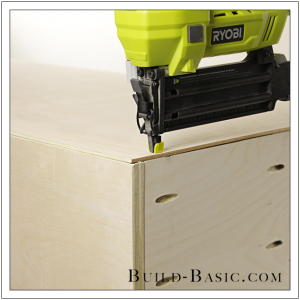
15. Attach the Back
Using a pneumatic nail gun loaded with 1-inch finish nails, secure the ¼-inch plywood back to the back edge of the Cubby Walls and Shelves.
16. Install the Cabinet
To prep the Cubby for installation, locate and mark the placement of the closet’s wall studs on your drawing, and then measure and mark them on the back 1 x 2 Support inside each Cubby. Drill pilot holes, and then insert 2-inch screws into the holes. Once all the Cubbies are assembled, tip them into place, and then drive the 2-inch screws through the Supports and into the wall to anchor the Cubbies against the back wall of the closet.
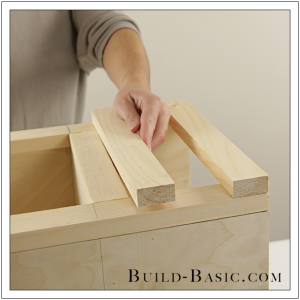
17. Attach the Baseboard Padding
To create a more substantial “foot”, and make the Cubbies look built-in, I’m padding out the baseboard using 1 x 2’s. I’m demonstrating this on a single Cubby, but ideally the padding and Baseboard would both be installed once the Cubbies are joined and installed in the closet. To install the Padding, I’m simply nailing two 1 x 2’s to the Face Frame–one level with the bottom edge of the lowest Rail, and the other flush with the bottom edge of the Stiles.
18. Attach the Baseboard
Again, if you’re assembling multiple Cubbies, it’s best to hold off on this step until they are joined and installed, but for reference sake, the Baseboard will set flush with the floor and create a ¼ inch reveal on the upper 1 x 2 Padding, as shown. To install, nail through the Baseboard and into the Padding using 1¼-inch finish nails.
MORE BUILDING PLANS


Rebecca Flores
I would recommend acrylic enamel
Magz
What kind of paint do you use for the finished product? The paint I choose dries fine, but if I were to place a cup or a mug on top of a shelf for example, it “sticks” to it.