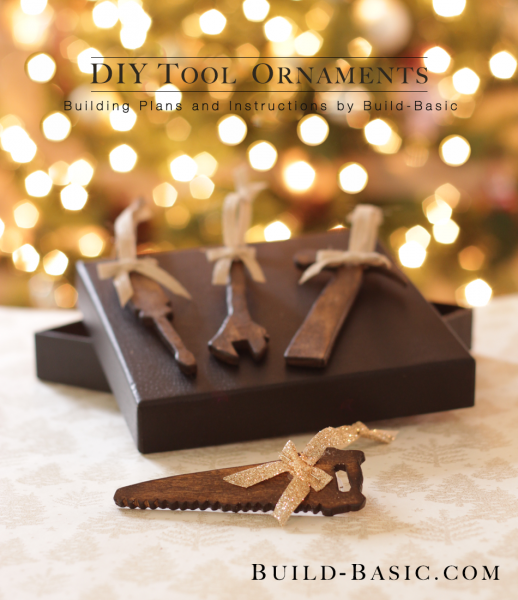
Add an authentic DIY twist to your décor, or gift the DIY’er on your holiday list this year with these handmade Tool Ornaments. All you need is a jigsaw and a ¼-inch-thick “hobby board” found at most home centers and craft store! (Oh yeah, and a drill to make a hole for the ornament hanger.) The best part is that the ornaments are petite, so even if you are terrible at following a line with a jigsaw (like me!) you can still pull these off and look like a pro.
TIP: Click the tabs below to find our free downloadable template, and to see the tools and materials lists.
Cost: $4
Time: 1 hour
Difficulty: Moderate. The cuts are easy, but taking it slow is key.
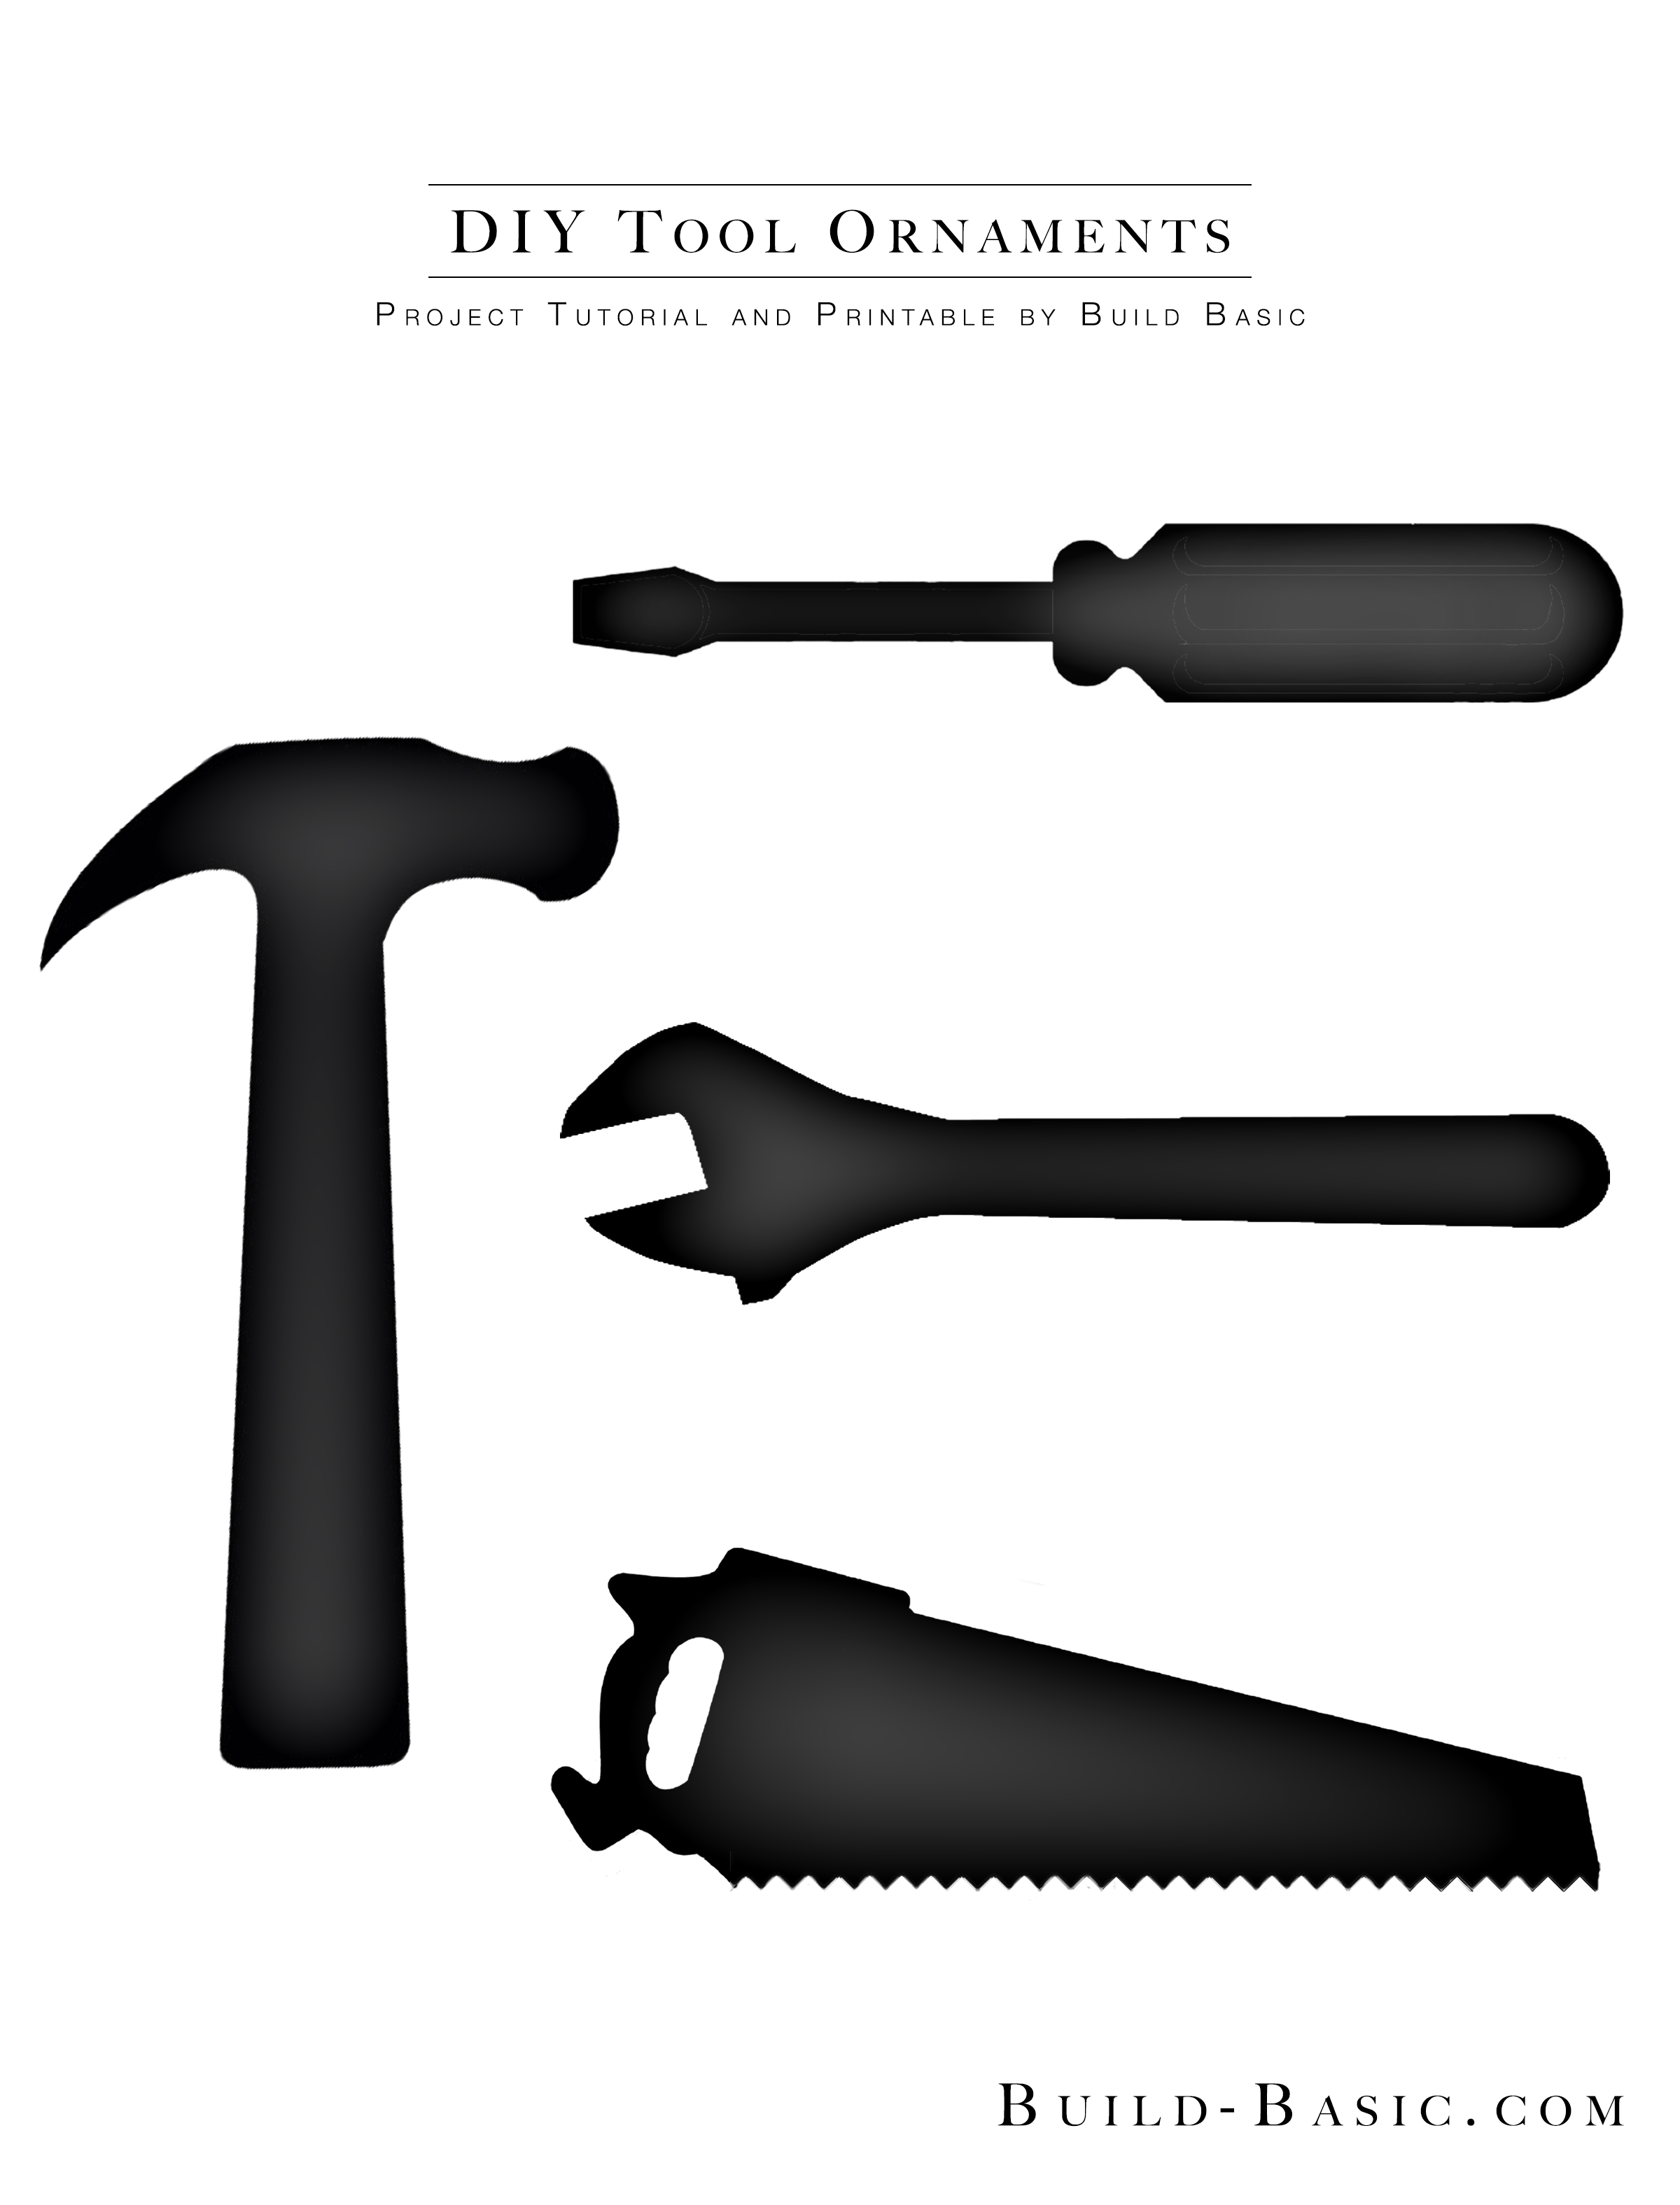
Download our Free Template
HERE. For best sizing and quality, “Save” the template to your computer, and then print.
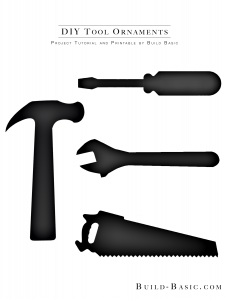
DIY Tool Ornaments Free Printable Template by @BuildBasic www.build-basic.com
Steps
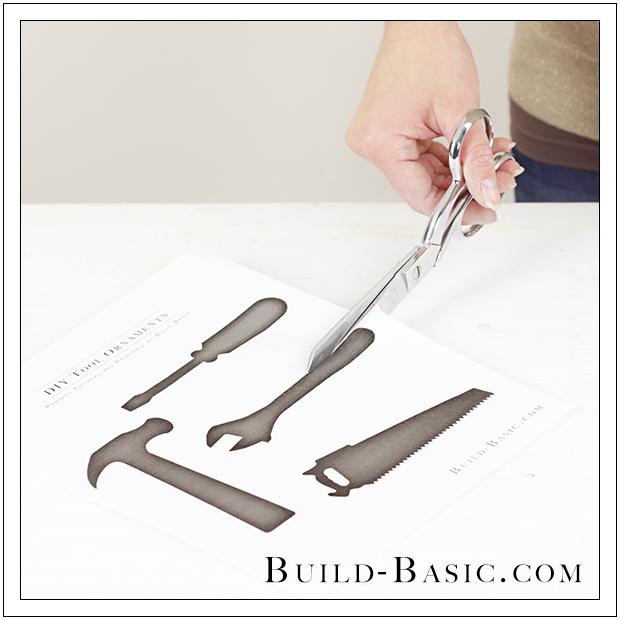
1. Print and Cut our Template
Download our
FREE TEMPLATE. Using scissors cut out each tool drawing.
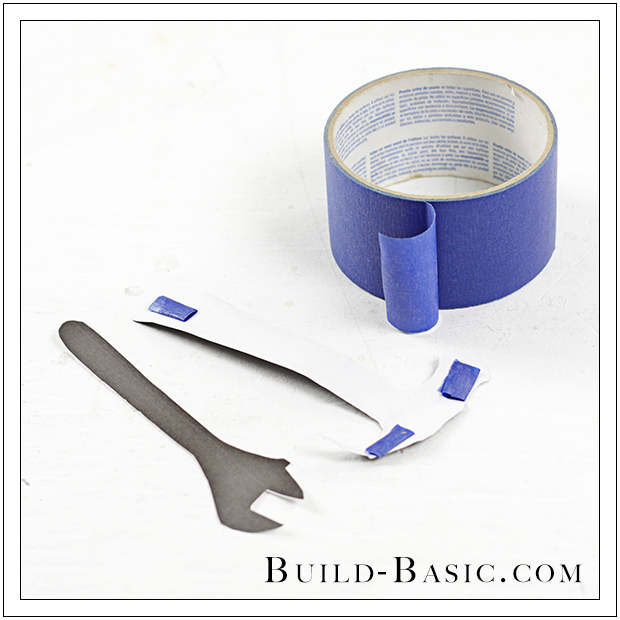
 2. Prep the Drawings
Roll up small pieces of tape, and then press them onto the back of each cutout.
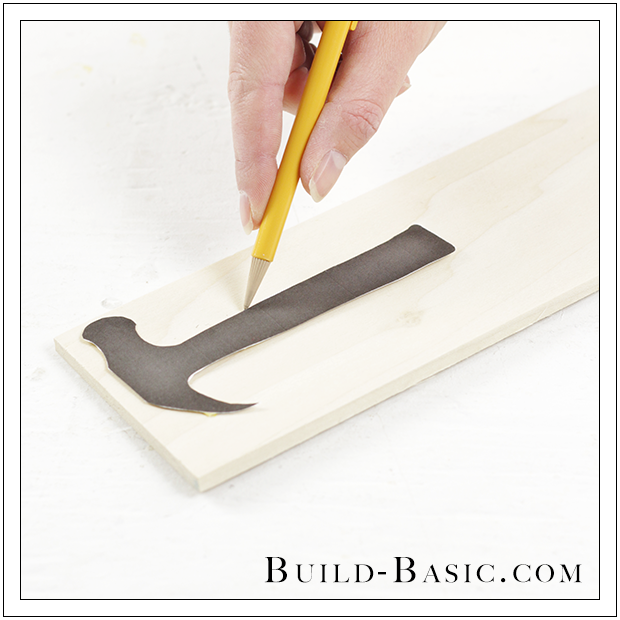
3. Position and Trace the Cutouts
Place the first template on the ¼” x 4″ board. If there’s a curvy end, like the top of the hammer, place that towards the end of the board so you can work on it first. To get warmed up, begin with the more simple designs, like the Hammer or Screwdriver, and then work your way up to the more difficult Handsaw. Trace the template onto the board, and then remove the paper and tape.
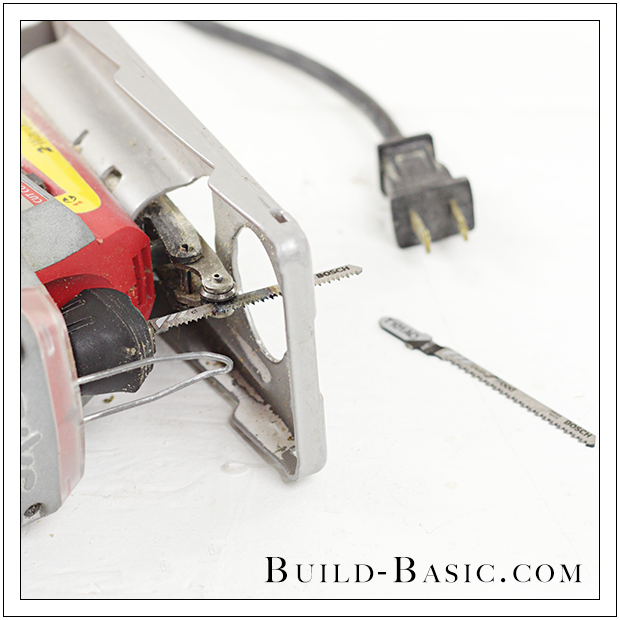
4. Prep the Jigsaw
Since most of the tools have small curves, swap out your regular jigsaw blade for a small scrolling blade ours (See link in our Tool List above).
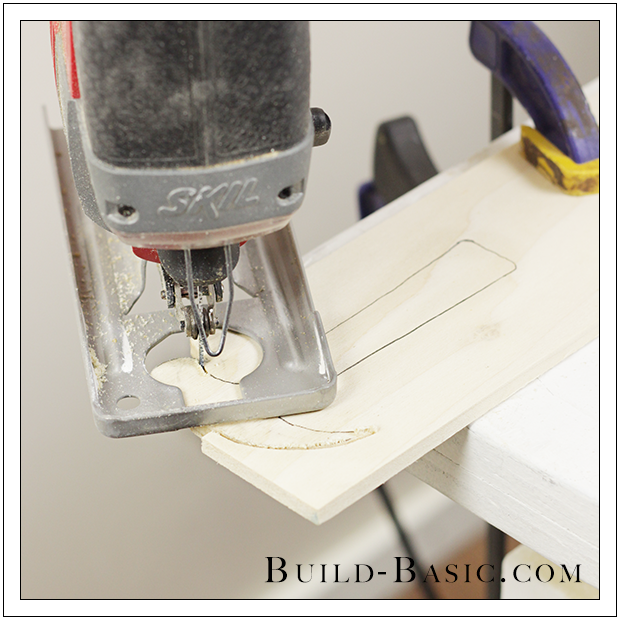
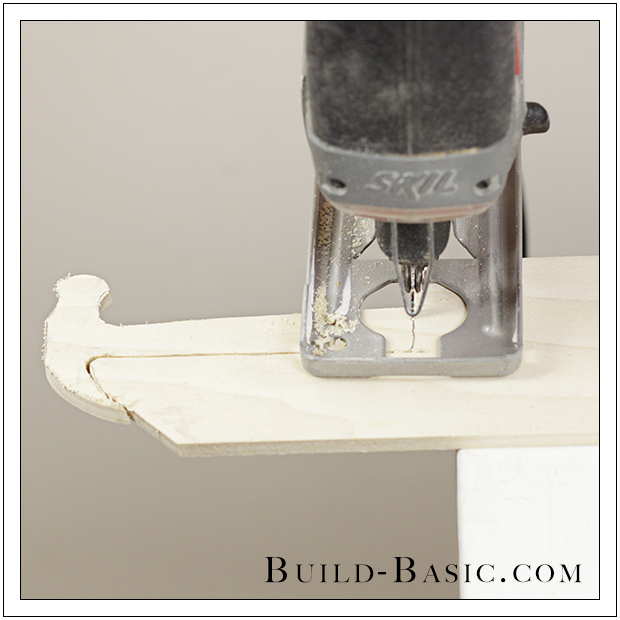
5. Begin Cutting the Outline
Using a jigsaw, begin trimming along the intricate parts of the design. It’s easiest to make these cuts while the majority of the design is attached and supported by the board. Finding a way to clamp the small ornament to the work surface after it’s been removed from the board can be more difficult.
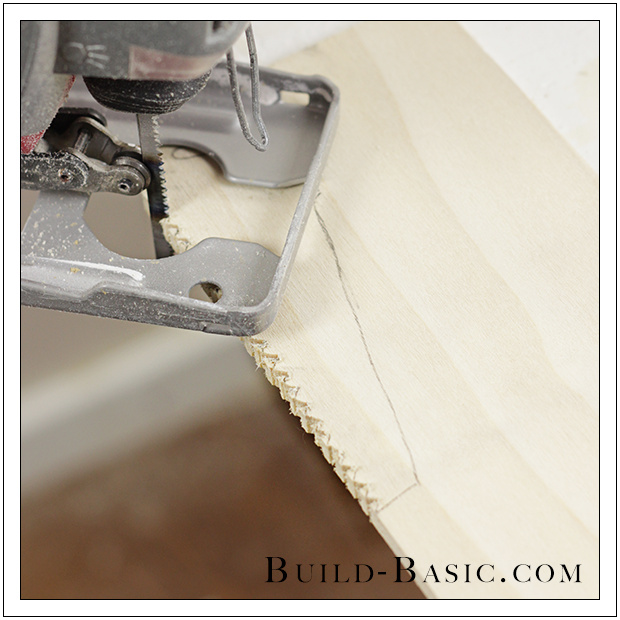
6. Finish Cutting the Outline
Once all the intricate parts of the ornament are cut out, make the final cut to remove the ornament from the board.
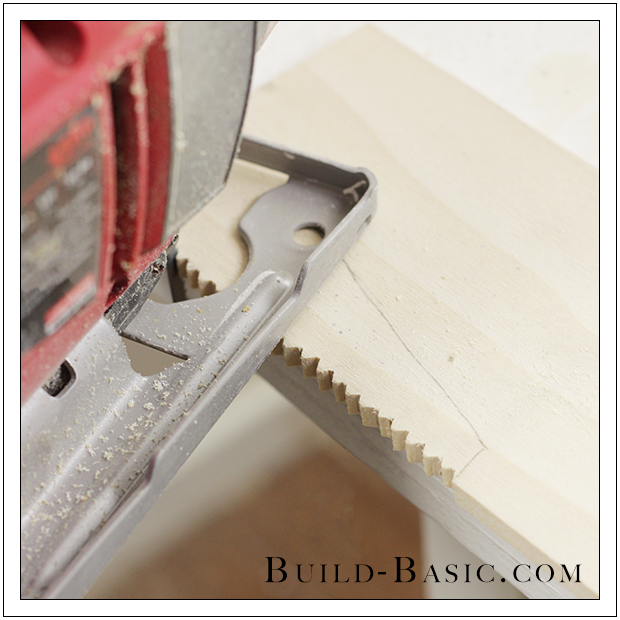
7. Begin Cutting the Saw’s Teeth
To cut the teeth on the saw’s blade, cut a series of parallel slanted slots.
8. Finish Cutting the Saw’s Teeth
To complete cutting the saw’s teeth, cut a second series of angled slots in the opposing direction as Step 7 to remove a wedge and create each tooth. As you can see, my teeth aren’t perfect, but the ornaments are so small that errors quickly fade in favor of the overall shape–so don’t stress about mistakes!
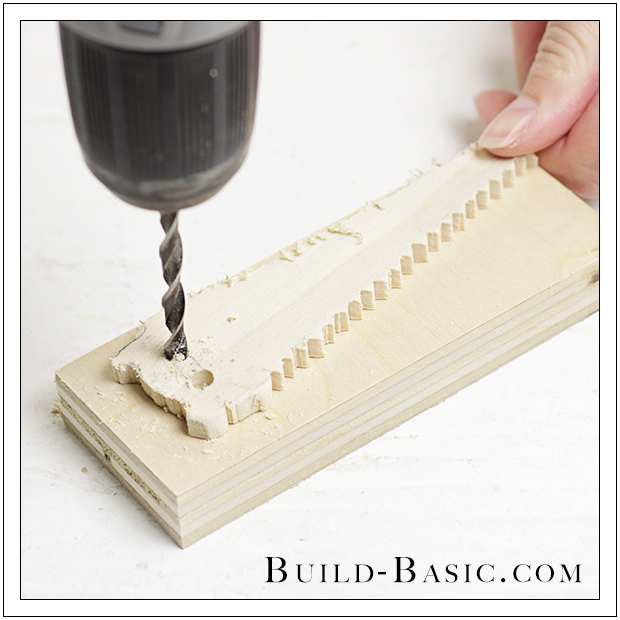
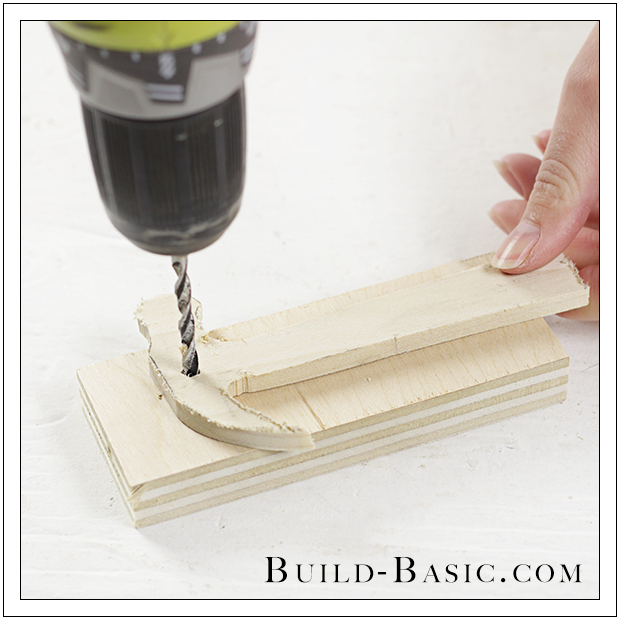
9. Cut the Saw’s Handle
To create the rounded ends of the Saw’s handle cutout, drill a hole at each end inside the outline. Place a scrap block below the ornament to reduce splitting on the backside. Lastly, use the jigsaw to cut between the holes and create the handle detail.
10. Drill Holes for the Ribbon
To create a place for the ribbon or wire hook to attach to each ornament, carefully drill a small hole through the ornament. Once again place a scrap block below each ornament to reduce splitting on the backside.
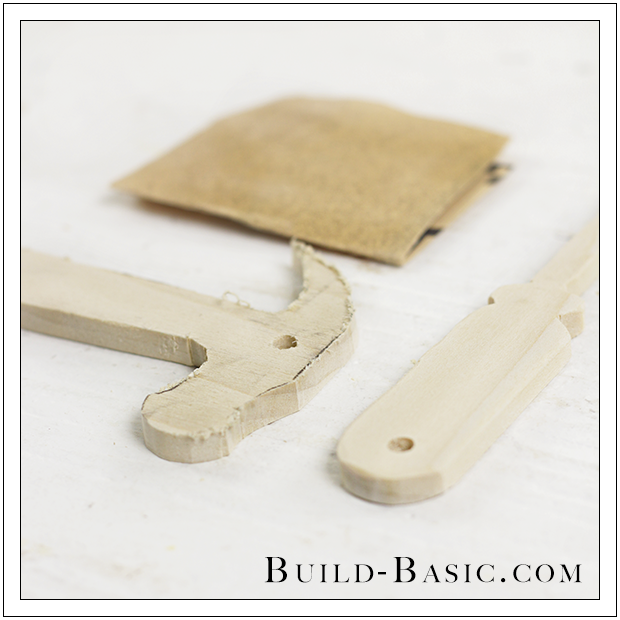
11. Finish the Ornaments
Clean the look of each ornament by sanding the edges smooth with sandpaper or a sanding sponge. Apply a coat of paint or stain, followed by a clear coat to protect the ornaments for years to come. Finish by adding a ribbon or wire hook.
MORE BUILDING PLANS


Katie
So cool! I am going to have to give this a go for net year. Ornaments are so expensive!
Jenn Post author
Katie,
I know! Ornaments at the store are ridiculously expensive! Glad you like the project! –Jenn
Heather
These are AWESOME – found you via Pretty Handy Girl on FB. So cool. Have a great holiday!