


NOTE: This tutorial is sponsored by Kreg Tool. All opinions are my own. This post may contain affiliate links. To see our full disclosure policy, click HERE
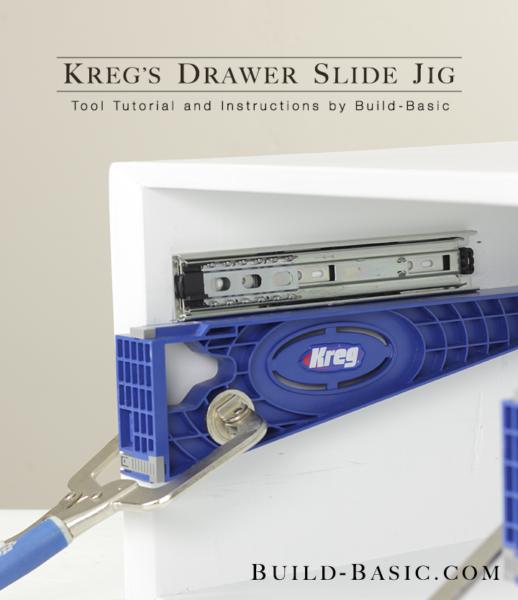
Installing drawer slides alone can be a pain. There’s just no good way to level, hold, predrill, and install them with only two hands. Enter the simplicity of Kreg’s Drawer Slide Jig. With a face that can be clamped directly to the inside of a drawer opening to hold the slide in place, and then repositioned outside the opening to hold the drawer while the drawers are installed in place. That means no more installing the parts of the slide separately and then hoping they match up. Score. Check out how I used the jig to install new drawer slides on my DIY Mid-Century Nightstand.
Cost: About $25
Time: 3 Minutes to Set Up
Difficulty: Easy. Just clamp the jigs to the inside walls of the drawer opening, and the set the slide in place. Reposition the jigs to the outside of the opening to hold the drawer in place for installation.
Time: 3 Minutes to Set Up
Difficulty: Easy. Just clamp the jigs to the inside walls of the drawer opening, and the set the slide in place. Reposition the jigs to the outside of the opening to hold the drawer in place for installation.
Note: This list may contain affiliate links
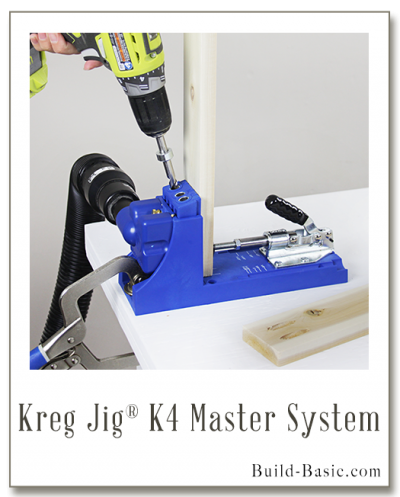
Kreg Jig Drawer Slide Jig
Kreg Jig Drawer Slide Jig
Note: This list may contain affiliate links
Drawer or Door Face
None
Steps
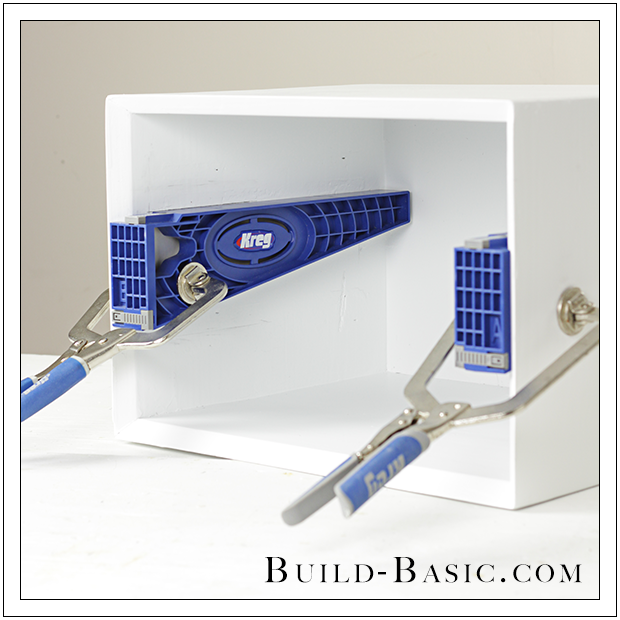
1. Position the Drawer Slide Jigs
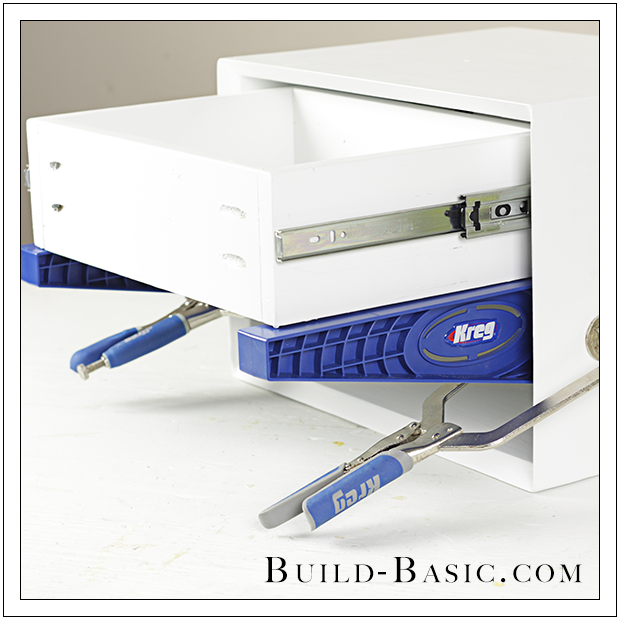
Mark the height of the drawer slides inside the opening. Place the jigs along the inside wall, and then clamp in place. Rest the lip of each jig along the front edge of the opening to ensure its top edge runs level from front to back. If you’re working with a face frame, you can also clamp to the backside of the face frame for a leveling edge.

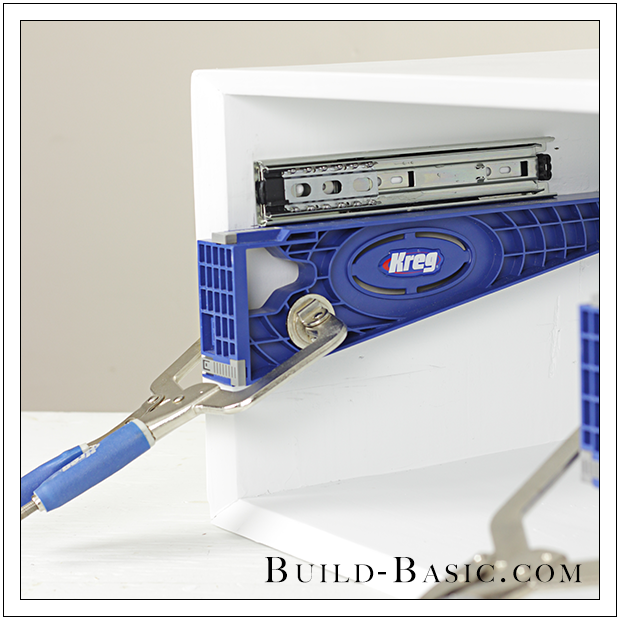
2. Place the Drawer Slide
Rest the drawer slide on the jig. If working with an inset drawer face like mine, recess the slide back from the front edge of the opening a distance equal to the thickness of the drawer front.
3. Install the Drawer Slide
Extend the drawer slide as needed to expose the mounting holes. Using a drill/driver and the screws provided, secure the drawer slide.

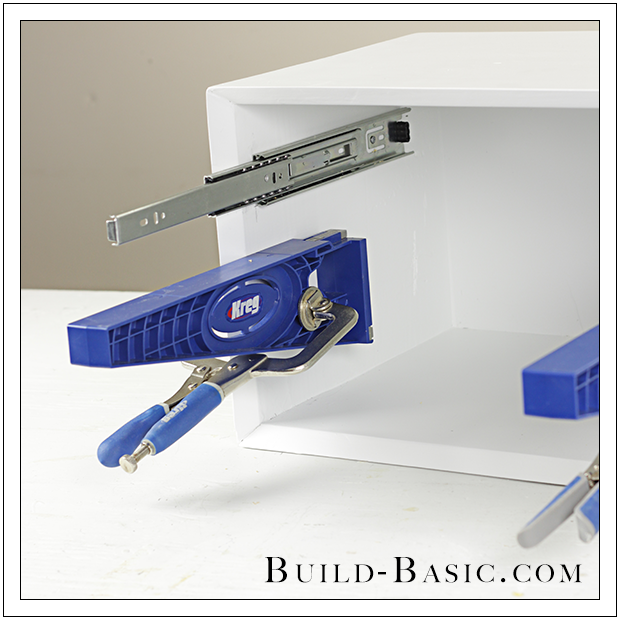
4. Reposition the Jigs
Unclamp the jig and flip its leg outward. If working with a face frame, you can easily just clamp the jig to the face frame and it will hold level. For my installation, I marked a level line below the drawer slide where I wanted to position the base of the drawer, and then clamped the jig along the line.
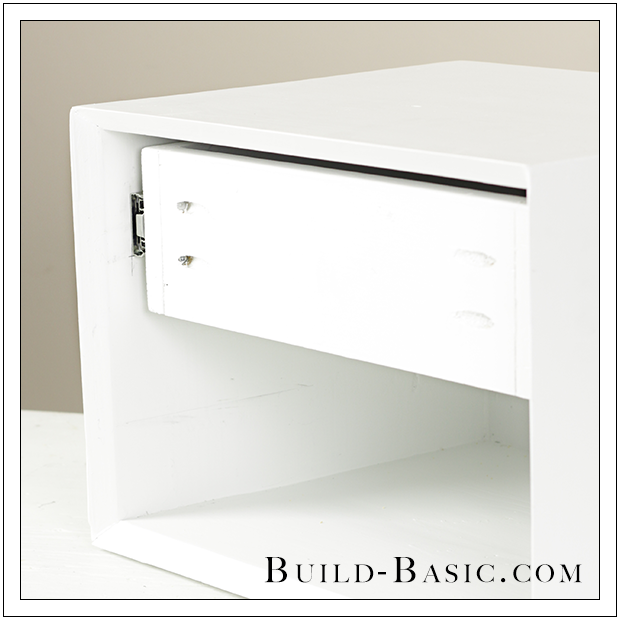
5. Place the Drawer
With both jigs clamped in place, rest the drawer on the jigs. Extend the drawer slide to the front edge of the drawer. Using a drill/driver and the screws provided, attach the slide to the drawer with at least two screws.
6. Remove the Jig
Slide the drawer into the opening, and then unclamp and remove the jigs.
MORE BUILDING PLANS


Al
impossible to use this jig to install a bottom drawer in a face frame cabinet using this jig
Phillip Woodard
Thanks for the demo on the Kreg drawer slide jig. I need to build and install 30 drawers. It begs the question though if a squared T wouldn;t work cheaper?