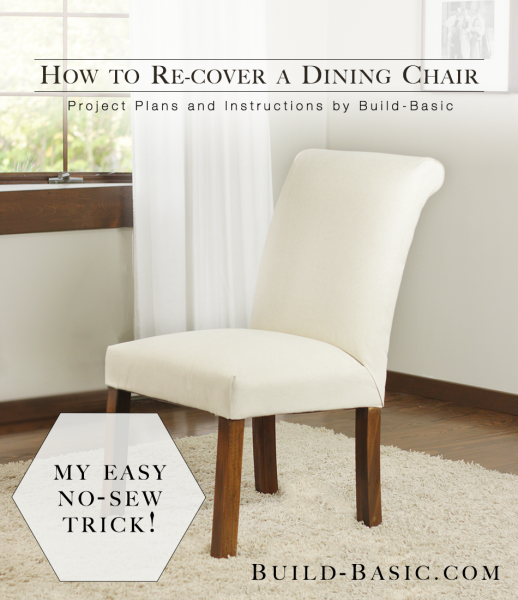
Welcome to Part Three of my How to Re-Cover a Dining Chair Series! In this section we’ll cover how to add fabric to the backrest of the chair. Miss a step? Click the links below to view any part of the series!


Blog Post: No-Sew Dining Chair Transformation
Part One – Add the Batting
Part Two – Fabric the Seat
Part Three – Fabric the Seat Back
Part Four – Secure the Panel
Part Five – Dustcover


TIP: Click the tabs below to see the tools, materials and cut list.


Cost: About $25 per chair depending on price of fabric

Time: 1 hour

Difficulty: Moderate. While no sewing is required, adjusting and stapling the fabric in place takes time and patience.

Note: This list may contain affiliate links

Flexible Tape Measure
Staple Gun
Scissors
Mallet or Hammer
Tin Snips to cut the metal tack strips
Needle Nose Pliers to remove staples
Flathead Screwdriver to tuck fabric
Iron to smooth the folds and tighten the fabric

Note: This list may contain affiliate links

3/8-inch staples
Fabric – Get 2 yards per chair
Batting – Get 1½ yards per chair
Dust Cover Fabric – Get about ½ yard per chair

Seat

  • Width – Stretch the tape measure across the seat cushion. Pull the tape down around the edges of the cushion until you reach the inside edge of the wood framing below on each side.
  • Depth – Slip the tape measure between the seat cushion and backrest. Pull the tape down around the edges of the cushion until you reach the inside edge of the wood framing below at both the front and back of the seat.

Backrest

  • Height – Starting on the backside of the top edge (rolled or straight), stretch the tape up and over the top of the chair, down the front side, between the seat and backrest, along the back edge of the seat cushion, and down to the inside edge of the wood framing below.
  • Width – Stretch the tape measure across the backrest. Pull the tape around the edges of the cushion until you reach the inside edge of the wood framing on the backside.

Panel

  • Height – Measure from the top edge of the backrest (or from the wood beneath the rolled edge) down the backrest, past the seat cushion, and under the seat to the wood framing.
  • Width – Measure the full width of the backrest, and then add two inches for the tack strips.

Dust Cover

  • Width and Depth – Measure the total width and depth of the underside of the seat, and then add two inches to each measurement to allow the edges to fold under.

Tack Strip

  • Length – Measure from the underside of the roll to the bottom edge of the seat.


Steps


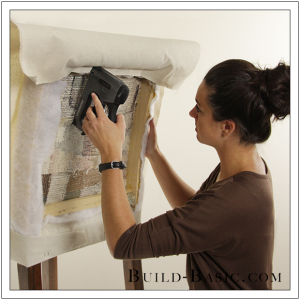
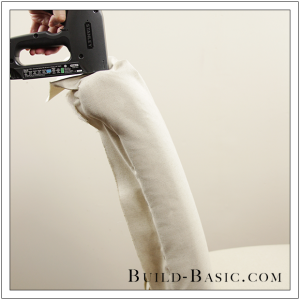
1. Attach the Fabric to the Rolled Edge
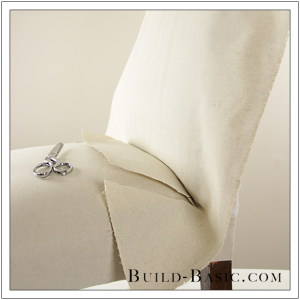
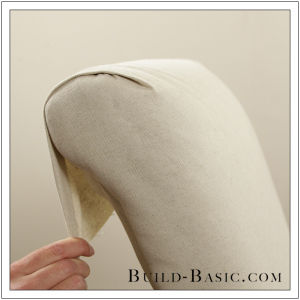
 

Drape the fabric over the top of the backrest. Center the fabric on the width of the backrest. Nestle the nose of the stapler under the roll, and then secure it to the wood mounting strip. Staple every ½ inch across the width of the back, stopping 4 inches from each edge.
How To Re-Cover a Dining Chair Part 3 by Build Basic - Step 1

www.Build-Basic.com

2. Slit the Fabric


Smooth the fabric over the front of the backrest. Tuck the fabric slightly into the crease between the backrest and seat. Locate the inside edge of each leg in the crease. Using scissors, create a slit that angles outward, and ends at the inside edge of each leg. Pull the back flap of fabric between the seat and backrest. Staple the fabric to the wood frame beneath the seat cushion.
How To Re-Cover a Dining Chair Part 3 by Build Basic - Step 2

www.Build-Basic.com

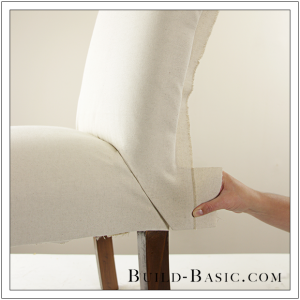
3. Secure the Fabric Along the Sides
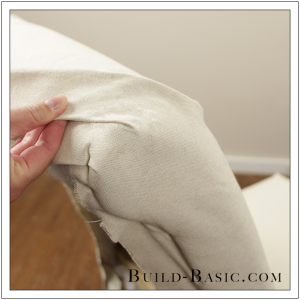
 

Pull the sides of the fabric taut around the back of the seat. Staple through the fabric and into the back edge of the wood frame. When you reach the roll, pull the fabric horizontally, and then secure on the backside of the roll.
How To Re-Cover a Dining Chair Part 3 by Build Basic - Step 3

www.Build-Basic.com

4. Create the Folds


Create small, overlapping folds at the top of the fabric to keep the side of the roll smooth. This step can be tricky, so don’t be afraid to adjust, secure, and then remove staples to readjust.
How To Re-Cover a Dining Chair Part 3 by Build Basic - Step 4

www.Build-Basic.com

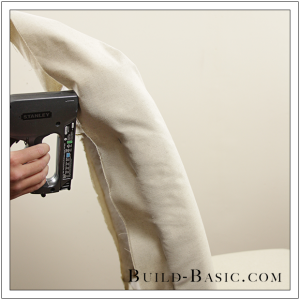
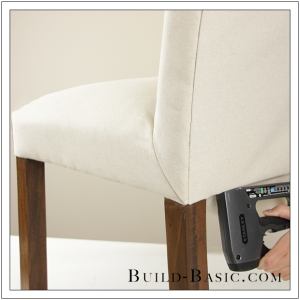
5. Secure the Fabric to the Roll


Staple the fabric onto the roll. The key here is to stay close enough to the edge so the remainder of the fabric can create a nice fold in the next step, but not so close that you can’t conceal the staples with the fold.
How To Re-Cover a Dining Chair Part 3 by Build Basic - Step 5

www.Build-Basic.com

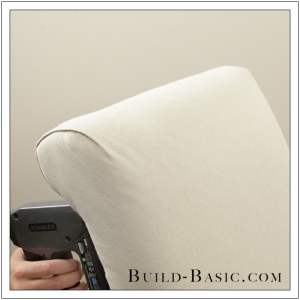
6. Fold Over the Top Edge


Fold the fabric over the creases made in step 4. Adjust the fabric until the edge of the fold runs flush with the outer edge of the roll.
How To Re-Cover a Dining Chair Part 3 by Build Basic - Step 6

www.Build-Basic.com

7. Staple the Fold


Pull the fabric down tightly, and then staple it to the wood strip beneath the roll. At this point, I like to use the hot iron with steam to crease the fold and smooth the fabric.
How To Re-Cover a Dining Chair Part 3 by Build Basic - Step 7

www.Build-Basic.com

8. Position the Flaps
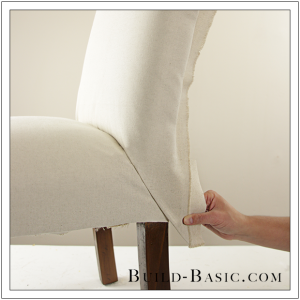
 

Pull the bottom corner of the fabric down along the side of the backrest and seat. Fold the bottom edge under so that the fold runs from the crease to the back corner of the seat. I think most people just fold this piece back, but the woodworker in me liked this “mitered” look–feel free to switch it up.
How To Re-Cover a Dining Chair Part 3 by Build Basic - Step 8

www.Build-Basic.com

9. Secure the Flaps


Now fold the point at the base of the flap so that it falls even with the bottom edge of the seat cushion. Pull it around the leg, and secure it beside the leg. If you don’t have enough fabric to stretch beyond the leg, place the staple high enough on the leg that you can still tuck another “tap” up under the fabric later on. Repeat steps 8-9 to secure the fabric around the remaining back leg.
How To Re-Cover a Dining Chair Part 3 by Build Basic - Step 9

www.Build-Basic.com

10. Add the Back Panel


Now let’s Go To Part Four where I show how to add the back panel.
How To Re-Cover a Dining Chair Part 3 by Build Basic - Step 10

www.Build-Basic.com


MORE BUILDING PLANS


Leave us a Comment!