Welcome to Part Two of my How to Re-Cover a Dining Chair Series! In this section we’ll cover how to add fabric to the seat cushion. Miss a step? Click the links below to view any part of the series!
Blog Post: No-Sew Dining Chair Transformation
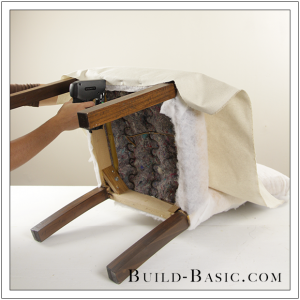
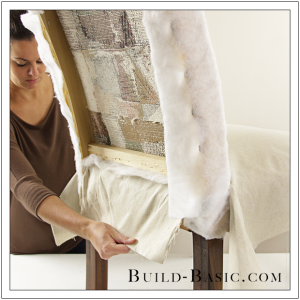
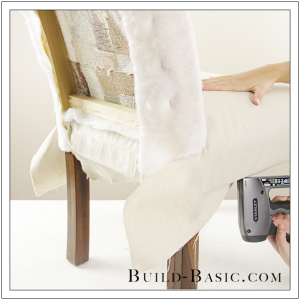
Part One – Add the Batting
Part Two – Fabric the Seat
Part Three – Fabric the Seat Back
Part Four – Secure the Panel
Part Five – Dustcover
TIP: Click the tabs below to see the tools, materials and cut list.
Cost: About $25 per chair depending on price of fabric
Time: 1 hour
Difficulty: Moderate. While no sewing is required, adjusting and stapling the fabric in place takes time and patience.
Note: This list may contain affiliate links
3/8-inch staples
Fabric – Get 2 yards per chair
Batting – Get 1½ yards per chair
Dust Cover Fabric – Get about ½ yard per chair
Seat
- Width – Stretch the tape measure across the seat cushion. Pull the tape down around the edges of the cushion until you reach the inside edge of the wood framing below on each side.
- Depth – Slip the tape measure between the seat cushion and backrest. Pull the tape down around the edges of the cushion until you reach the inside edge of the wood framing below at both the front and back of the seat.
Backrest
- Height – Starting on the backside of the top edge (rolled or straight), stretch the tape up and over the top of the chair, down the front side, between the seat and backrest, along the back edge of the seat cushion, and down to the inside edge of the wood framing below.
- Width – Stretch the tape measure across the backrest. Pull the tape around the edges of the cushion until you reach the inside edge of the wood framing on the backside.
Panel
- Height – Measure from the top edge of the backrest (or from the wood beneath the rolled edge) down the backrest, past the seat cushion, and under the seat to the wood framing.
- Width – Measure the full width of the backrest, and then add two inches for the tack strips.
Dust Cover
- Width and Depth – Measure the total width and depth of the underside of the seat, and then add two inches to each measurement to allow the edges to fold under.
Tack Strip
- Length – Measure from the underside of the roll to the bottom edge of the seat.
Steps
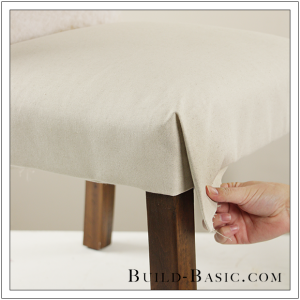
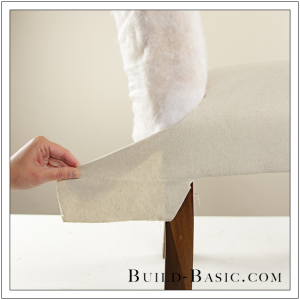
1. Attach the Fabric to the Front Edge
Lay the fabric over the seat so that it drapes equally over the front and side edges. Pull the front of the fabric over the edge of the seat cushion, and then down to the wood framing below. Using a staple gun, attach the fabric to the bottom edge of the wood framing. Position a staple about every inch along the fabric, stopping 4 inches from each leg.
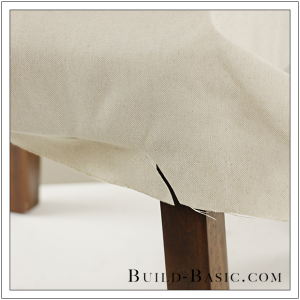
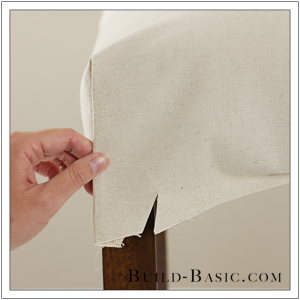
 2. Slit the Fabric
Lightly tuck the fabric into the crease at the back of the seat cushion, and then fold it forward onto itself. Locate the inside edge of the back legs in the crease. Now cut a slit that angles outward and ends at the inside edge of each leg.
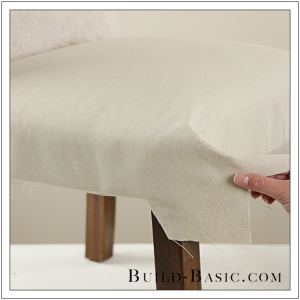
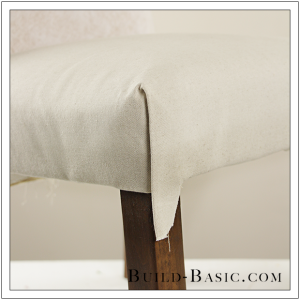
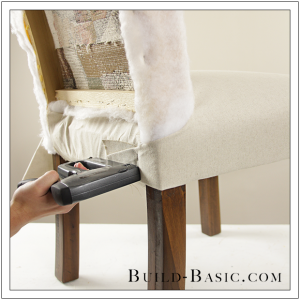
3. Secure the Back Edge
Pull the back flap of fabric through the opening between the seat and backrest. Pull the fabric taunt, but not so tight that it puckers. Staple the fabric to the wood frame beneath the seat.
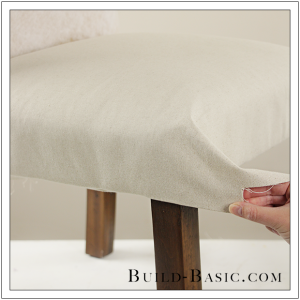
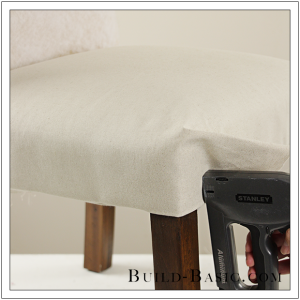
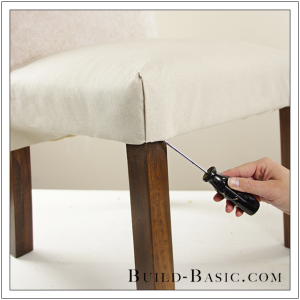
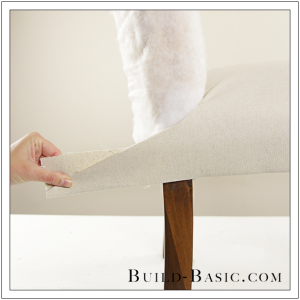
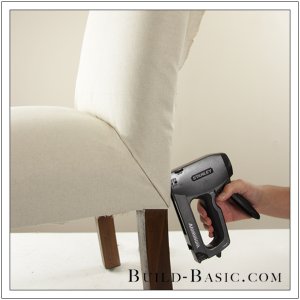
4. Staple the Fabric Along the Sides
Pulling from the center of each side, smooth the fabric, and then secure it with staples to the wood framing below. Place a staple about every inch, stopping 4 inches from each leg.
5. Prep the Fabric Around the Front Legs
Pull the front corner of the fabric against the side of the cushion. Using scissors, clip a notch that extends from the center of the side of the leg to the back edge of the leg. Cut an additional V-notch to remove the front corner of the fabric–this isn’t necessary, but will cut down on excess bulk when you’re trying to smooth the folds.
6. Secure the Fabric Beside the Leg
Tuck the flap beside the leg under the seat, and then secure it with staples.
7. Position the Corner
Pull the remaining fabric forward against the side of the seat cushion.
8. Tuck the Corner
Tuck the bottom edge of the fabric up under the excess so that the fold runs flush with bottom edge of the seat.
9. Secure the Corner
Pull the flap around the leg, and then staple it against the front edge of the seat, beside (not on) the leg.
10. Fold the Front Edge
Now fold the front edge over the secured flap so that the edge of the fold runs vertical at the corner of the cushion. If the fold isn’t lining up, use a flathead screwdriver to pop out the staples from step 9, and readjust.
11. Notch the Fold
Cut a notch in the fold that runs from the center of the face of the leg to the inside edge of the leg, as shown.
12. Secure the Fabric
Fold the fabric beside the leg up and under the seat, and then secure it in place with staples. Now, just the tab should hang along the face of the leg, as shown.
13. Tuck the Fabric
Using a flathead screwdriver, push the tab up and under the fabric stapled in step 9. Repeat steps 5-13 to notch and secure the fabric around the remaining front leg. At this point, I used a hot iron with a steam setting to crease the fold and “lock” it in place. You can also add a little top stitch to hold fold down, but I didn’t feel it was necessary.
14. Notch the Fabric at the Back Legs
Pull the back tail of the fabric back along the side of the seat. Cut a notch in the fold that runs from the center of the outside face of the leg to the inside edge of the leg, as shown.
15. Secure the Fabric
Tuck the fabric beside the leg up and under the seat, and then staple it in place. Once complete, you should be left with a clean tail, as shown.
16. Fold the Tail
Fold the bottom edge of the tail under so that the edge of the fold runs flush with the bottom edge of the seat.
17. Secure the Fabric
Pull the fabric around the leg, and then secure beside the leg, as shown. Repeat steps 14-17 to secure the fabric around the remaining back leg.
18. Add Fabric to the Backrest
MORE BUILDING PLANS


Shiavani Simone
Thanks for the clearly detailed instructions. I have a set of four bar chairs that are made on that same (Parson’s style) but the colors and style of fabric are wrong for the room. It’s in my kitchen’s breakfast area and the fabric is a blue velour. This tutorial gives me the confidence to finally tackle those chairs.