*This post is sponsored by Rust-Oleum. All opinions are my own. Click here to read my full disclosure policy.
When I decided to move my shop to the garage for more space, I knew we needed to make some major updates. We painted the walls, installed new lighting and added storage solutions. Throughout the makeover, I thought the floors were off the table (because they had been previously coated with an epoxy product), until I stumbled on Rust-Oleum’s Floor Primer and had a major aha moment.
(Note: You can still complete this project is you have a bare concrete floor. You’ll just etch instead of using the primer like we did.)
I contacted Rust-Oleum to see if their product could work on my floors and the answer was YES! As long as my previously coated floors were properly adhered to the concrete, all I had to do was clean the floor and apply the primer before a brand new epoxy coating! (And because I was priming, there was no need to etch the floor. ) My excitement was a little over the top for the woman working the help line, but I’ve had my eye on Rust-Oleum’s white faux marble kit for a long time.
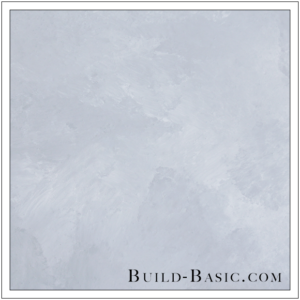
If you haven’t heard of Rust-Oleum’s Marble Floor Kit, it differs a bit from their other pour-on floors in that the look is achieved with a two-part roller that applies two colors at one time to create a marbling effect. Even better, the two-part colors mix right in their pouches so there was no need for buckets and a paddle mixer. I just burst the divider between the pouches, mixed, and then poured the colors into the tray—needless to say, this makes the cleanup a cinch.
So back to the story; I reached out to Rust-Oleum to see if they wanted to team up with me on the project, and here we are, staring at our beautiful new floors that make the space bright, light and sooo easy to clean. What do you think? Would you do this project? Leave me a note in the comments below and scroll down to see my full video tutorial!
TIP: Click the tabs below to see the tools and materials needed for this project.
NOTE: This tutorial may contain affiliate links. To see our full disclosure policy, click HERE
Cost: About $250 per bay (250 sq ft) Time: 3 Work Days with Drying Time in between Difficulty: Moderate. Cleaning and rolling the paint on the floor is easy, but working quickly and in a consistent pattern is key.
Extension Pole
Stiff Bristle Scrub Brush
Floor Squeegee to remove excess water more quickly
Hose or Watering Can to rinse the floor after cleaning
Roller Frame
Roller Cover with ¼-inch Nap to apply the Rust-Oleum Floor Primer
Box Cutting Knife and Duct Tape to test the adhesion of the previously coated surface
(2) Chip Brushes to cut in the corners. Get one for use with the primer and one per epoxy kit.
Scissors to open the Primer and Epoxy Kit Pouches
Remove all contents from the Rust-Oleum Floor Kit and Primer Can. Read the instruction thoroughly to learn about application temperatures, dry time, and more. Check that each box has the specified contents and that all pounces are sealed. If a pouch has burst or leaked, return and replace the item.
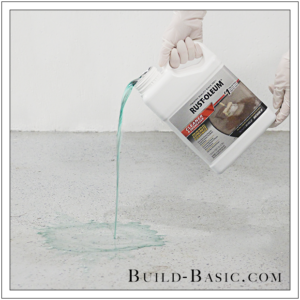
2. Clean the Floors
Sweep and/or vacuum the floor to remove all debris. Put on safety equipment —safety glasses to protect eyes from splashes, and a face respirator mask. Open windows or garage doors for ventilation. Pour Rust-Oleum’s Cleaner and Degreaser solution onto the floor.
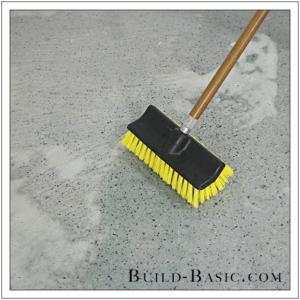
3. Scrub the Floor Clean
Spread the solution onto the floor using a stiff-bristle scrub brush attached to an extension pole. Allow the solution to set for 20 minutes before scrubbing the floor clean.
4. Rinse the Floor
Using a hose or watering can, rinse the floor thoroughly.
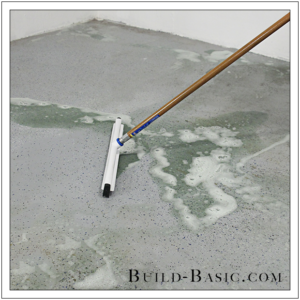
5. Dry the Floor
Using a floor squeegee, remove the excess water. Give the floor a final rinse, and squeegee the floor dry. Allow the floor to dry for at least 24 hours.
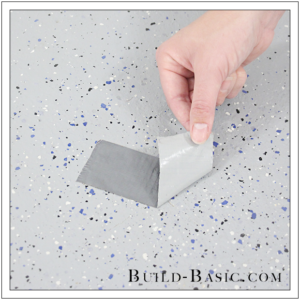
6. Test the Condition of the Previous Coating
Before priming and coating the floor, first check the adhesion of the existing coating. To do this, cut an X through the existing coating with a blade—we used a box-cutting knife. Place a piece of duct tape over the X, and then remove it with one quick pull. If more than 25% of the existing coating comes up on the tape, you should not cover the existing coating.
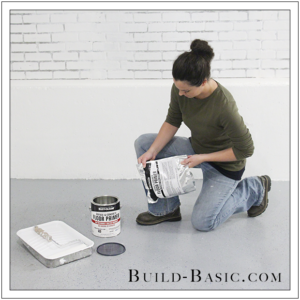
7. Prep the Primer
Remove the pouch from the Primer can. Agitate the pouch for 1-2 minutes, rotating the bag to thoroughly mix the contents of the bag from the corners. Put on protective nitril or neoprene gloves and a face respirator mask. Open doors and/or windows for ventilation. Using scissors, cut open the corner of the pouch and pour the contents into a paint tray fitted with a liner.
8. Cut In Along the Edges
Before beginning, plan a “route” around the space. For example, in our garage space, we worked from the back wall forward to paint ourselves out of the room. Begin by cutting in along the edges of the floor with a paintbrush.
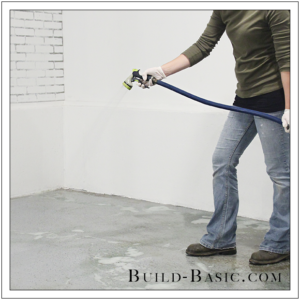
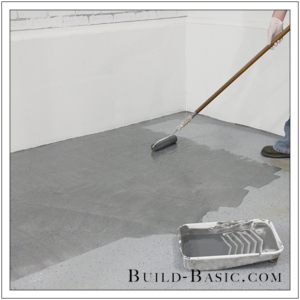
9. Prime the Floor
Using an extension pole fitted with a roller frame and a 1/4-inch nap roller cover, roll the primer onto the floor. Work in patterns that create a “W” and “M”, alternating directions to coat the floor. Do not let the product pool. Allow the floor to dry for 24 to 48 hours.
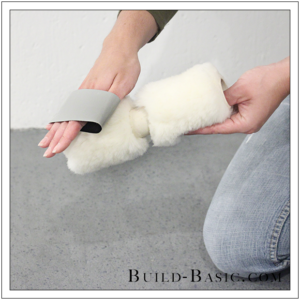
10. Prep the Floor Kit’s Roller Cover
To prep for application, first remove lint from the roller. Wrap a piece of duct tape around your hand with the sticky side facing outward. Roll it along the cover to remove loose fibers.
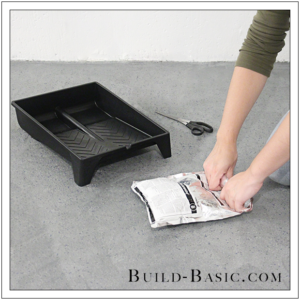
11. Prep the Floor Kit Mix
The great thing about the marble floor kit is that the 2-part mix combines right in the pouch, so there’s no need for a bucket or mixing paddle. To mix the pouch, first lay it on the floor and roll from part A side toward Part B side until the divider inside the pouch releases with a “pop” allowing the two parts to mix. Agitate and rotate the pouch thoroughly for 2-3 minutes. Repeat to mix the second pouch.
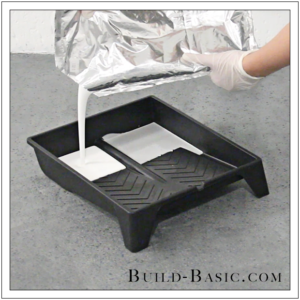
12. Prep the Paint Tray
WEARING protective nitril or neoprene gloves and a face respirator mask, and with open doors or windows for ventilation, use scissors to cut a small opening in a corner of each pouch. Pour each color into one side of the paint tray, being sure not to overfill the reservoir. TIP: Have the kit’s box or spare bucket handy to hold the partially filled pouches upright between refills of the paint tray.
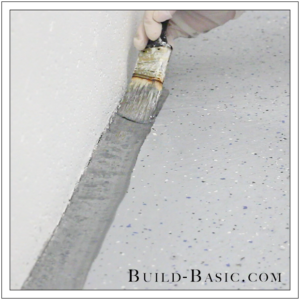
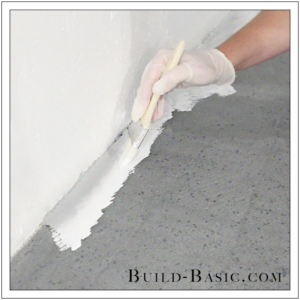
13. Cut in Along the Edges
Dip a brush into the paint tray so that it fills with half of each paint color. Run the brush along the edges of the wall. Flip the brush over and crosshatch in the other direction to blend the colors, fanning out and away from the wall.
14. Load the Roller
The roller is divided into two sides that run on either side of the paint tray’s divider. When loading and refilling the roller, always place the roller in the same direction to avoid mixing the colors.
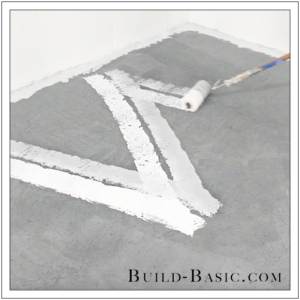
15. Roll the Floor
Working in sections, roll 6 to 12 inch passes on the floor creating “W” and “M” patterns. Frequently flip the roller and change direction to achieve full coverage without over-blending the colors. TIP: In hindsight, I preferred the areas with shorter strokes when the roller was first refilled and the colors were able to best mix for the marbling affect. In areas where I tried to make the paint “stretch” by over rolling, the contrast was not as great and looks more mottled than marbled.
16. Finish Rolling
Work in sections across the space. Refilling the paint tray as needed. (With our temperature, the epoxy had an open working time of about 45-minutes.) Once the roller starts to feel gummy, set the remainder of the material aside to harden for disposal. If working with more than one kit, mix the new paint pouches and start with a new roller cover and brush. TIP: It helps to also switch out gloves since they get sticky during the process.