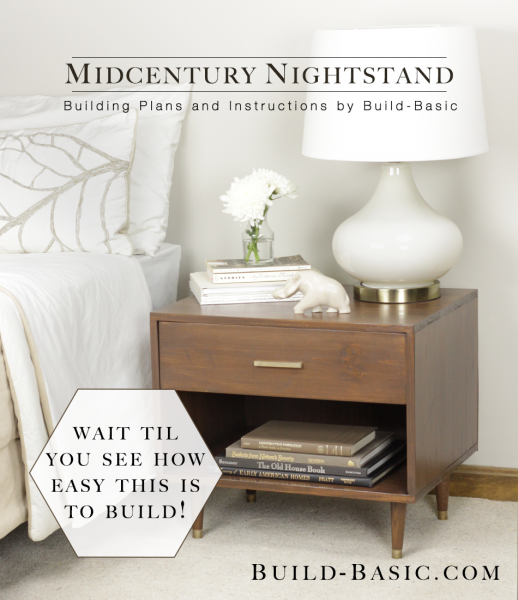
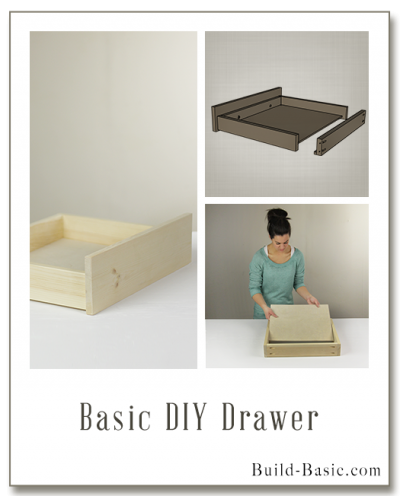
Our simplified take on this midcentury-style nightstand it little more than a four-piece frame completed with a plywood back and some tapered legs. The fasteners are cleverly hidden on the inside and underside of the box to allow the uninterrupted surfaces to complement the design’s clean lines. If you plan to add a drawer like we did, check out our Basic DIY Drawer tutorial to learn how to make a beautiful, sturdy drawer without touching a router or table saw.
Cost: $42
Time: 3 Hours
Difficulty: Easy. Pocket hole joinery and simple screw-in legs make this shell quick and easy to assemble.
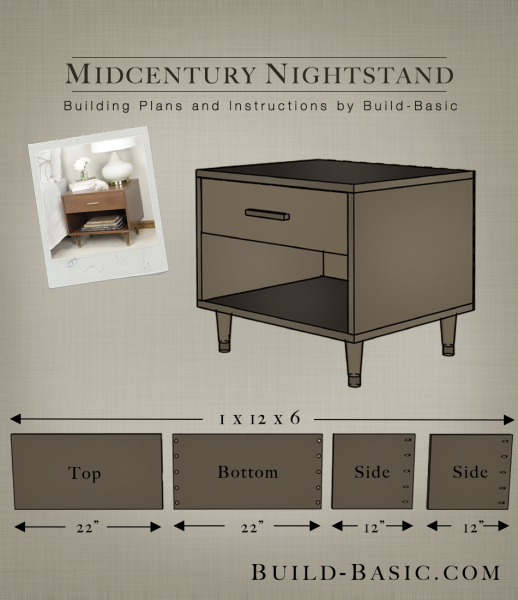
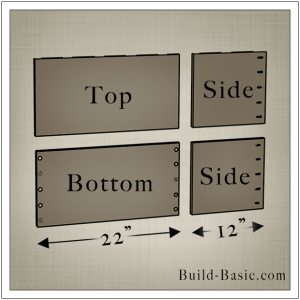
1×18 Top – 1 @ 22 inches
1×18 Bottom – 1 @ 22 inches
1 x 18 Sides – 2 @ 12 inches
¼-inch Plywood Backing – Custom cut to size
Steps
1. Cut the Pieces
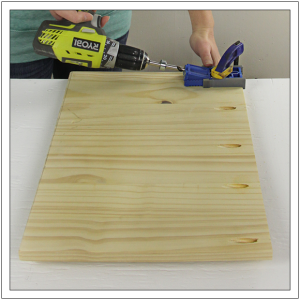
Using a framing square, measure and mark the first cut listed above on a 1×18-inch board. Using a circular saw, cut the line. Repeat until all four panels are cut to size. Lightly sand each piece in preparation for assembly.
TIP: Get straight cuts with a circular saw using our DIY Cutting Fence.
 2. Prep the Sides
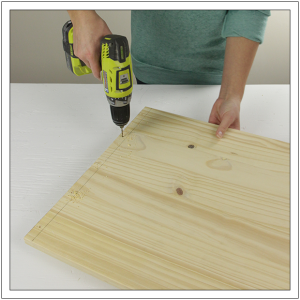
Mark one long edge of each Side panel as the “top” edge. Using a drill/driver and a pocket hole jig, create five evenly spaced pocket holes along each top edge.
3. Prep the Base
Using a straightedge or framing square, draw a line ¾ inch from each end of the bottom panel. Inside this line, drill five evenly spaced pilot holes on each end. If you don’t have a countersink pilot bit, just use a drill bit sized slightly thinner than the thickness of the wood screws.
4. Position the Pieces
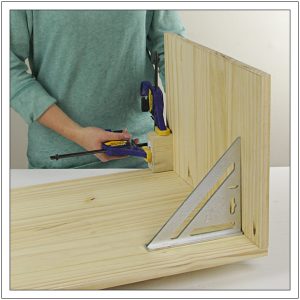
Flip the Top Panel facedown. Apply wood glue to the top edge of a Side Panel, and then stand it upright on the Top Panel, flush with its end with the pocket holes facing inward. Using a speed square, create a square joint and then clamp a block to both pieces to hold them in place.
5. Attach Sides to the Top
Using a drill/driver, drive 1 ¼ inch pocket hole screws through the pocket holes in the Side Panel and into the Top Panel. Repeat steps 4 and 5 to attach the second Side Panel.
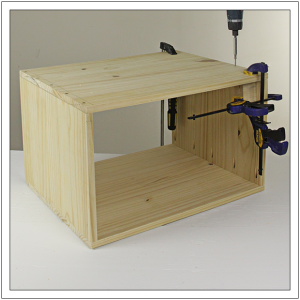
6. Attach the Base
Apply wood glue to the exposed bottom edge of each Side Panel. Place the Base Panel onto the Side Panels. Using blocks to square the joints, clamp the pieces in place. Now drive 1 ¼ inch wood screws through the pilot holes in the Bottom Panel and into each Side Panel.
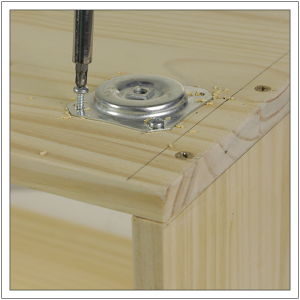
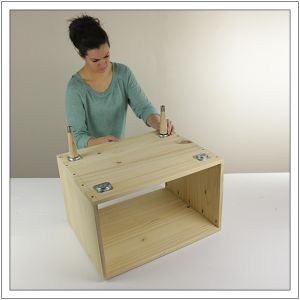
7. Add the Leg Mounting Plates
At each corner of the Bottom Panel, measure a mark a line 1 ½ inches from each edge. Position the Top Plates inside the lines. Drill shallow pilot holes in each of the mounting holes, and then secure the Top Plates using the screws provided.
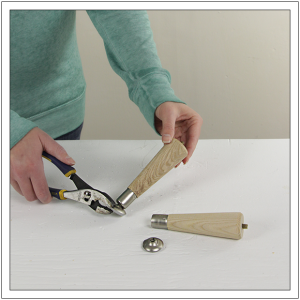
8. Modify the Legs
While it’s not required, we removed the foot at the base of the legs. To do so, pry the adjustable piece free using pliers. If a jagged edge remains, it can be capped with a small round felt pad.
9. Add the Legs
Screw the threaded rod on each leg into a top plate to secure them in place.
10. Secure the Back
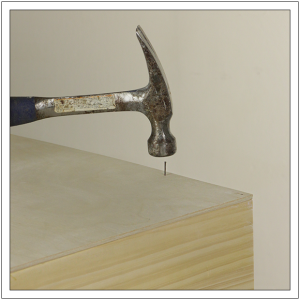
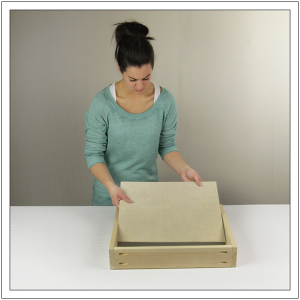
Place the ¼ inch plywood backing face up on the work surface. Lay the back edge of the assembly onto the plywood, flush with two edges. Mark the remaining two edges. Using a circular saw, cut the plywood to size. Now flip the assembly on its face, and place the plywood facedown onto the assembly, flush with its outside edges. Using a hammer, drive ¾ inch finish nails through the plywood and into the back edge of the assembly to hold the Back Panel in place.
Tip: Check out our Build a Basic DIY Drawer tutorial.
11. Add the Drawer (optional)
Click over to our
Basic DIY Drawer tutorial to learn how to build a simple drawer (without using a table saw or router).
MORE BUILDING PLANS


Pingback: 17 Brilliant DIY Nightstand Ideas Every Bedroom Needs - Woot Home
Pingback: 50 Free DIY Nightstand Ideas & Plans - Lemon Slide
Pingback: 20 Inspirational Mid-Century Furniture Projects - Frugal Mom Eh!
Ayleen
Hello! Love this nightstand! Wondering if you have a diy for a dresser of similar style? Thanks so much!!!!!
Victoria
Do I need to go to a special lumber yard for 18″ board? It appears the big box stores only have 12″ deep wood. I could jig two smaller boards, but that would detract from the clean midcentury lines.