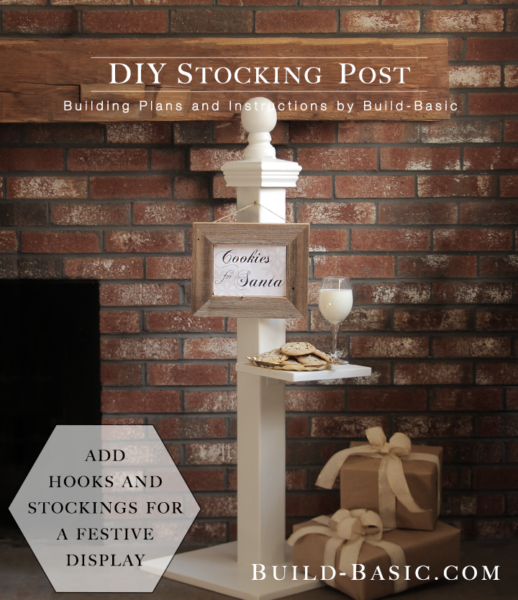
This free-standing post is a perfect holiday decoration to place next to the tree or fireplace. Use it to hold cookies and milk for Santa like I did, or add hooks to hang stockings!
NOTE: This project is a part of The Home Depot Workshop series where 20+ bloggers are challenged to customize a project designed by The Home Depot. To see all the creative ideas and learn more about your local Home Depot workshop classes, click HERE.
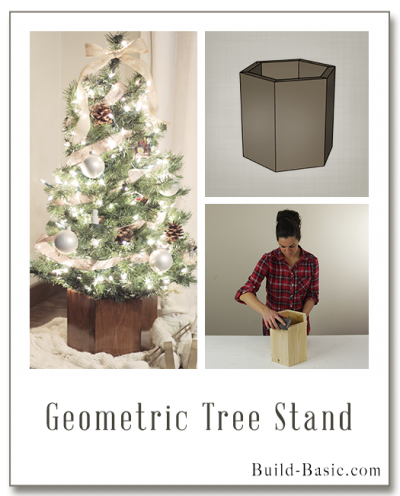
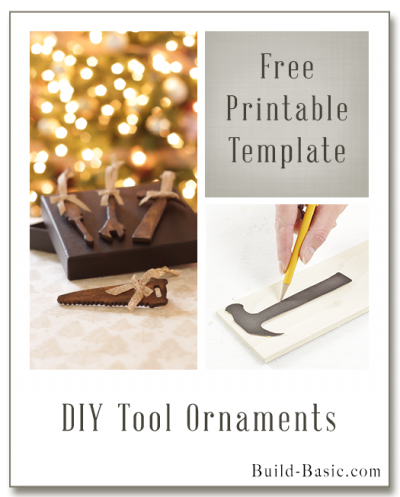
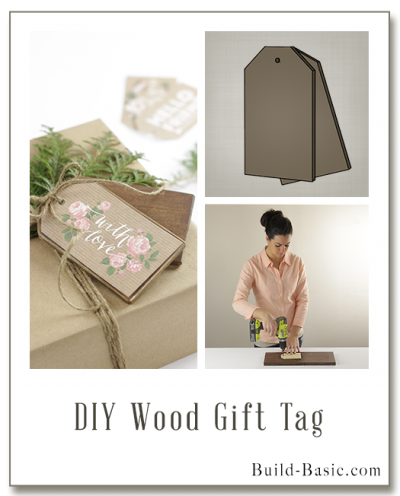
TIP: Click the image above to reveal the free building plans. Click the tabs below to see the tools, materials and cut list.
NOTE: This tutorial may contain affiliate links. To see our full disclosure policy, click HERE
Cost: $45
Time: 30 minutes
Difficulty: Easy. Attaching the cap and finial to the post are a cinch, but cutting the plywood base and shelf requires a circular and/or miter saw.
Note: This list may contain affiliate links
(1) 4 x 4 x 4½’ Pressure-Treated Pine Wood Premium Eased Edge Deck Post
(1) ½ x 2′ x 2′ Sanded Plywood
(1) 4 x 4 Pressure-Treated Unfinished Pine Ball Top Finial
(1) Pressure-Treated 4 x 4 Hampton Wood Flat Top Post Cap
(1) 1½-inch L-Bracket to attach the Shelf
(1) Flat Black Single Prong Robe Hook Value Pack (6-Pack)
(4) 2½-inch Wood Screws
(4) 1-inch Wood Screws
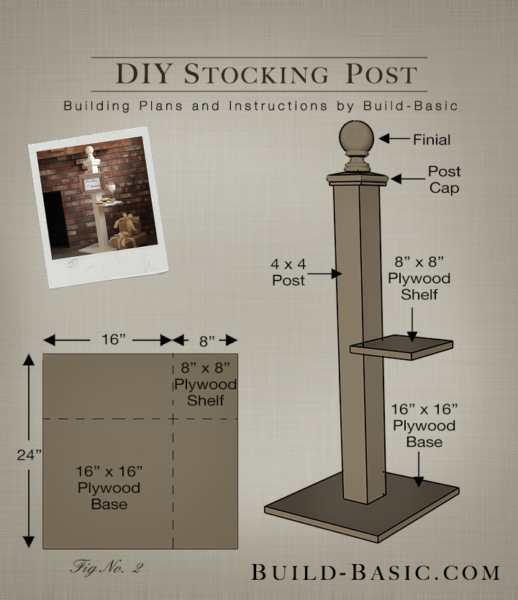
4 x 4 Deck Post – 1 @ 36 inches
½-inch Plywood Base – 1 @ 16″ x16″
½-inch Plywood Shelf – 1 @ 8″ x 8″
Steps
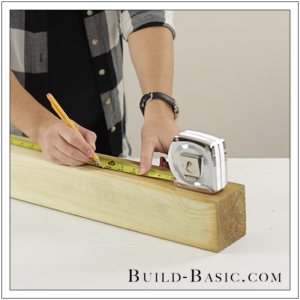
1. Measure and Mark the Post
Using a tape measure, mark the height of the 4 x 4 Deck Post at 36 inches. Using a square, draw a line at the mark. If cutting the Post with a circular saw, carry this line around the post.

2. Cut the Post
Using a miter saw, cut the post along the line marked in Step 1. If using a circular saw, cut along the line on one edge of the post, and then roll the Post to the opposing edge to cut along the line and through the thickness of the Post.
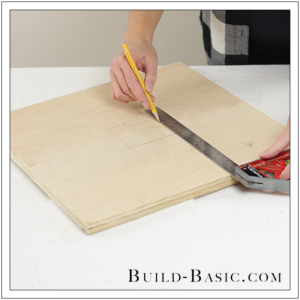
3. Cut and Mark the Plywood Base
Measure, mark, and cut a 16″ x 16″ section from the ½-inch Plywood using a circular saw or tablesaw. Using a ruler or combination square, mark the outline of the 4 x 4 post (actual dimensions 3¼” x 3¼”) in the center of the Plywood Base. This means marking a line 6 3/8 inches from each edge. Mark the outline of the Post on both sides of the Base.
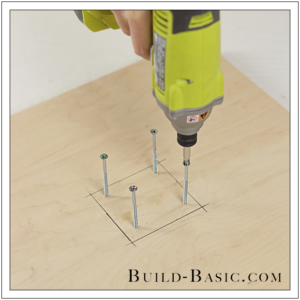
4. Prep the Base
To prep the Base for installation, Start four 2½-inch screws inside the outline on the underside of the Base as shown.
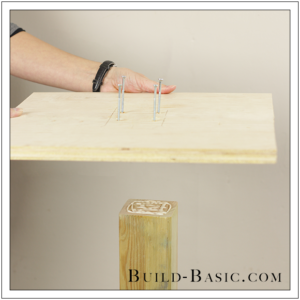
5. Attach the Base
Stand the Post upside-down. Apply wood glue to the end of the Post. Position the Base centered on the Post, using the outline as a guide. Drive the 2½-inch wood screws through the Base and into the Post, periodically checking that the Base hasn’t shifted during installation.
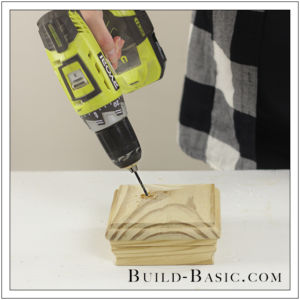
6. Prep the Post Cap
Prep the Post Cap by drilling four pilot holes through the Cap. Position the pilot holes about 1 inch from the center of the Cap, angled inward toward the center as shown. Start a 1¼-inch wood screw in each of the pilot holes.
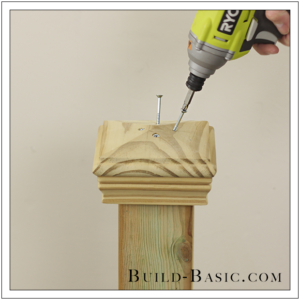
7. Attach the Post Cap
Flip the Post upright, standing on its Base. Apply wood glue to the top of the Post. Center the Cap on the Post. Using a drill/driver, drive the wood screws through the Cap and into the Post.
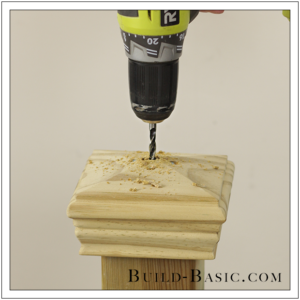
8. Drill a Pilot Hole for the Finial
Using a drill/driver fitted with a ¼-inch drill bit, drill a hole though the center of the Post Cap and into the top of the Post.
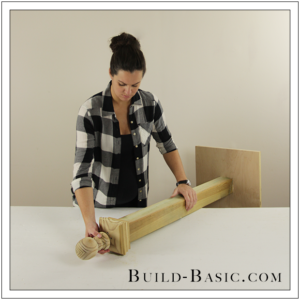
9. Add the Finial
Place the threaded screw on the underside of the Finial into the hole drilled in Step 8. Twist the Finial until the underside touches the Post Cap.
10. Cut the Shelf
Using a circular saw, tablesaw, or miter saw, cut an 8″ x 8″ section from the ½”-inch Plywood to create the Shelf.
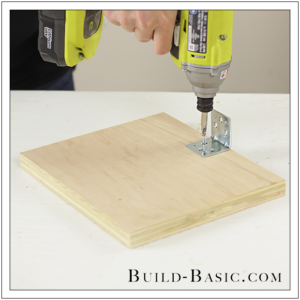
11. Prep the Shelf for Installation
Mark a centerline along one edge of the Shelf. Place the L-bracket onto the Shelf, and then secure using the screws provided.
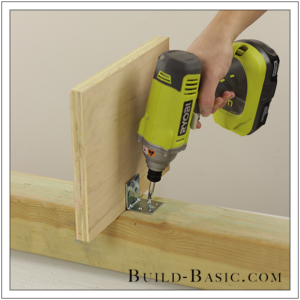
12. Mount the Shelf
Mark the height of the Shelf on the Post, 18 inches from its Base. Place the Shelf onto the Post with the L-bracket facing downward. Using a square, level the Shelf on the Post. Using a drill/driver, drive screws through the L-bracket and into the Post to secure the Shelf.
MORE BUILDING PLANS


Catherine
Nice idea. I drilled a hole thru the post and threaded ribbon thru to hang the sign
Pingback: Home Depot Virtual Party – DIY Stocking Post ‹ Build Basic