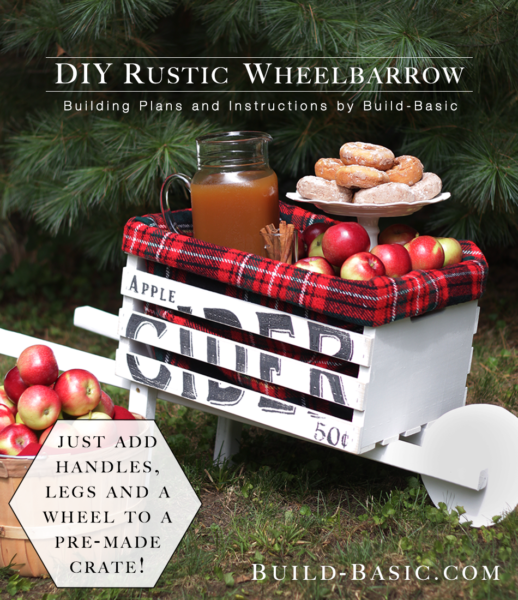
The versatility of this easy DIY Rustic Wheelbarrow makes it a perfect weekend project! With a pre-made crate and a few pieces of lumber, this project is an easily screw-together assembly.
NOTE: This project is a part of The Home Depot Workshop series where 20+ bloggers are challenged to customize a project designed by The Home Depot. To see all the creative ideas and learn more about your local Home Depot workshop classes, click HERE.
TIP: Click the image above to reveal the free building plans. Click the tabs below to see the tools, materials and cut list.
NOTE: This tutorial may contain affiliate links. To see our full disclosure policy, click HERE
Cost: $20
Time: 1 Hour
Difficulty: Easy. The parts are easy to cut to size, and then attach to the premade crate with screws.
Note: This list may contain affiliate links
(1)
Pre-made Wood Crate
(3) 2 x 2 x 36″ Square End Pressure-Treated Wood Baluster
(1) ½” x 36″ Wood Dowel
(1) 2 x 8 x 8′ Board (I used two 1 x 8 x 8″ scrap pieces sandwiched together to save money)
(6) 2½” Wood Screws
(2) 1″ Wood Screws
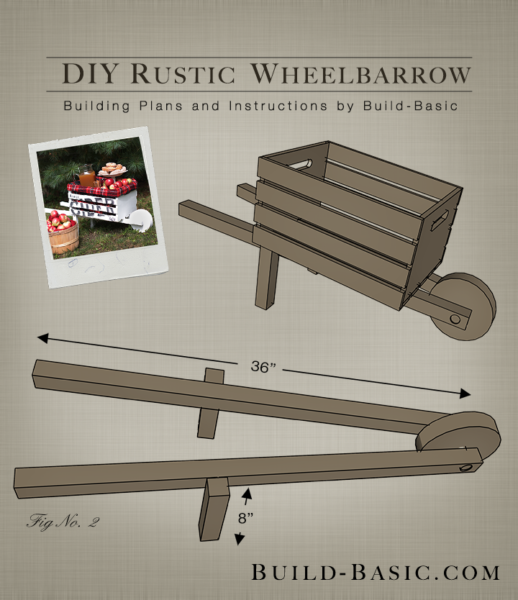
2 x 2 Baluster Handles – 2 @ 36 inches
2 x 2 Baluster Legs – 2 @ 8 inches
½” Dowel Axel – 1 @ 3¾ inches
2 x 2 Wheel – 1 @ Cut to 7-inch circle
Steps
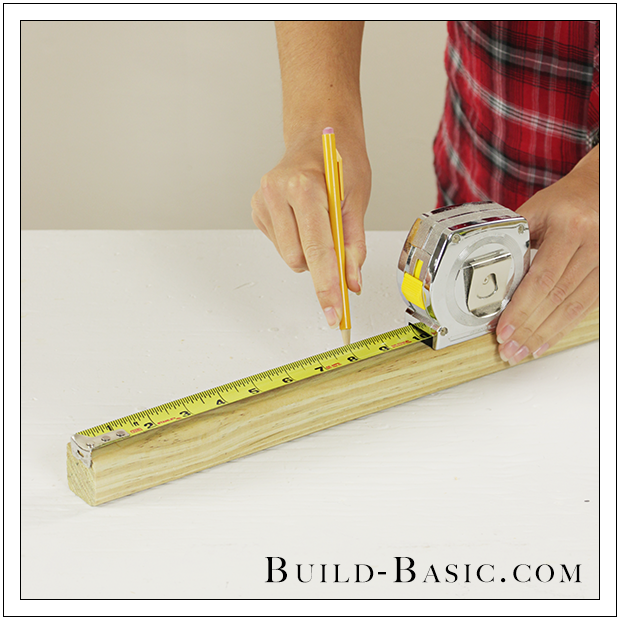
1. Cut the Handles and Legs
Measure and mark an 8-inch section on a 2 x 2 baluster. Using a miter saw or circular saw, cut the section to create a Leg, and then repeat to create the second Leg. Verify that the two remaining 2 x 2 baluster Handles are of equal 36-inch length, and then set them aside.

2. Cut the Wheel Axel
Measure and mark an 3¾-inch section on the ½-inch dowel. Using a miter saw or circular saw, cut the section to create the Wheel Axel.
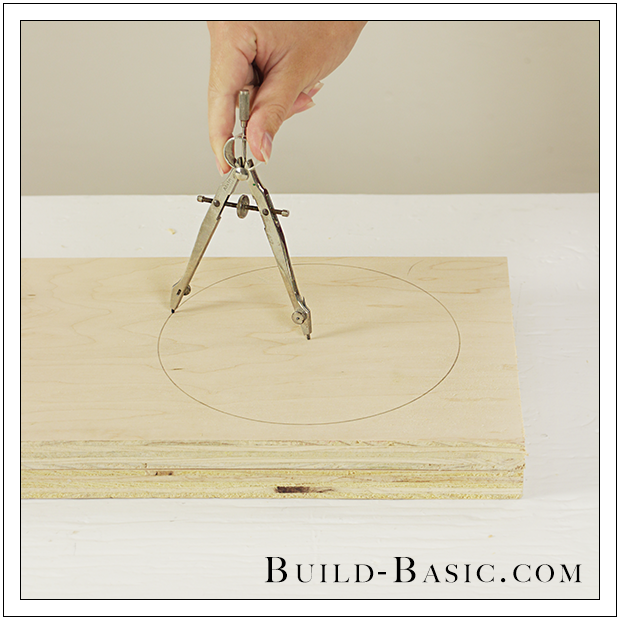
3. Mark the Wheel
On the 2 x 8 board, mark a 7-inch circle using a nail and string, or a compass, as shown. Note: To save money on my materials, I sandwiched two 8-inch long pieces of a 1 x 8 board together using glue, equalling the same thickness as a 2 x 8 board.
TIP: Don’t have a compass? Use my trick in Step 3 of THIS TUTORIAL to create a simple circle-drawing tool using a paintstick and a nail.
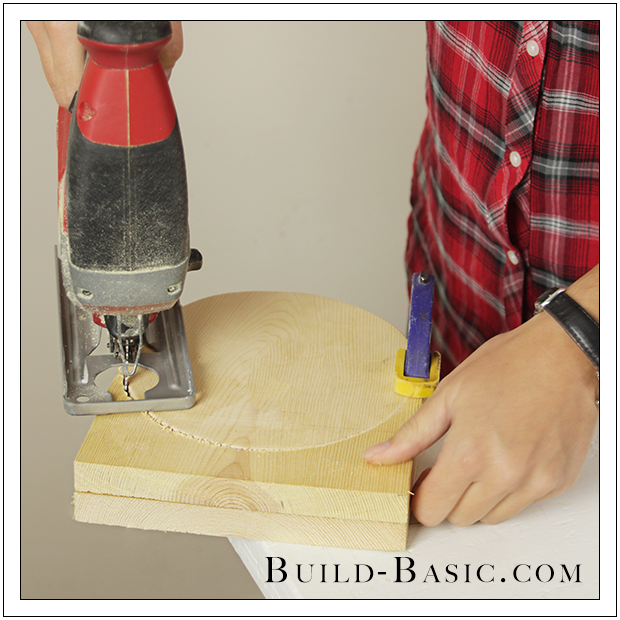
4. Cut the Wheel
Clamp the board(s) firmly to the work surface with a section of the circle overhanging the edge. Using a jigsaw, cut a section of the circle before readjusting the clamp and board, and then working your way around the circle.
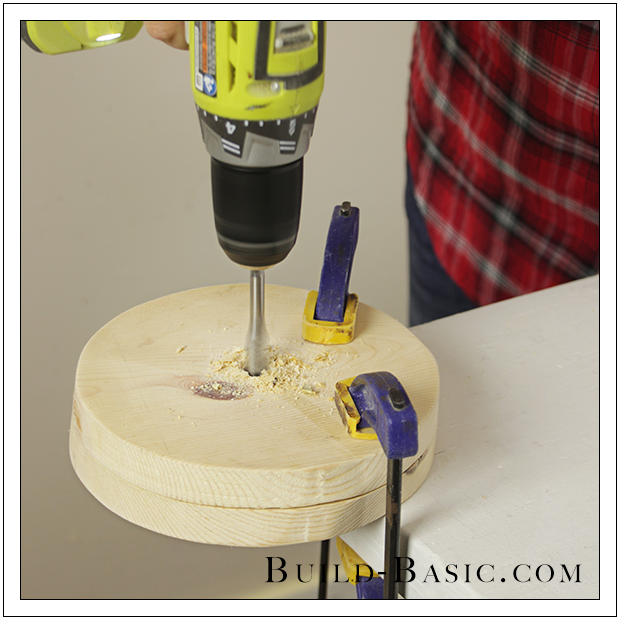
5. Drill the Axel Hole Through the Wheel
To create a hole for the ½-inch Dowel Axel, drill a hole through the center of the Wheel using a drill/driver fitted with a ½-inch drill bit. (Note: I used a ½-inch paddle bit for this step, but either is fine.)
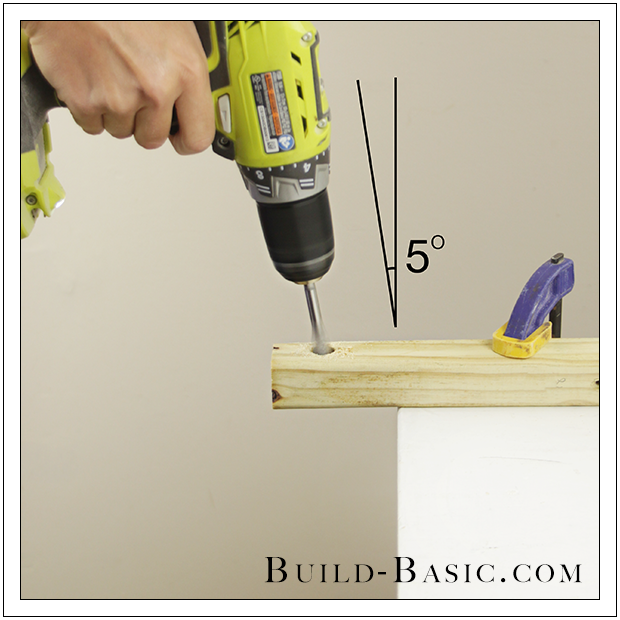
6. Drill the Axel Hole Through the Handles
Make a mark 1¼-inch from the end of each 36-inch-long Handle. Place the tip of the drill bit onto the mark—centered on the width of the Handle—and then tilt the drill about 5-degrees toward the end of the Handle, as shown. Drill a ½-inch hole through the Handle. Repeat to drill an angled hole through the second Handle.
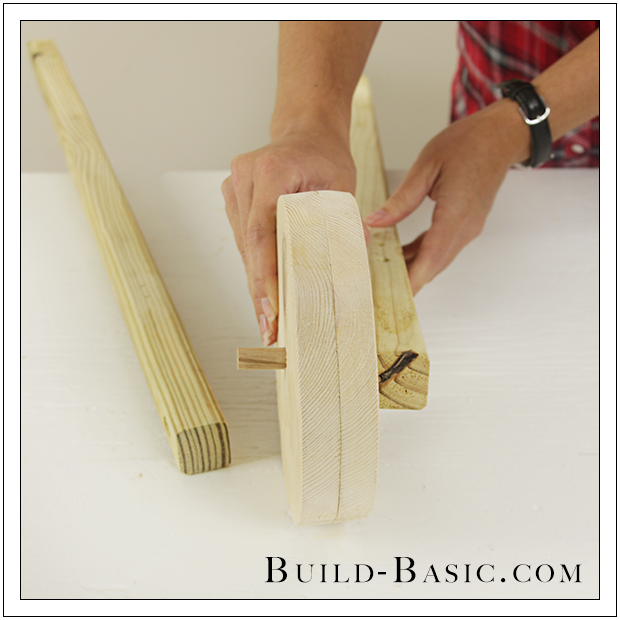
7. Insert the Axel
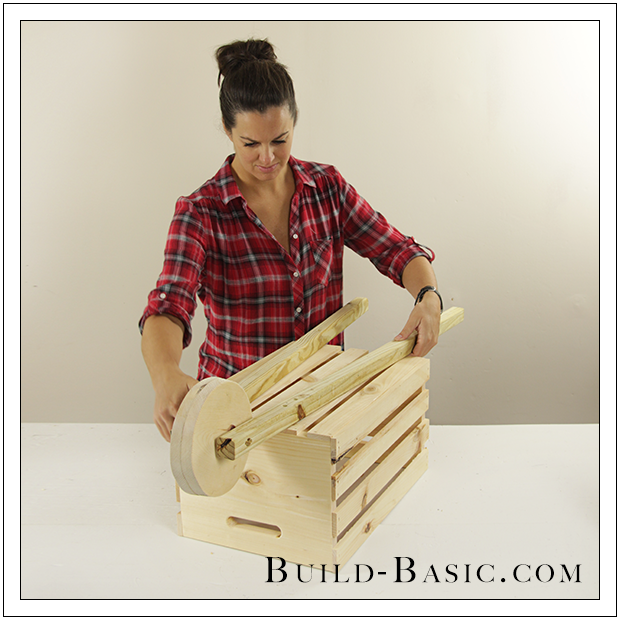
Place the ½-inch dowel Axel through the Handles and Wheel. Ensure that the Handles are positioned so that the Axel forces the long end of the Handles to spread outward toward the end opposite the Wheel.
8. Position the Wheelbarrow Base
Place the assembled Handles and Wheel onto the underside of the Crate. Center the assembly, and then slide it forward until the Wheel end of the Handles overhang the Crate by six inches.
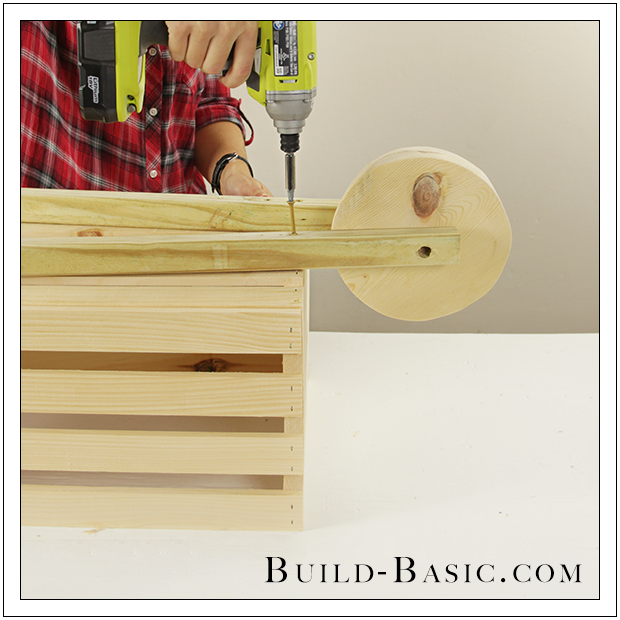
9. Attach the Handles to the Crate
Using a drill/driver, drive a 2½-inch wood screw through each Handle and into the edge of the Crate near the Wheel-end of the assembly.
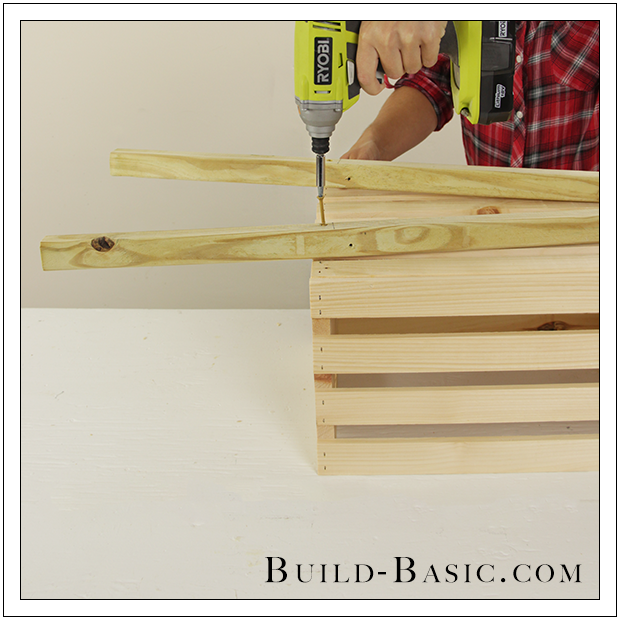
10. Finish Attaching the Handles to the Crate
Using a drill/driver, drive a 2½-inch wood screw through each Handle and into the edge of the Crate near the remaining end of the assembly, as shown.
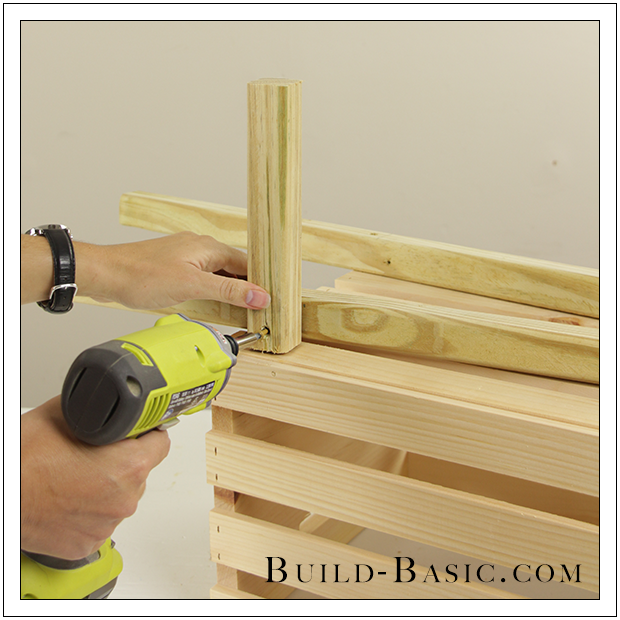
11. Add the Legs
Position the 8-inch-long Legs upright against the outer edge of each Handle, ¾-inch from the edge of the Crate. Drive a 2½-inch wood screw through each Leg and into its adjoining Handle. Flip the assembly upright, and then drive a 1-inch wood screw through the base of the Crate and into the top end of each Leg to secure the pieces in place.
MORE BUILDING PLANS


George Clegg Jr
Thank you Jenn. I also want to tell you how wonderful the baby news is. As a grandfather to 8 it is really great!!