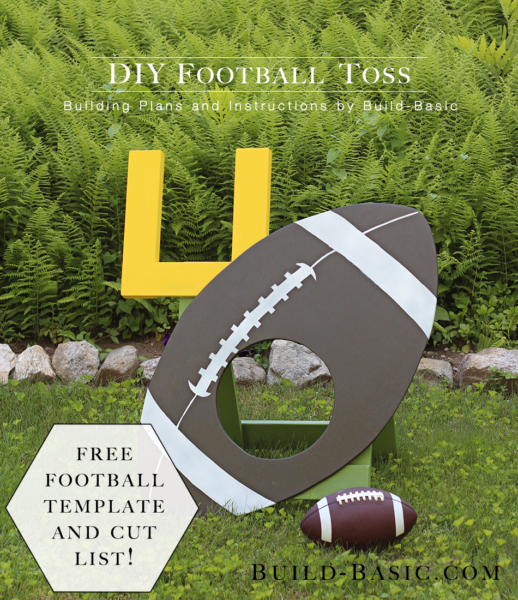
For a backyard cookout or tailgate, this fun DIY Football Toss is sure to impress your guess and create a fun family game (or a healthy competition with friends)! Just scroll down to see how you can project my free template onto a 2’x4′ piece of plywood to easily make your own!
<<This project was created as a part of The Home Depot DIY Workshops Program which was sponsored by The Home Depot. To learn more about the program and see how your favorite DIY bloggers customized a Father’s Day Football Toss, click HERE!>>
TIP: Click the image above to reveal the free building plans. Click the tabs below to see the tools, materials and cut list.
NOTE: This article contains affiliate links. Click HERE to learn more.
Cost: $35
Time: 2 Hours
Difficulty: Easy. Just cut out the parts using my
free template, and then secure them using wood screws.
Note: This list may contain affiliate links
(1) ½” x 2′ x 4′ Plywood – To make the football
(3) 1 x 4 x 8′ Boards – To make the leg assemblies and goal post
(4) ¾-inch Wood Screws – To attach the football to the leg assembly
(28) 1¼-inch Wood Screws to assemble the frame and goal posts
(2) 2½-inch Utility Hinges
Paintstick or twine
Small nail of any type
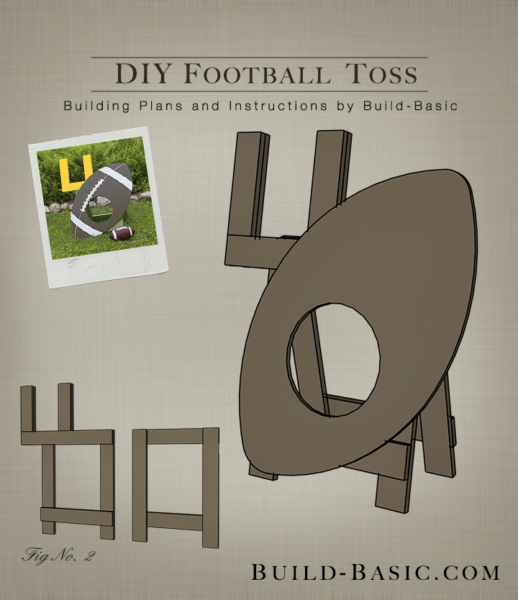
1 x 4 Legs – 4 @ 27 inches
1 x 4 Braces – 3 @ 20½ inches
1 x 4 Braces – 1 @ 26½ inches
1 x 4 Goal Posts – 2 @ 12 inches
1 x 4 Goal Posts – 2 @ 15½ inches
½-inch Plywood Football – 1 @ Create cutout using my FREE TEMPLATE
Steps
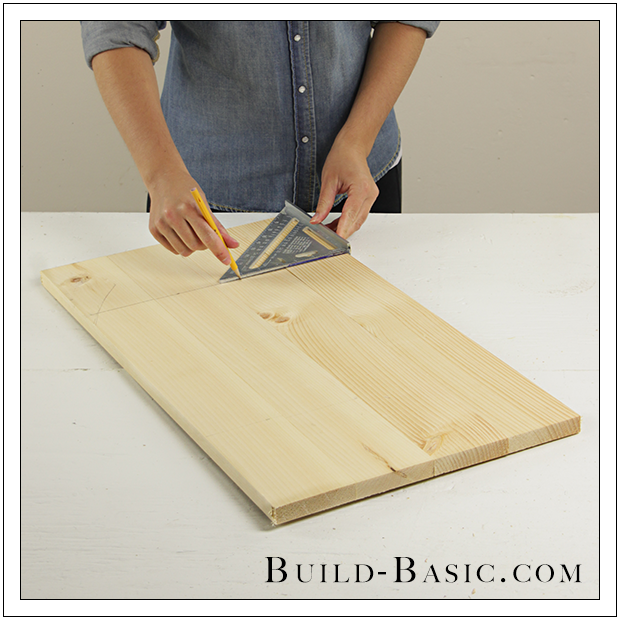
1. Cut and Mark the Boards
Using a
miter saw and the cut list above, cut the 1 x 4 Legs and Braces to length. Place the Legs side-by-side on the work surface. Using a square or ruler, mark a line across all the boards that runs 3½-inches from their bottom edges. This marks the height of the bottom Braces.

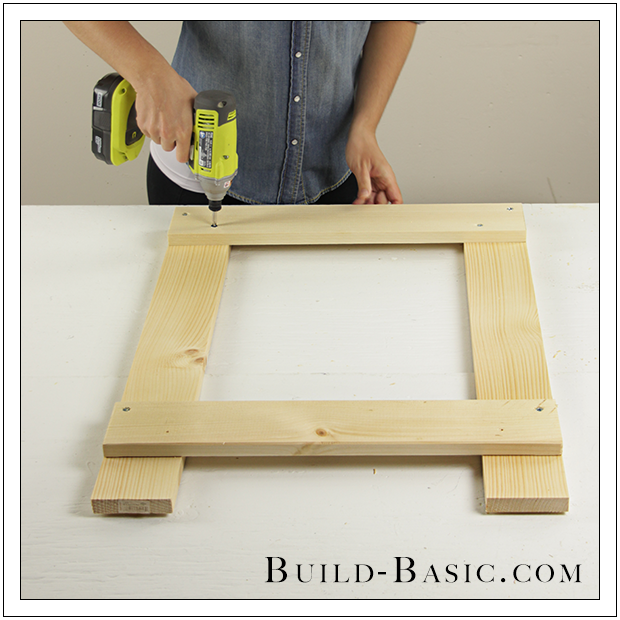
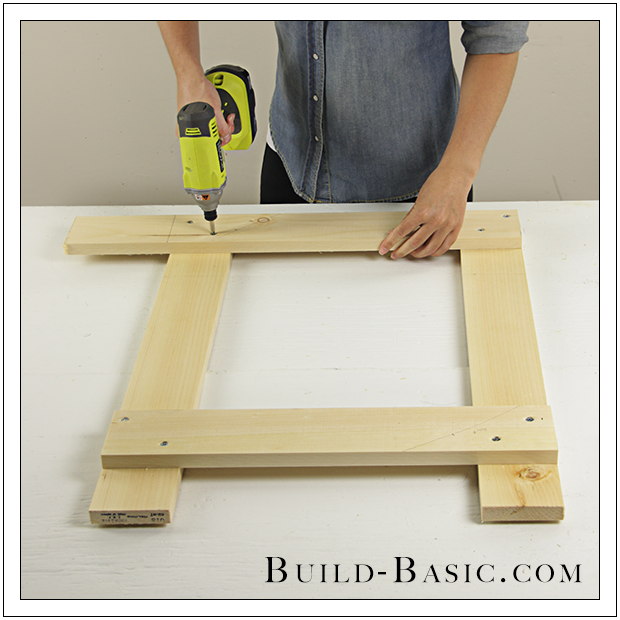
2. Create a Leg Assembly
Place two 20½-inch-long Braces across two Legs. Position the Legs so that they set flush with the ends of the Braces. Position the Braces so that one sets flush with the top edge of the Legs, and the other rests above the lines marked on the Legs in Step One. Pre-drill two holes through each joint using a 1/8-inch drill bit. Secure the boards by driving 1¼-inch screws through the Braces and into the Legs.
3. Create the Second Leg Assembly
Layout the remaining Legs and Braces in the same way. Position the longer Brace flush with the top edge of the each Leg. Shift the Brace so that its right end sets flush with the outside edge of the right Leg, as shown. Secure the boards using a
drill/driver and 1¼-inch screws.
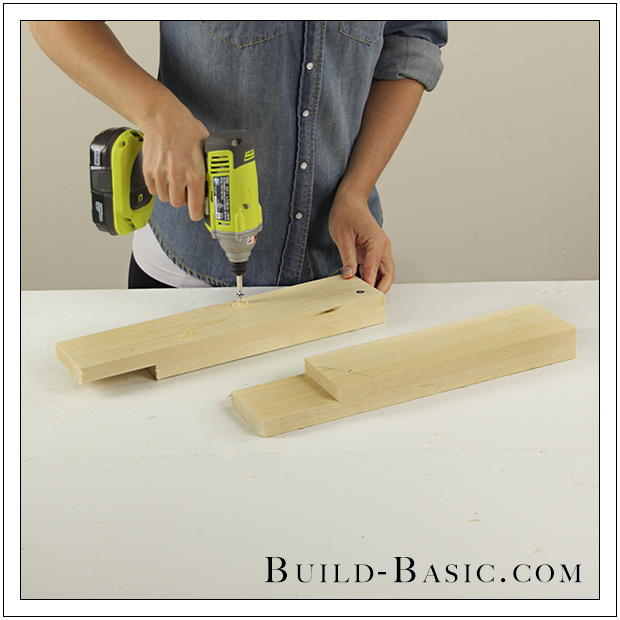
4. Create the Goal Posts
Cut the 1 x 4 Goal Post boards to length using the cut list above. Sandwich one short and one long board together so that ends of the boards set flush at one end. Drive 1¼-inch screws through the long board and into the short board, as shown. Repeat to assemble the second Goal Post.
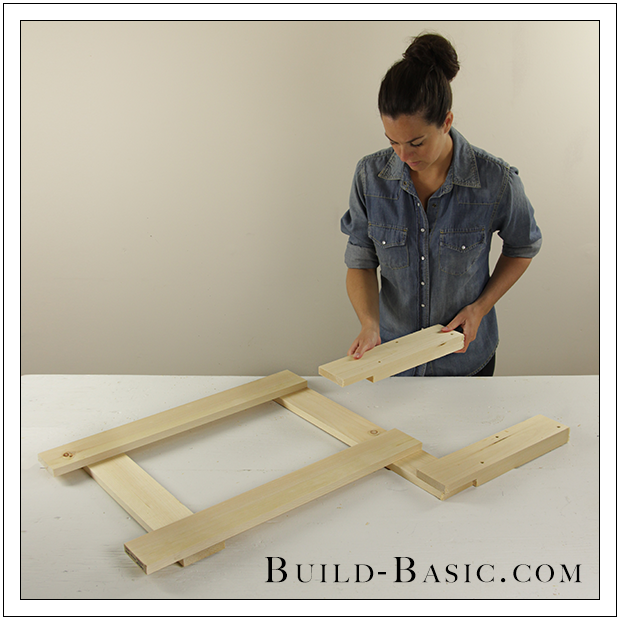
5. Position the Goal Posts
Place the Leg assembly with the longer Brace on the work surface with the Braces facing down. Place an assembled Goal Posts onto the long Brace so it sets flush with the end of the Brace. Position the second Goal Post so that there’s 8-inches between the Posts.
6. Attach the Goal Posts
Pre-drill two holes through each Goal Post and into the Brace. Using a
drill/driver, drive 1¼-inch screws through the Goal Posts and into the Brace to hold the pieces in place.
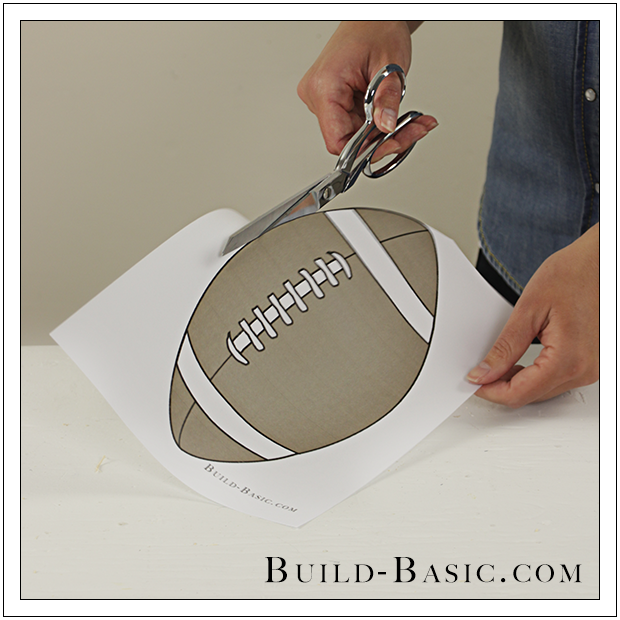
7. Prep the Football Template
8. Outline the Plywood Football
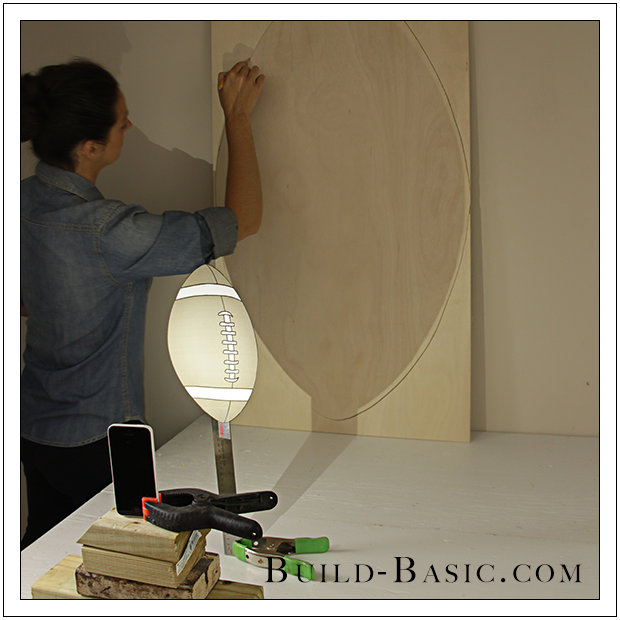
Prop the football cutout in front of a flashlight so that the outline projects onto the plywood board. Move the flashlight closer to the football until the outline on the plywood is about 41-inches-tall and 23¾-inches wide. For my setup, I taped the football to a ruler and held it upright with a clamp. I then propped my phone on blocks, and held it upright with a clamp for use as a flashlight. Once the outline was complete, I roughly sketched the details of the football onto the plywood.
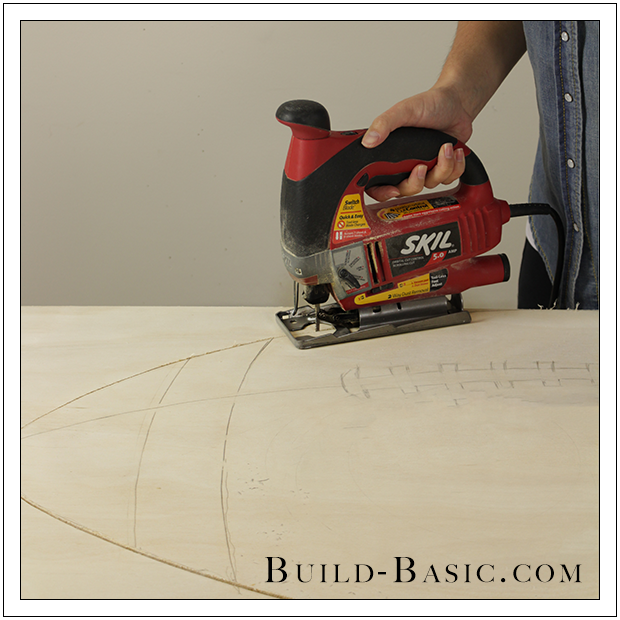
9. Cut out the Football
Using a
jigsaw, cut along the outline of the Football. Once the football is completely cut from the plywood, sand the edges smooth with a sanding sponge or random orbital sander.
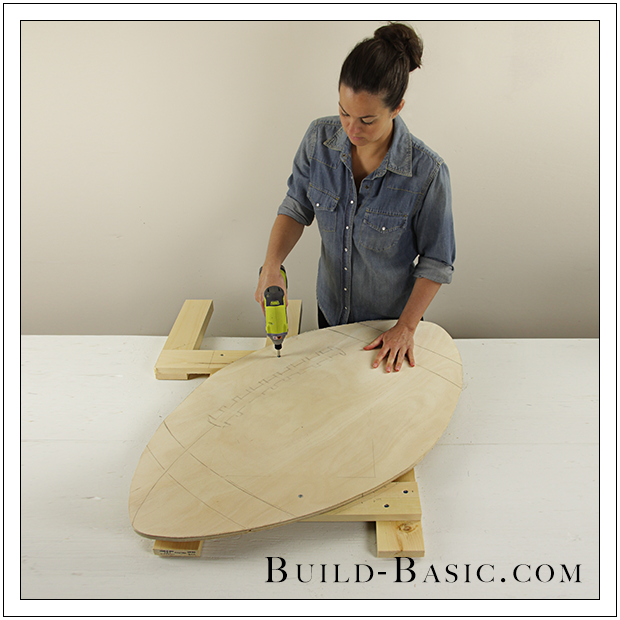
10. Attach the Football to the Leg Assembly
Place the Football onto the Braces on the Leg assembly that has the attached Goal Posts. Position the Football so that it sets flush with the bottom edge of the left Leg, and then tilt the Football until it no longer obstructs the opening between the Goal Posts. Drive ¾-inch screws through the Plywood and into the Braces.
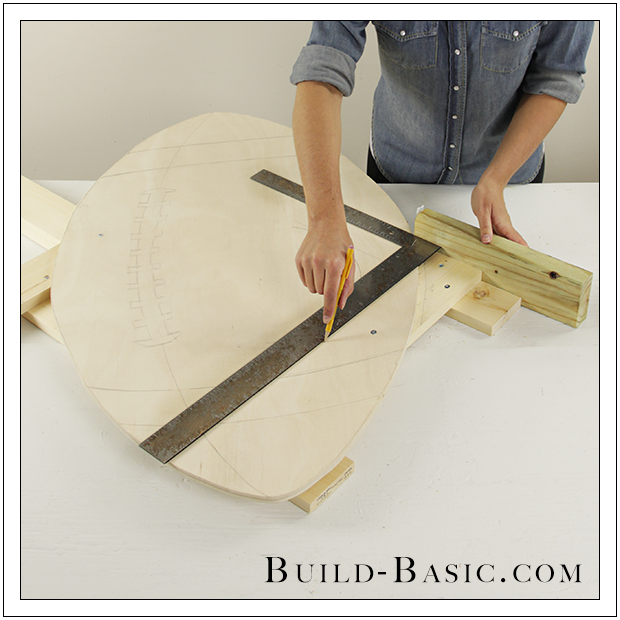
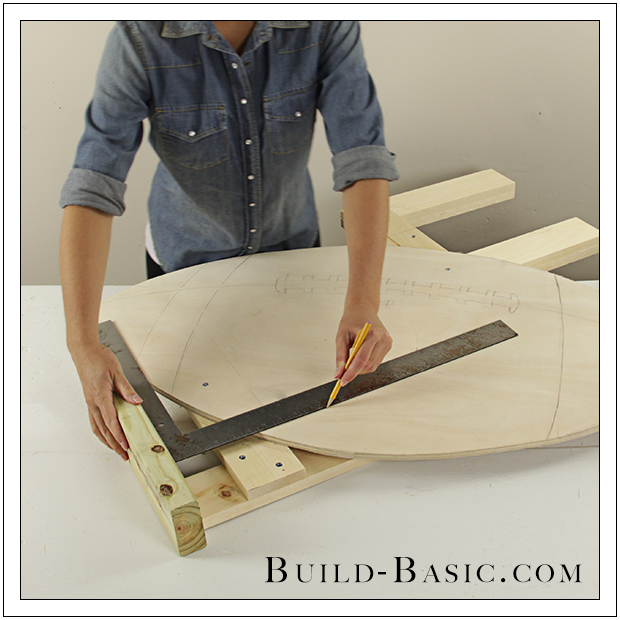
11. Mark the Brace Placement
Place a framing square onto the plywood Football. Using a scrap block, align one leg of the framing square with the top edge of the lower Brace. Mark the line on the Plywood.
12. Mark the Leg Placement
Again, using a scrap block, align one leg of the framing square with the inside edge of the right Leg. Mark the line on the Plywood.
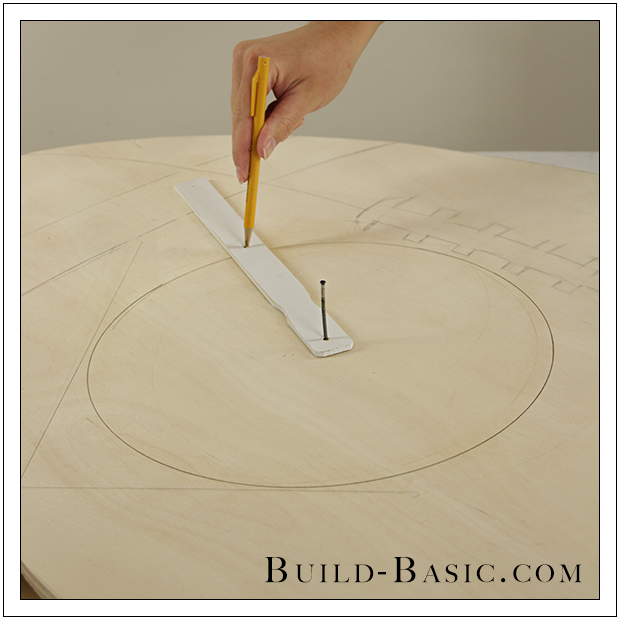
13. Outline the Circular Cutout
Make two marks on a paint stick that are 6 inches apart. Drill holes at the marks, and then slide a nail through one hole and a pencil through the other. Place the nail onto the Football, and adjust its location until the pencil rests inside the lines marked in Steps Eleven and Twelve, and does not obstruct the design of the Football. Rotate the paint stick around the nail to draw a circle.
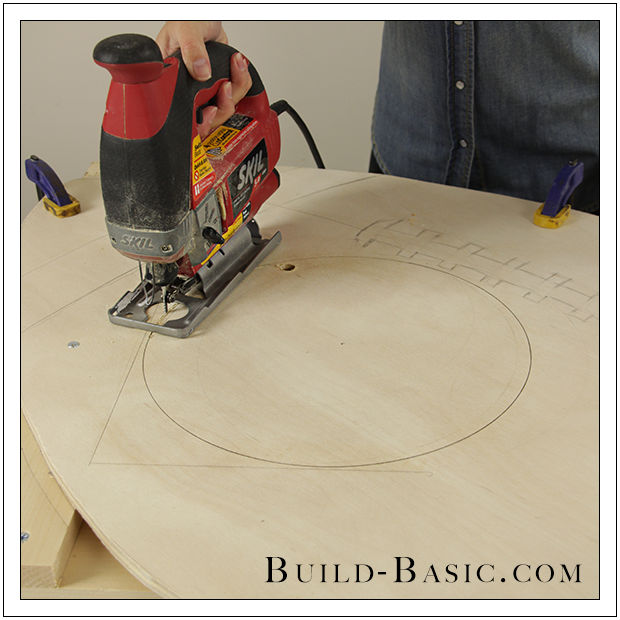
14. Cut Out the Circle
Using a drill and a ½-inch drill bit, create a hole inside the circle marked in Step Thirteen. Starting with the blade of a
jigsaw inside the hole, cut out the circle. Sand the edges smooth.
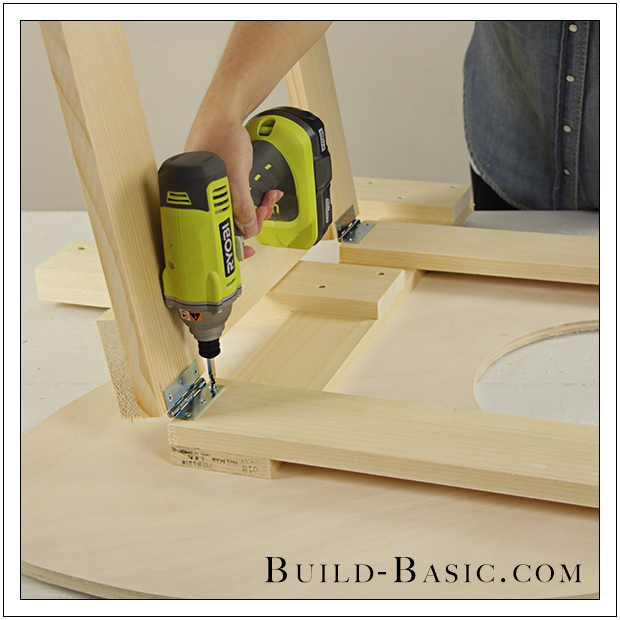
15. Add the Hinges
Place both Leg assemblies with their Braces facing down on the work surface and their top edges aligned. Using the drill, attach the 2½-inch hinges to the Legs, as shown.
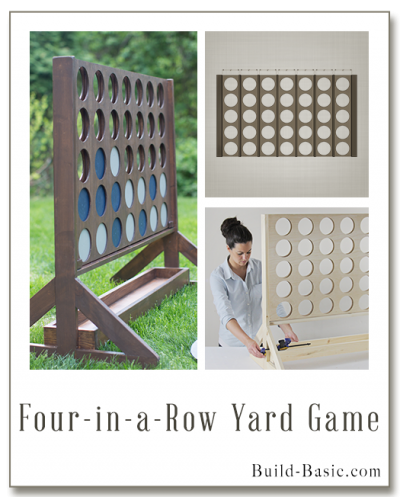
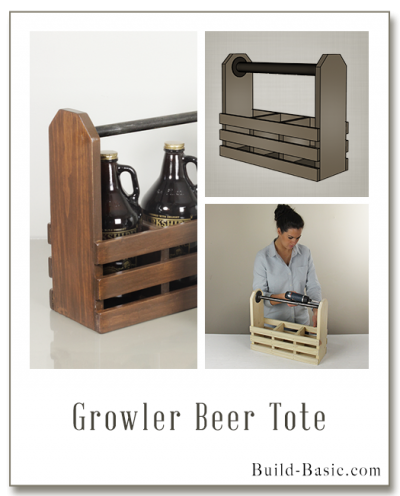
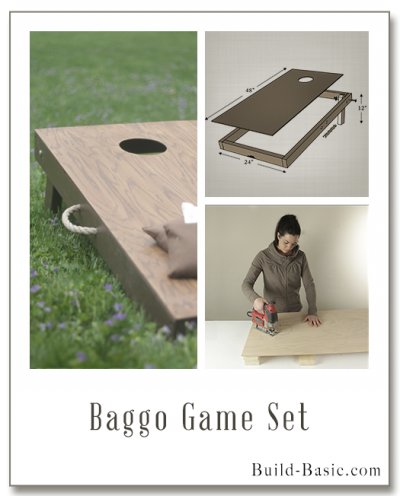
MORE BUILDING PLANS


Anonymous
Thanks Jenn. Think I’ll build one for the Church kids.
Pingback: Home Depot Virtual Party – Father’s Day Football Toss ‹ Build Basic