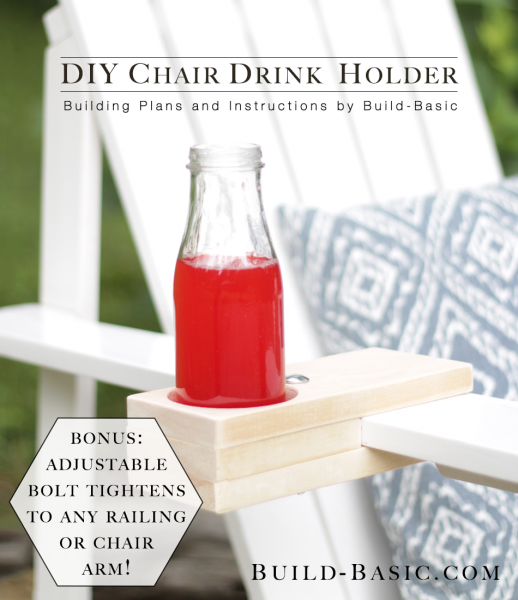
Grab a scrap piece of 1×4 and assemble this simple drink holder in under 15 minutes! With an adjustable wing nut, the holder can clamp onto the arm of just about any chair, or onto a deck railing. Worried about using a hole saw? Check out my tool tutorial or make the cut using a jigsaw.
Pssst: Did you know you can click the image above to reveal Free Building Plans, or the “tabs” below to view the Tools, Materials and Cut Lists for this project? Try it!
Cost: $3
Time: 15 Minutes
Difficulty: Easy. Make three cuts, drill the holes, and then slide a bolt through the parts to hold them together.
1 x 4 – Get a 2-foot board
3-inch 3/8-inch carriage bolt with Washer and Wing Nut
1¼-inch Finish Nails. You’ll only need four.
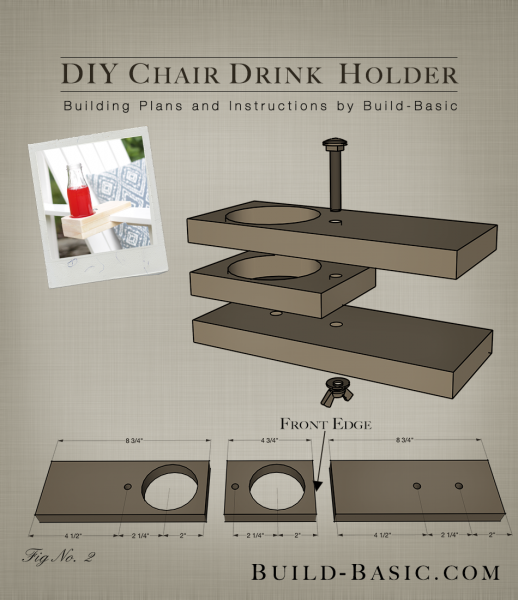
Top Board – 1 @ 8 ¾ inches
Spacer Block – 1 @ 4 ¾ inches
Bottom Board – 1 @ 8 ¾ inches
Steps
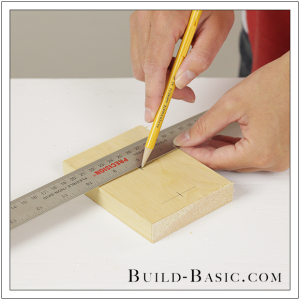
1. Prep the Parts
Using the cut list above, cut the pieces to size. On the Spacer Block, mark the location of the pilot 2-inches and 4¼-inches from the front edge of the board.
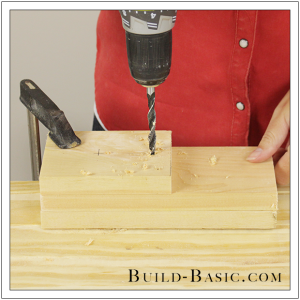
 2. Drill the Pilot Holes
Clamp all the pieces together so that their front edges set flush. Using a drill/driver and a 3/8-inch drill bit, drill into the marks on the Spacer Block, and then through all three boards. (Note: While the Bottom Board doesn’t need a pilot hole for the hole saw, the 3/8-inch pilot hole works nicely as drainage.)
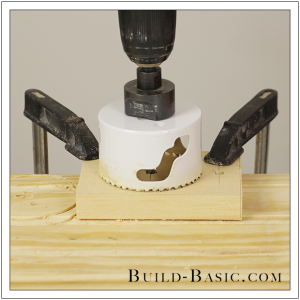
3. Cut the Hole in the Spacer Block
Using two clamps, secure the Spacer Block to the work surface on top of a scrap piece of wood. Place the hole saw’s drill bit into the pilot hole that’s 2 inches from the board’s front edge. Drill through the board, and then remove the cutout.
Tip: Check out my How to Use a Hole Saw tutorial. Alternatively, you could make this cut using a jigsaw.
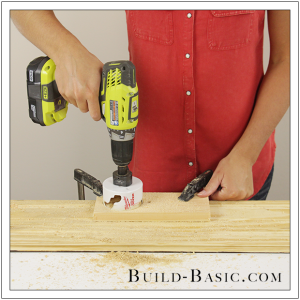
4. Drill a Hole through the Top Board
Now clamp the Top Board in place on the scrap piece of wood. Place the hole saw’s drill bit into the pilot hole that’s 2 inches from the front edge of the board. Drill through the board, and then remove the cutout.
5. Attach the Spacer to the Bottom Board
Place the Spacer Block on the Bottom Board, flush with its front edge. Using a hammer, drive 1¼-inch finish nails through the corners of the Spacer Block and into the Bottom Board.
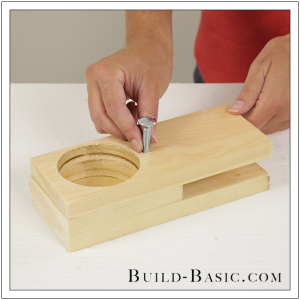
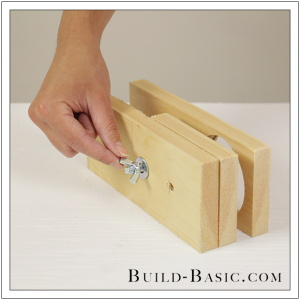
6. Insert the Carriage Bolt
Place the Top Board onto the assembled Spacer Block and Bottom Board. Push the carriage bolt through all three boards, as shown. The Top Board can now be lifted to accomodate the thickness of a chair arm or deck railing up to almost 1½-inches. If the surface is thicker, you can always swap in a longer carriage bolt.
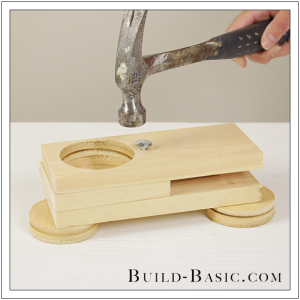
7. Set the Carriage Bolt
Place the assembly on scrap blocks with the carriage bolt protruding beyond the Bottom Board. Using a hammer, pound the square section of the carriage bolt into the wood to set the bolt and prevent it from spinning.
8. Secure the Carriage Bolt
Place the washer and wing nut onto the end of the carriage bolt to finish the assembly.
MORE BUILDING PLANS


Brett
Do you have plans for the chair the cup holder is attached to?
Pingback: 10 DIY Drink Holders for Spring and Summer - Craftsman Club Blog
Pingback: Homeallstyles|Interior Decorating and Home Design Ideas Comfy DIY Chair Drink Holder For Indoors And Outdoors - Homeallstyles|Interior Decorating and Home Design Ideas
Pingback: Comfy DIY Chair Drink Holder For Indoors And Outdoors | Shelterness
Janet
I made one of these to see how it works. I do not have the 3 inch hole tool so I had planned to use my Rockwell table saw. I figured I would drill a hole and cut the circle. Then I remembered I had a circle cutting attachment that came with the table saw. This was my first time to try the attachment. It took me a bit to learn how to but it cuts a very good 3 inch circle. So this project got me to use a tool I forgot I had. A new thing learned! One problem for me my tables and chairs on the patio dont fit the glass holder. I think I should build a chair to fit the glass holder now! Thanks again for another fun and very useable project.